I) Create and activate an interim financial report
II) Access the activated financial report
III) Fill in a financial Report
a) Financial Report tab
b) Signed Financial Report tab
c) Report Tracking tab
d) Documents tab
IV) Submit the financial report for review
I) Create and activate an interim financial report
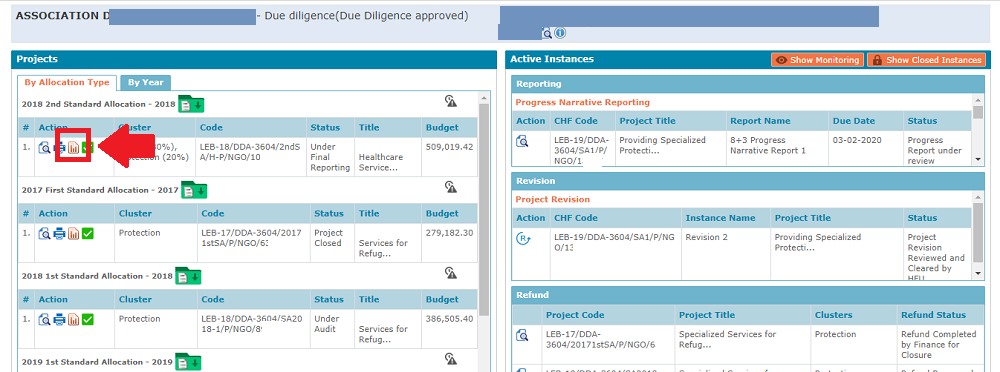
Implementing Partners can activate the Interim Financial Reports themselves when their expenditure reaches 70% of their current tranche and they wish to request the subsequent disbursement tranche.
To do so, click on the ‘Activate Financial Report’ icon  next to your approved project’s line, and click on [Activate].

The ‘activate financial report’ icon is always displayed on the GMS, next to approved projects’ lines. However, you might read the below error message if there is already an active financial report template. The OneGMS does not allow two financial reports to be active at the same time.
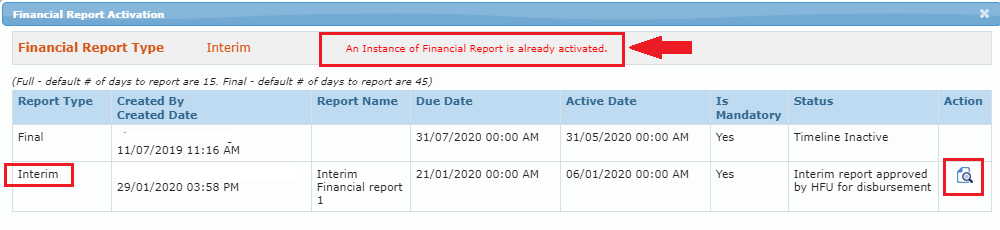
You can access the active financial report instance by clicking on the magnifying glass icon  .
.
II) Access the activated financial report
All reports (both narrative and financial) are located on the upper right of the Implementing Partner’s Home Page, under the heading 'Active Instances'.
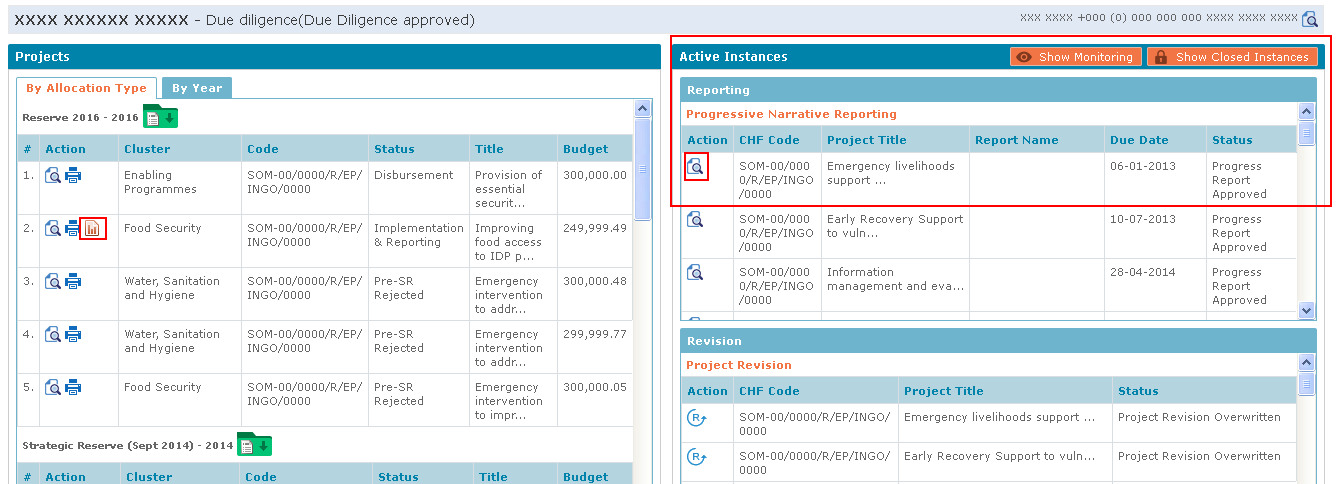
Brief descriptions of the columns present in the Reporting section are:
- Action: Click on the [View] icon to view the report.
- CHF Code: Displays the project code
- Project Title: Displays the title of the project.
- Report Name: Displays the name of the report name
- Due Date: Displays the deadline date on which the Implementing Partner has to submit the report.
- Status: Displays the current status of the report.
When activated (either automatically by the system, manually by the HFU, or manually by the IP), the Implementing Partner can view the report under the ‘Active Instances – Reporting section’.
Once an instance has been activated, Implementing Partners must fill in and submit the report before the due date, as indicated in the Timelines’ tab of the project.
To open the Report template, click on the [Edit] icon of the required project present in the Action column of the Reporting section under the Active Instances.

III) Fill in a financial Report
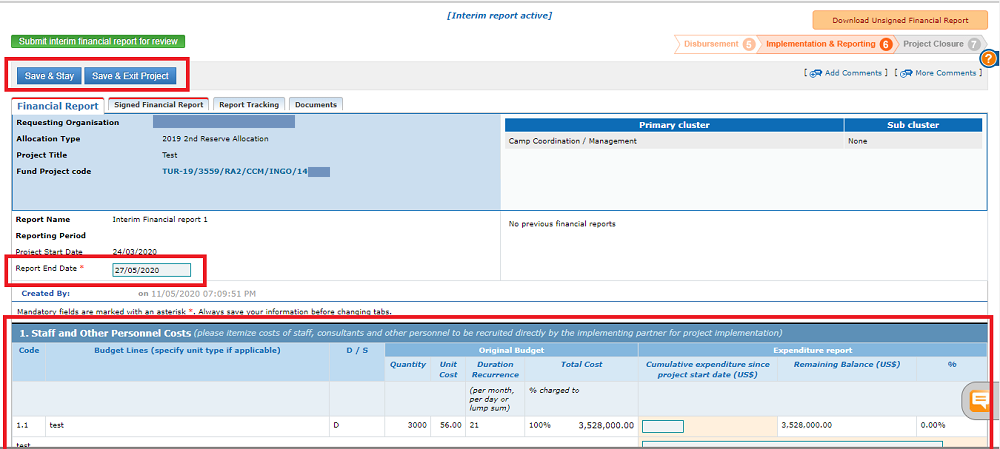
The Financial Report tab is the main tab of the reporting module, as it includes the budget which lines or categories you must report against. You will find below a description of the tab’s fields, for both line and category levels reports:
Line-Level:
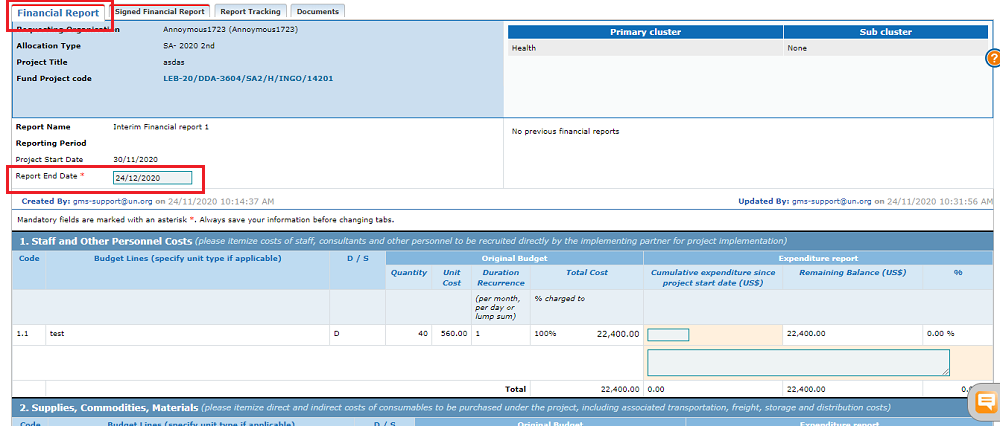
Fields Description:
• Report End Date (Date box): Enter the date till which the entered expenditure information is applicable.
• Budget template: Update the lines with the actual incurred expenditure information.
• Leave Comment (Text box): Enter any additional comments applicable for the Financial Report’s line. (as usual in the GMS, you can always leave comments for the whole tab or the whole reporting template. To learn how to save comments in the OneGMS modules, please refer to this article of the Help Portal.)

Please remember to click on Save & Stay OR Save & Exit button to save the inputted information.
Category-Level:

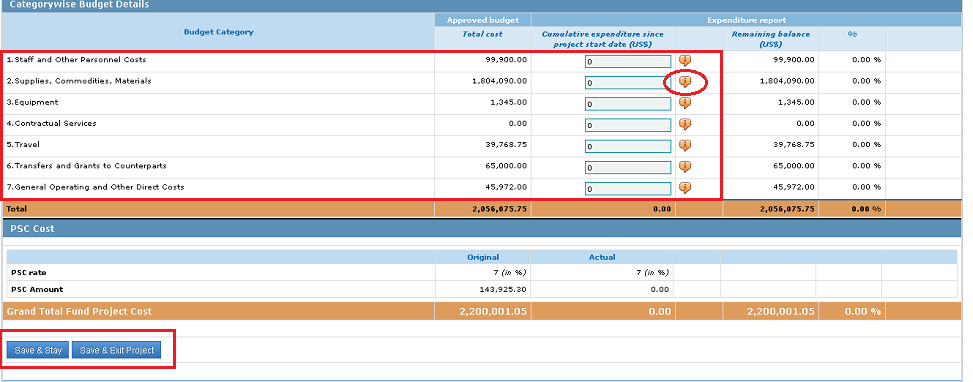
The category level reports are different only on the first tab where the UN agency reports the category-wise expenditure in the budget.
Fields description:
• Report End date: (Date box): Enter the date till which the entered expenditure information is applicable.
• Cumulative Expenditures since project start date: Enter the values in the editable fields as per budget category mentioned in the screen.
• Comments box: Click on the Comments icon to enter comments for individual budget category. (as usual in the GMS, you can always leave comments for the whole tab or the whole reporting template. To learn how to save comments in GMS modules, please refer to this article of the Help Portal.)
Click on the Save & Stay button or Save & Exit Project button to update the details.
|
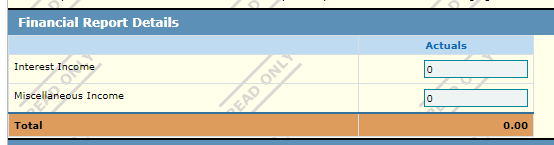
Quick Note: The ‘Final Financial Report Details’ section For FINAL Financial Reports only, Partners will notice an additional box at the top of the Financial Report tab, above the budget: the ‘Financial Report Details’.
Financial Report Details section |
|
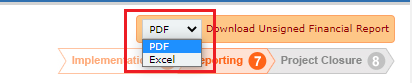
OneGMS tip: How to download the unsigned financial report as a PDF/Excel You have the possibility to download the unsigned information entered in the budget of the Financial report tab. To do so, go to the top-right of the page, and select the Excel or PDF option.
|
b) Signed Financial Report tab
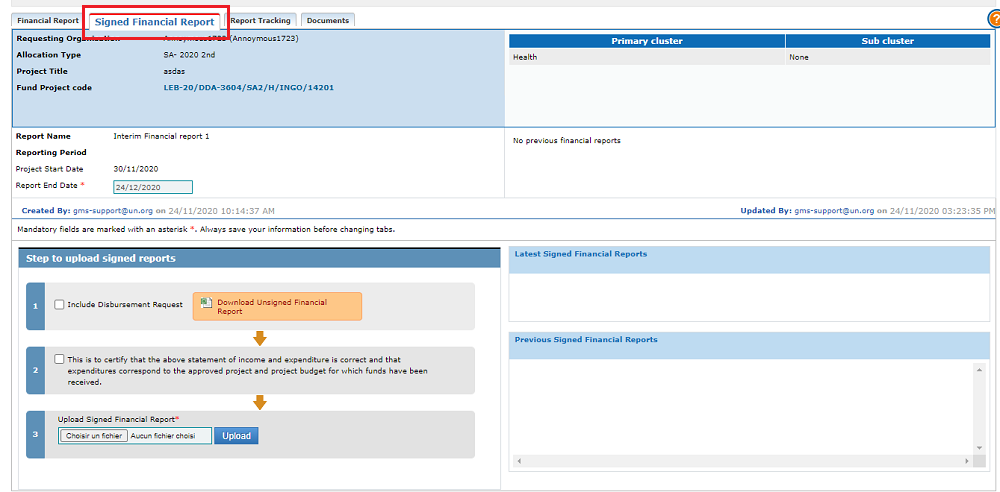
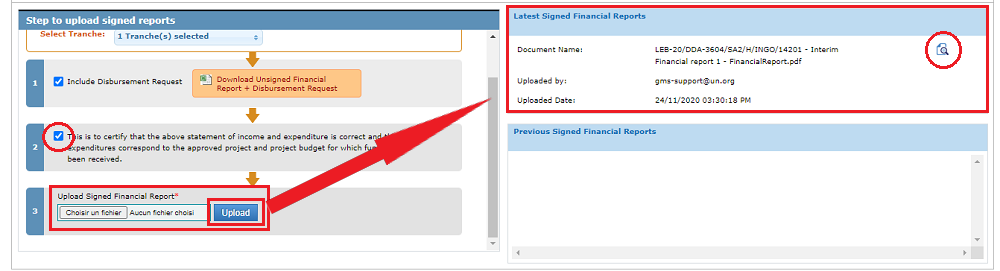
In the Signed Financial Report tab, you are required to (i) download the information you entered in the Financial Report tab’s budget, (ii) print it, (iii) sign it , (iv) date it and (v)stamp it, before (vi) uploading this signed document for HFU review.
You can find all guidance on these steps below:
- Click on [Download Unsigned Financial Report] to download the unsigned report in excel format.
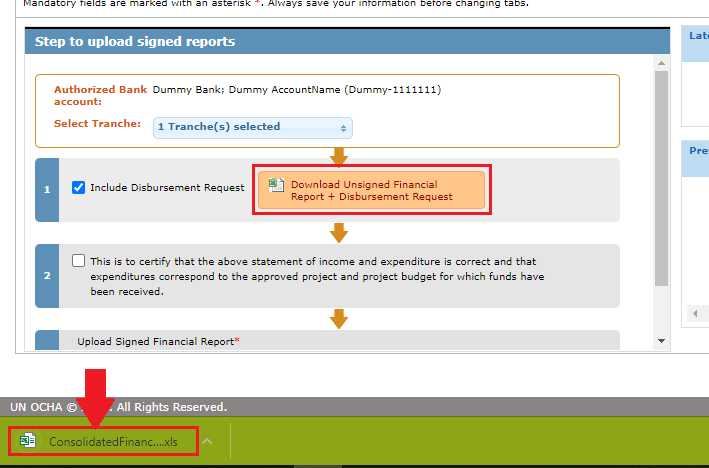
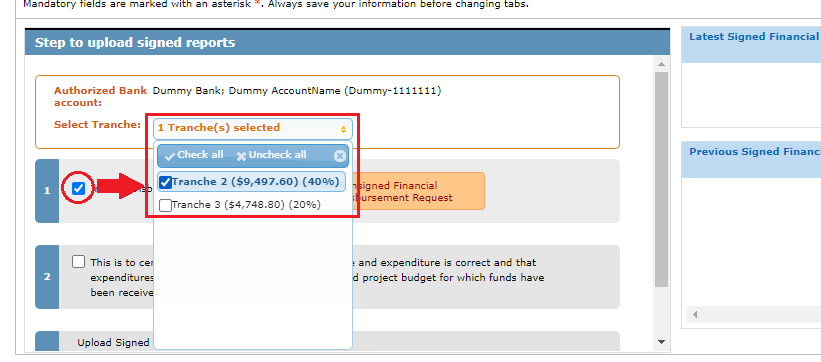
Please note: If a disbursement is required, Tick the [Include Disbursement Request] checkbox (as shown in the screenshot below). You need to select the tranche details from the drop-down list displayed.
- Print the downloaded Excel document, sign, date and stamp it. Please convert your document to a PDF before uploading it on the GMS. Make sure that both Excel sheets (the Financial Statement and the Financial Report) are combined into one PDF before uploading it on GMS.
- Back on the Signed Financial Report tab of the Financial Reporting module of the GMS, select the checkbox to certify that the financial report corresponds to the approved project and project budget.
- Select the signed document from your desktop by clicking on [choose document], then click on [upload] to upload your signed financial Report in PDF format.
You will find your signed document uploaded on the right side of the page. You can view it by clicking on the magnifying glass icon.
![]()
The Financial Report tracking tab allows users to track the who, what, when, pertaining to the financial report. This tab shows all the steps of the financial report workflow, including the dates when the financial report’s status changed, and the user who pushed it to the next stage.
At any point during the Financial reporting stage, users, HFU, FCS Finance and IP alike, can upload/download documents. To do so, go to the Documents’ tab, and click on [Add documents]. In the pop-up window, select the document’s category, and choose the document from your desktop before clicking on [upload].
You can also download all documents by clicking on [Download All Files].

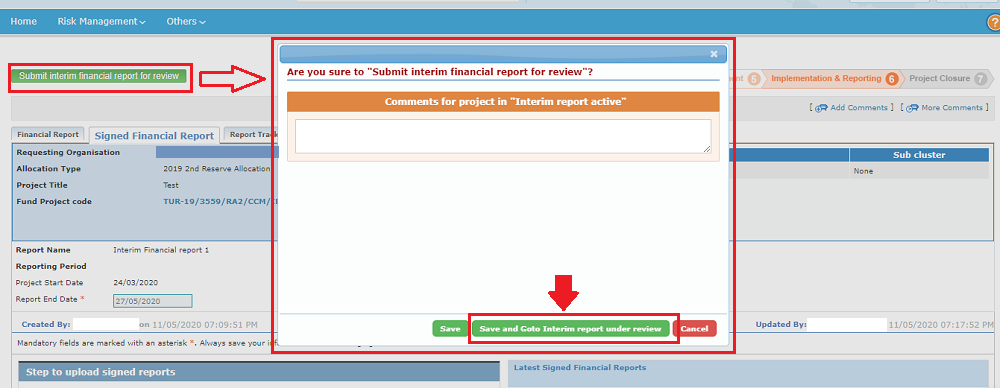
IV) Submit the financial report for review
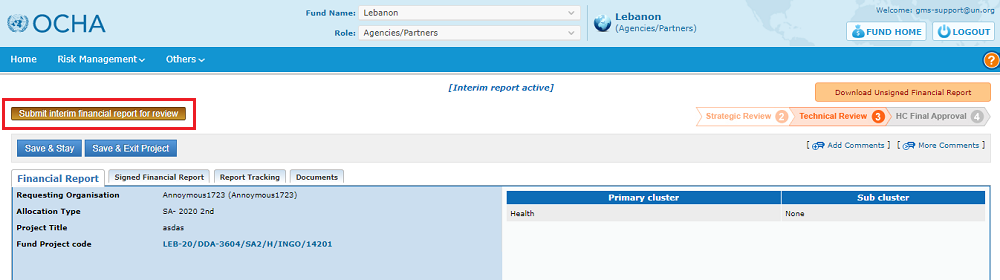
After entering all information and uploading the signed financial report and statement in PDF, you can send your financial report for HFU’s review. To do so, click on [Submit financial Report for review].
Please note: the system will not allow you to submit the report if one of the tabs’ header is red. If you are unsure what this means, please refer to this article on the tab’s headers.
In the pop-up window, add comments if needed, and click on [Save and Go to Report Under Review].