OneGMS Focus: Agency Compliance Business Role
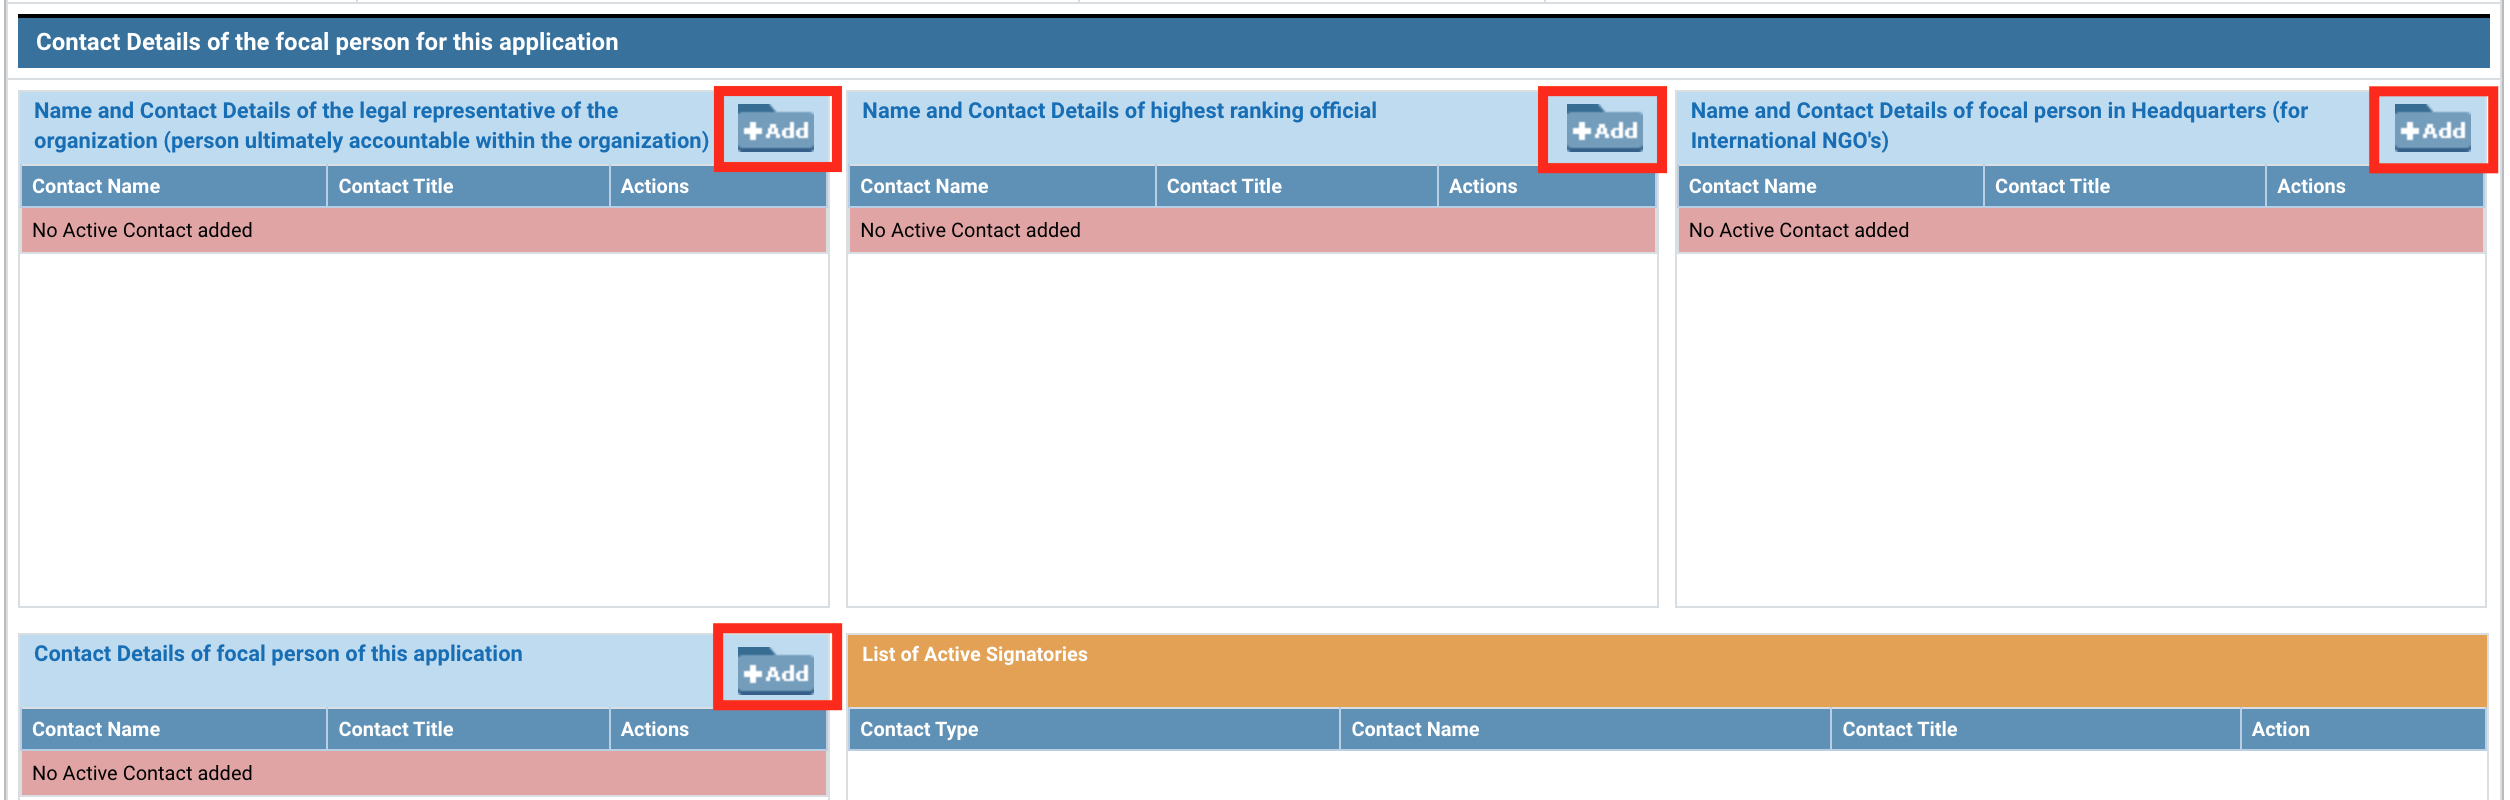
b) Contact Details of the focal person for this application
OneGMS Focus: Email Verification
c) Office Locations
d) Additional Information
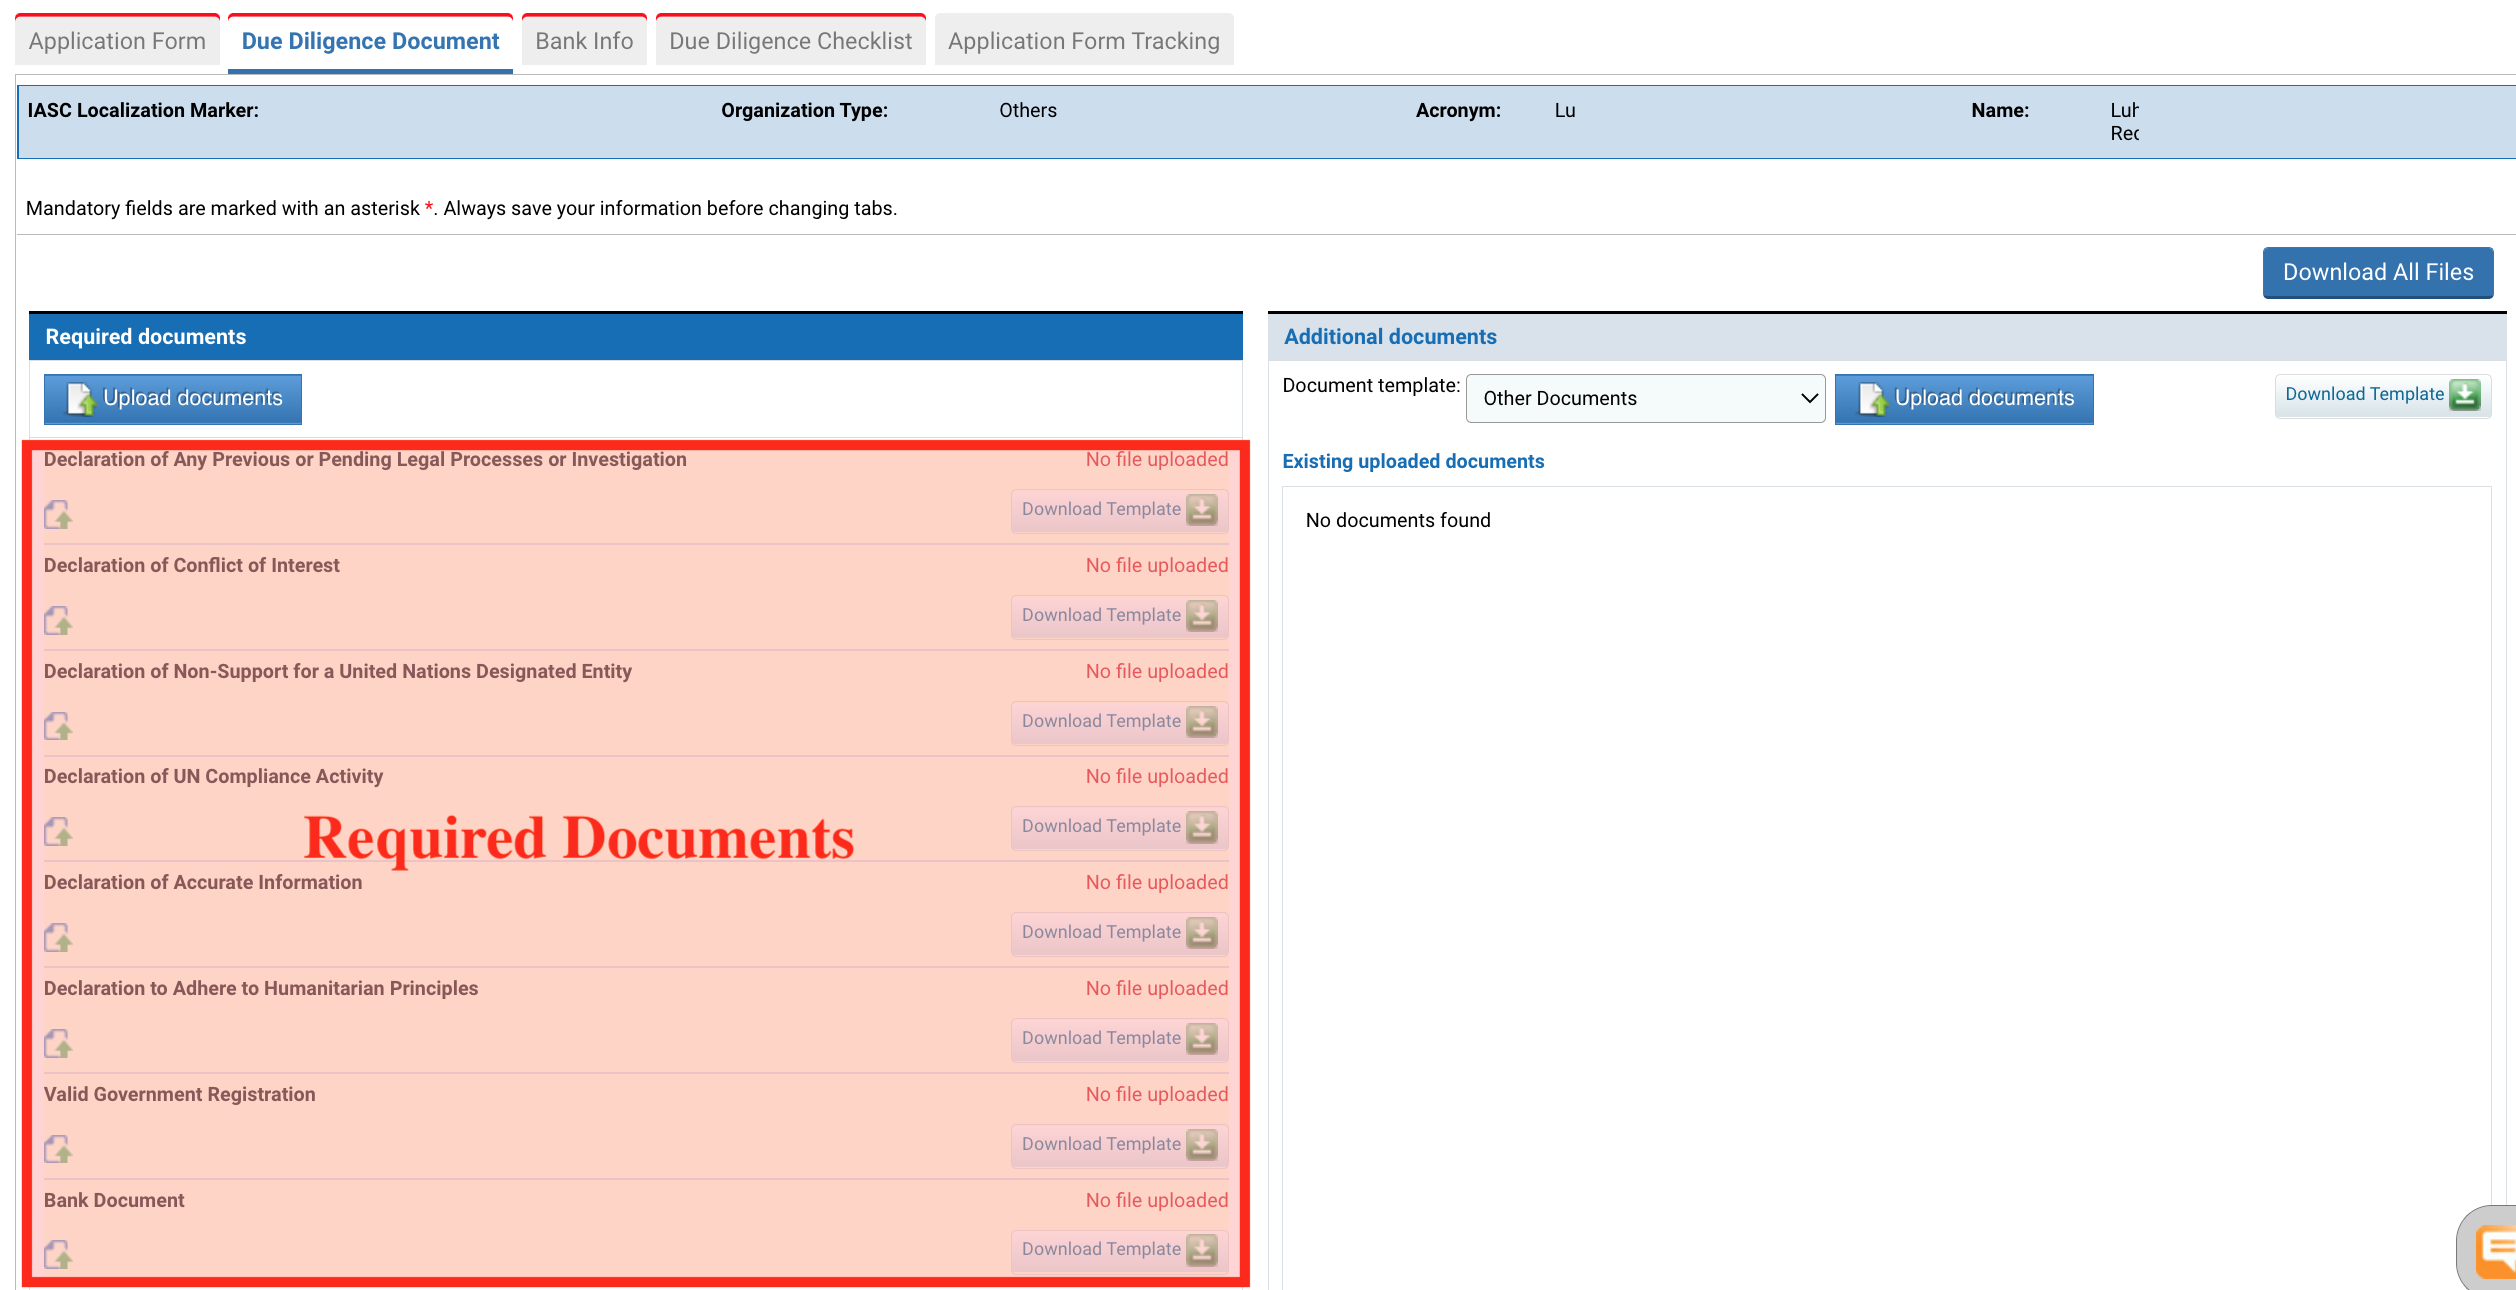
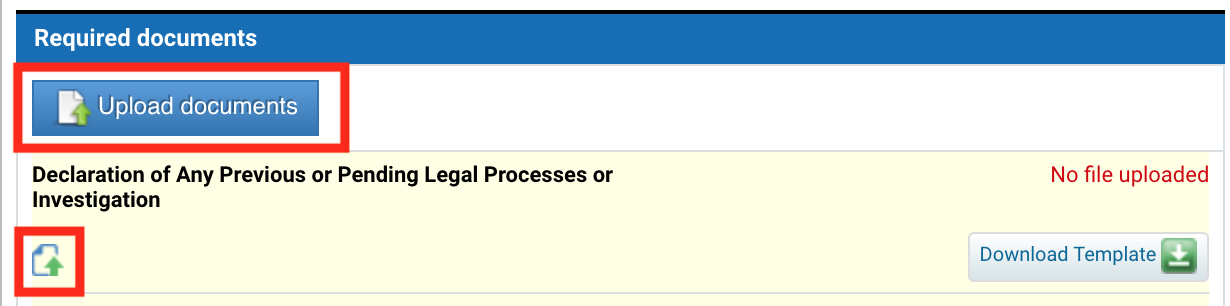
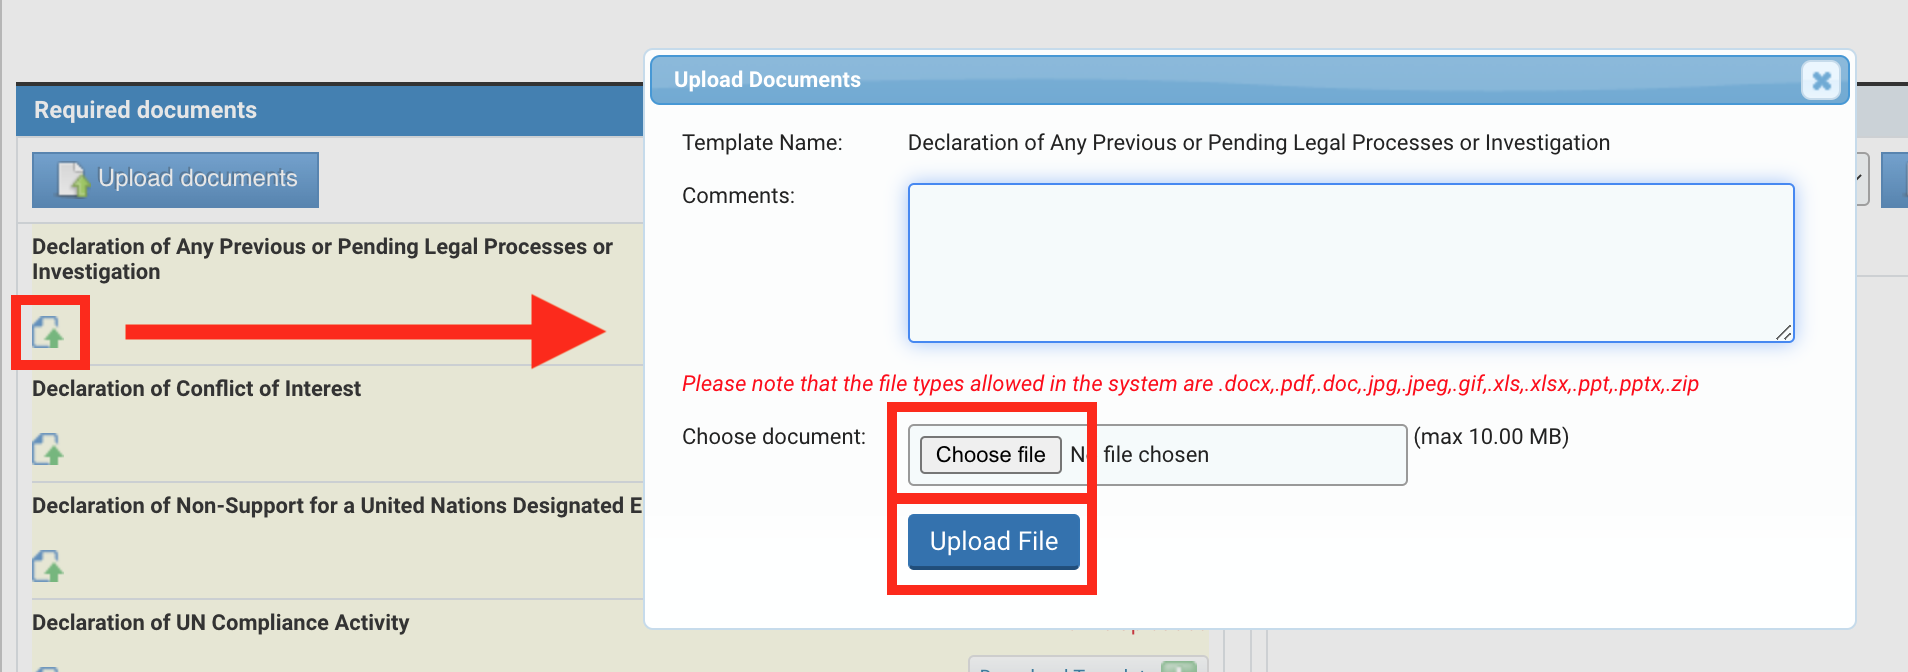
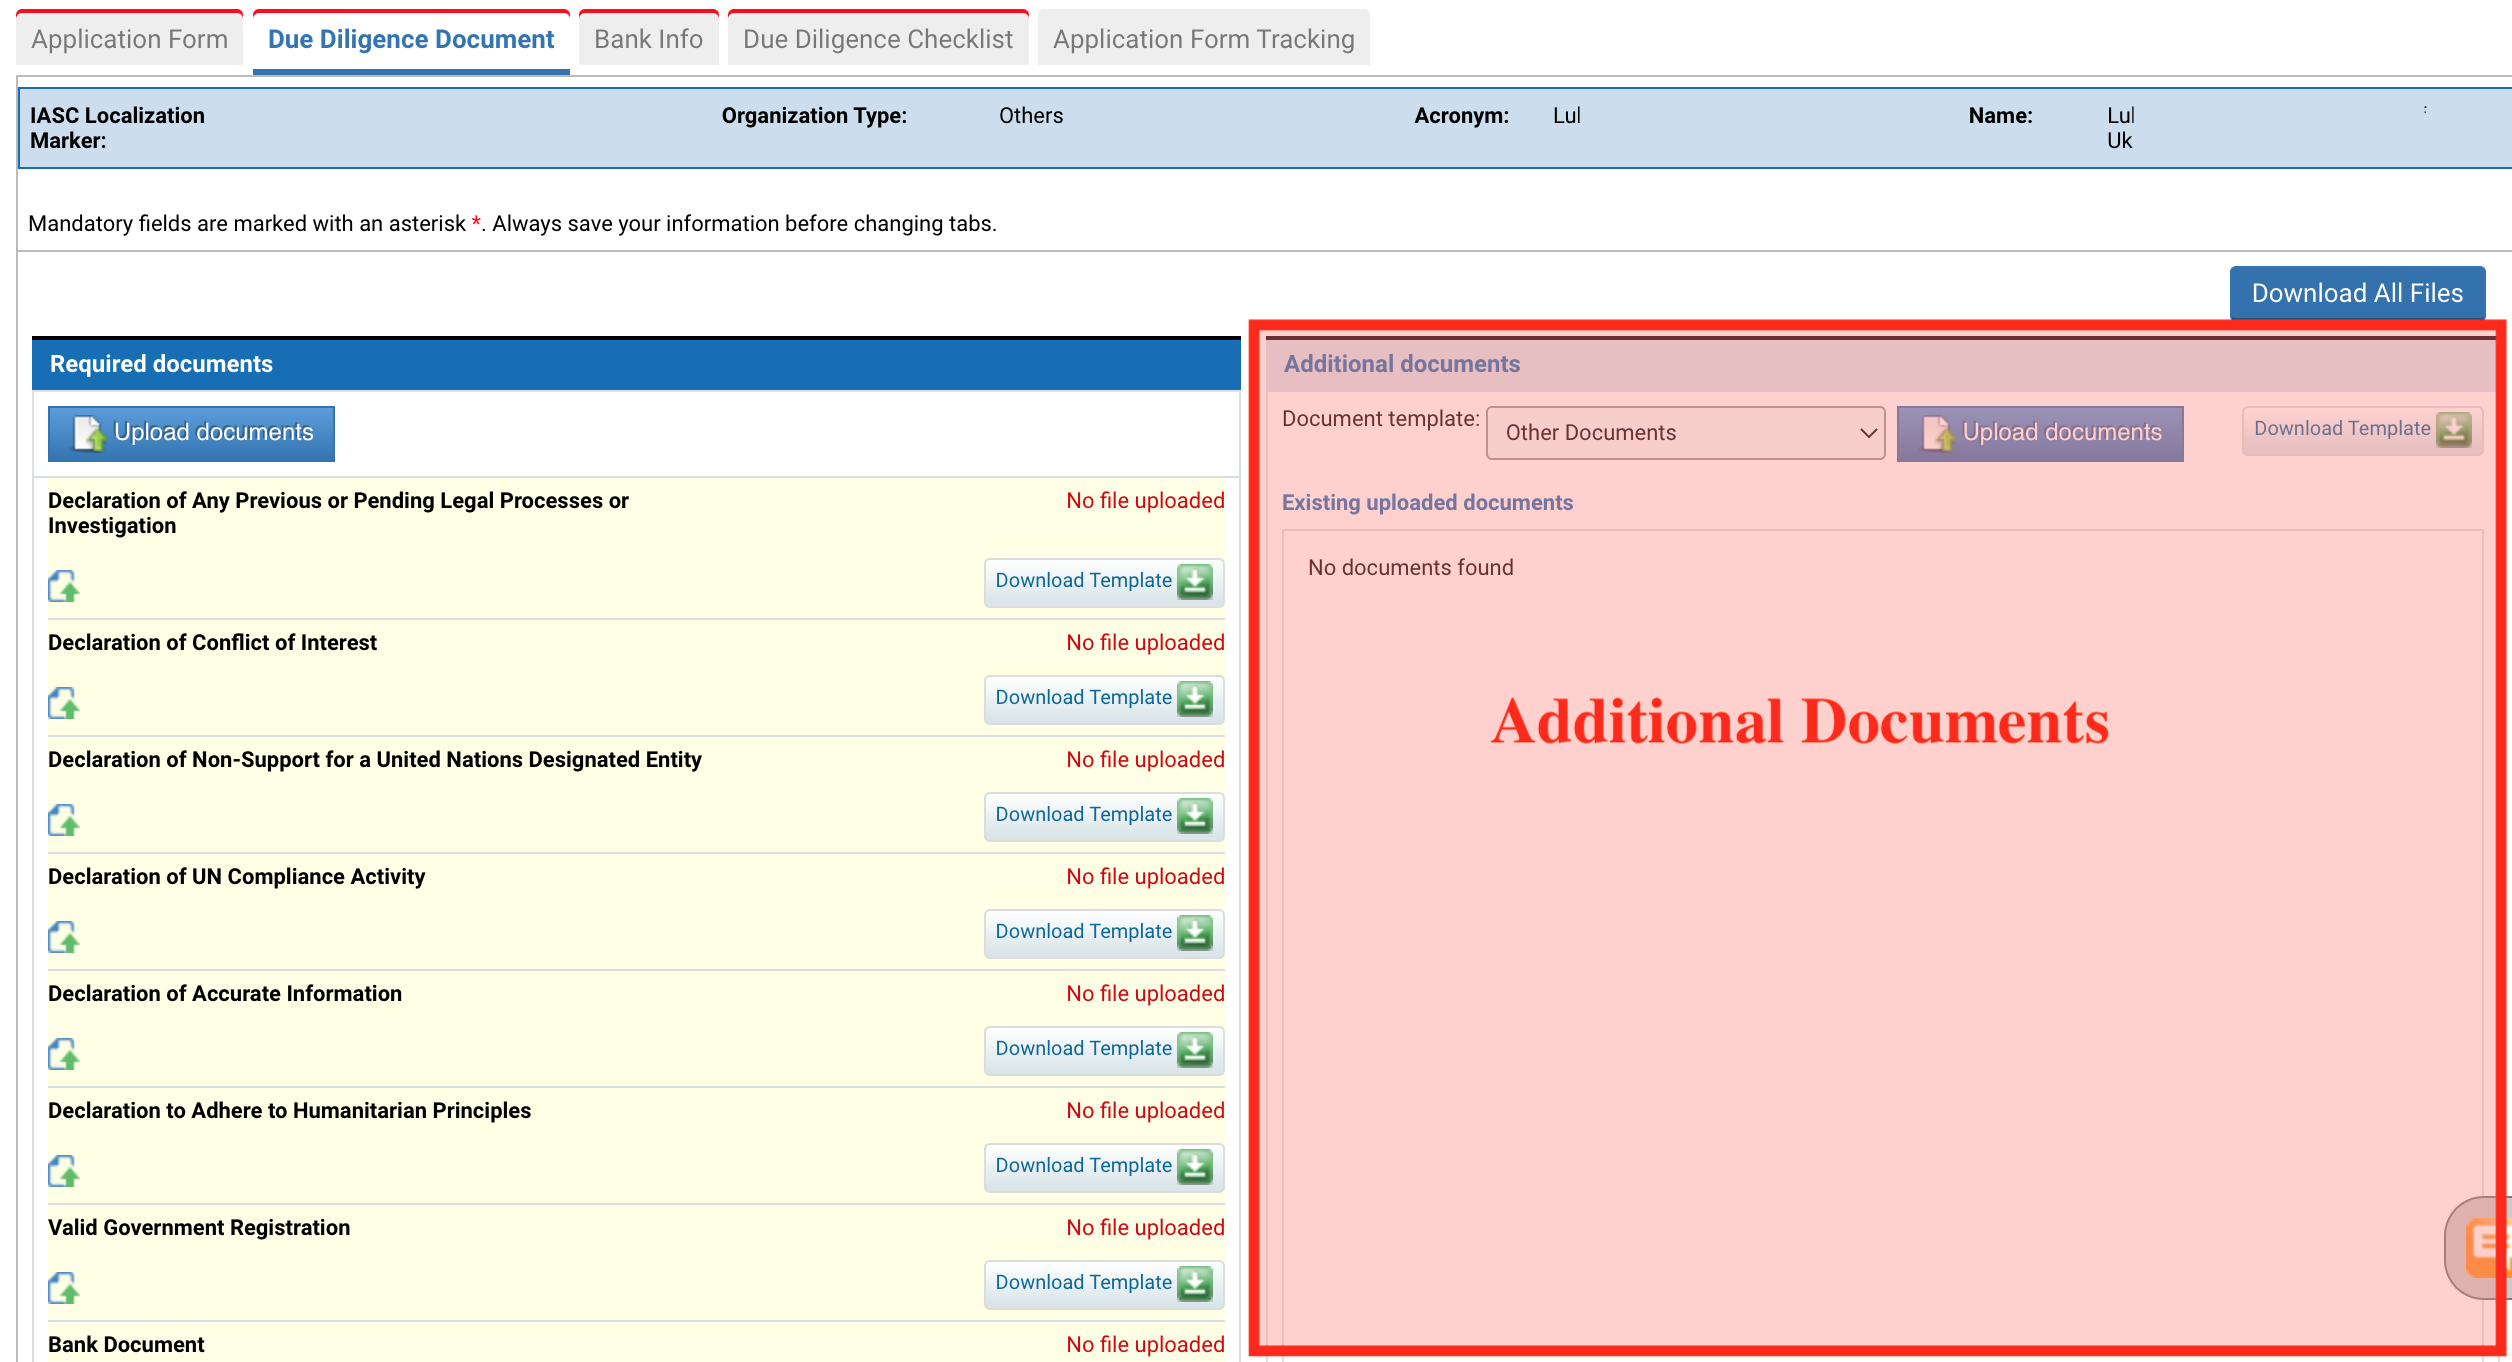
a) Required documents
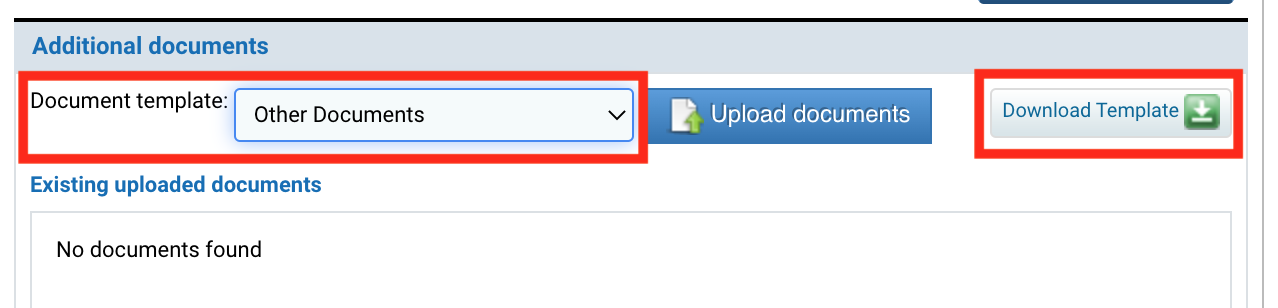
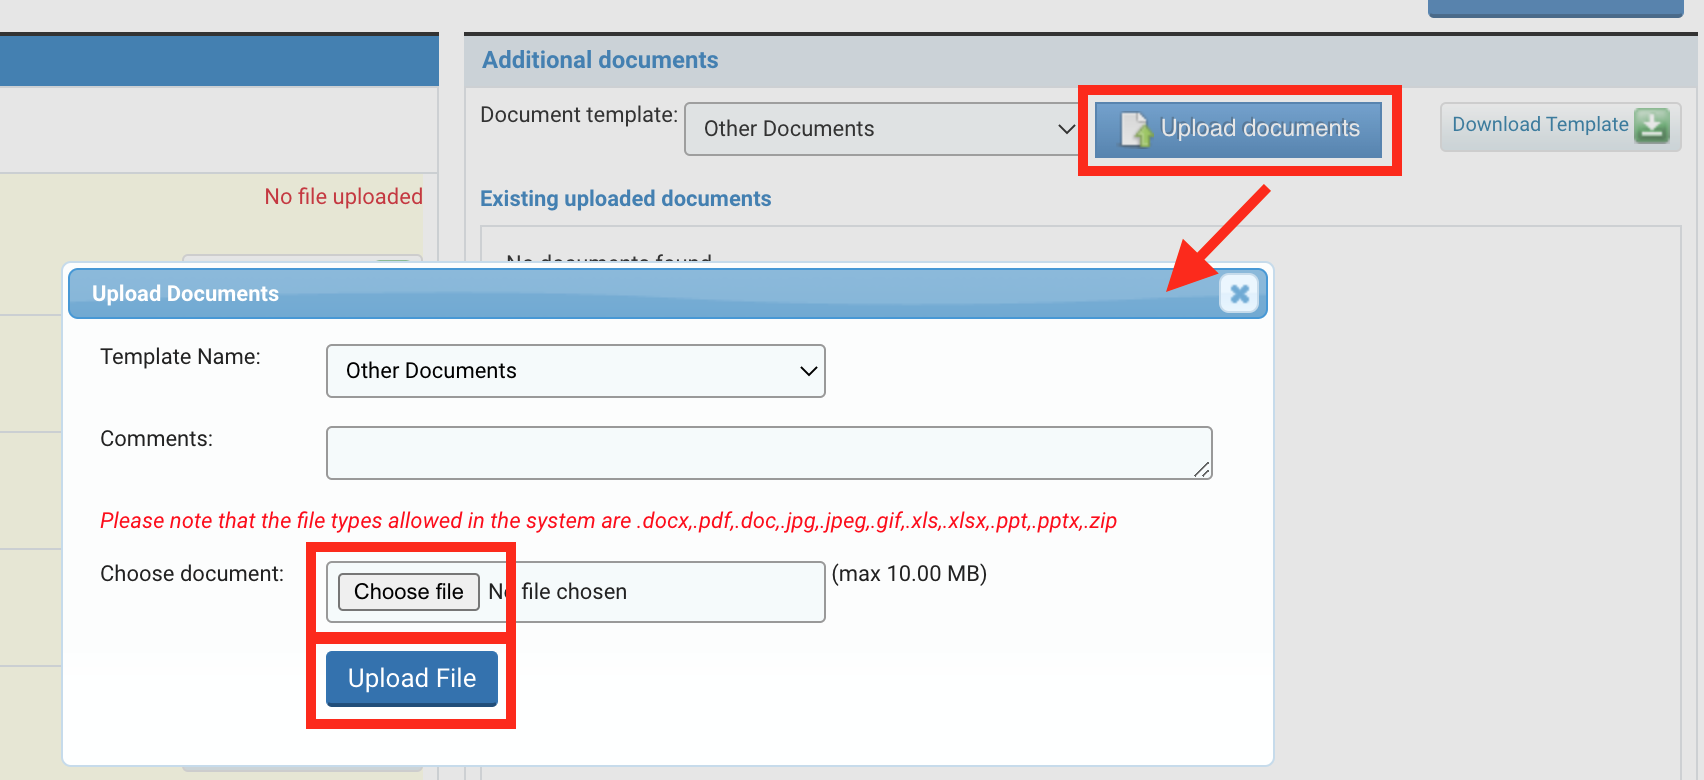
b) Additional documents
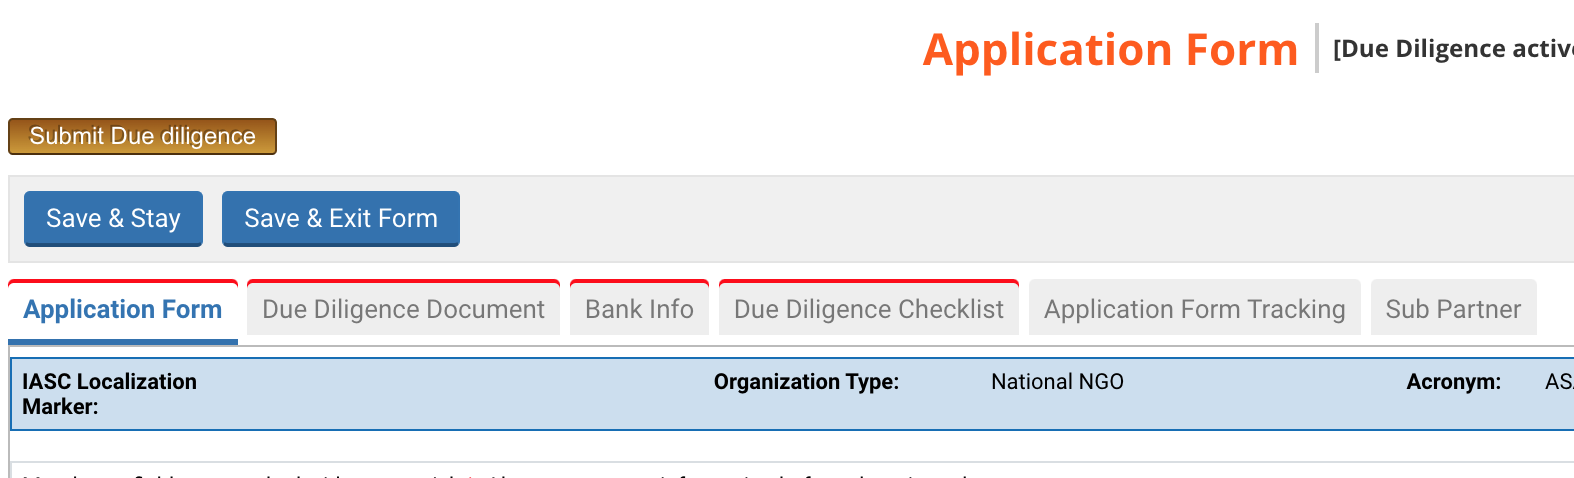
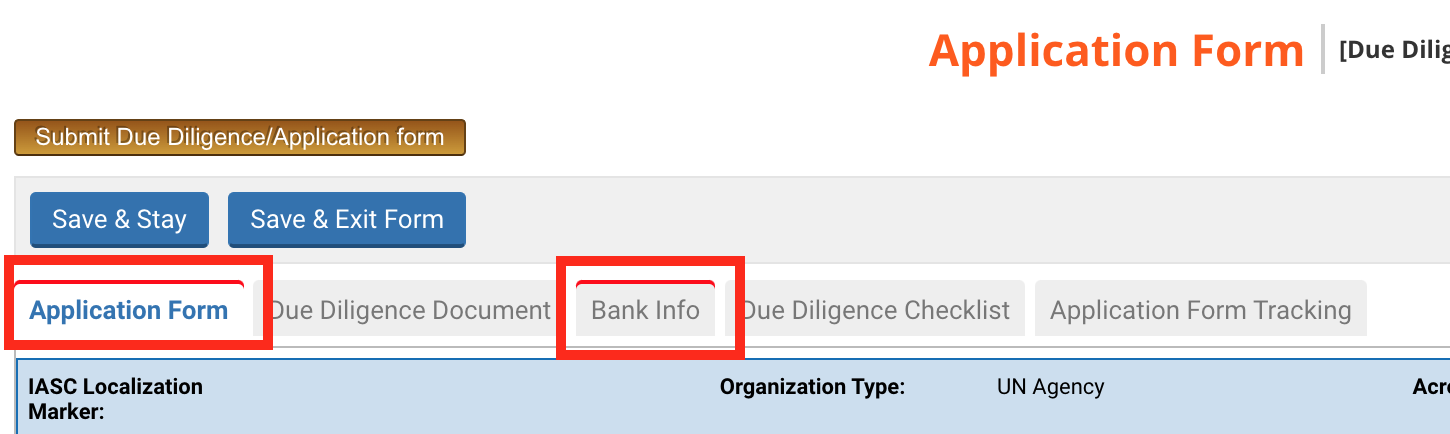
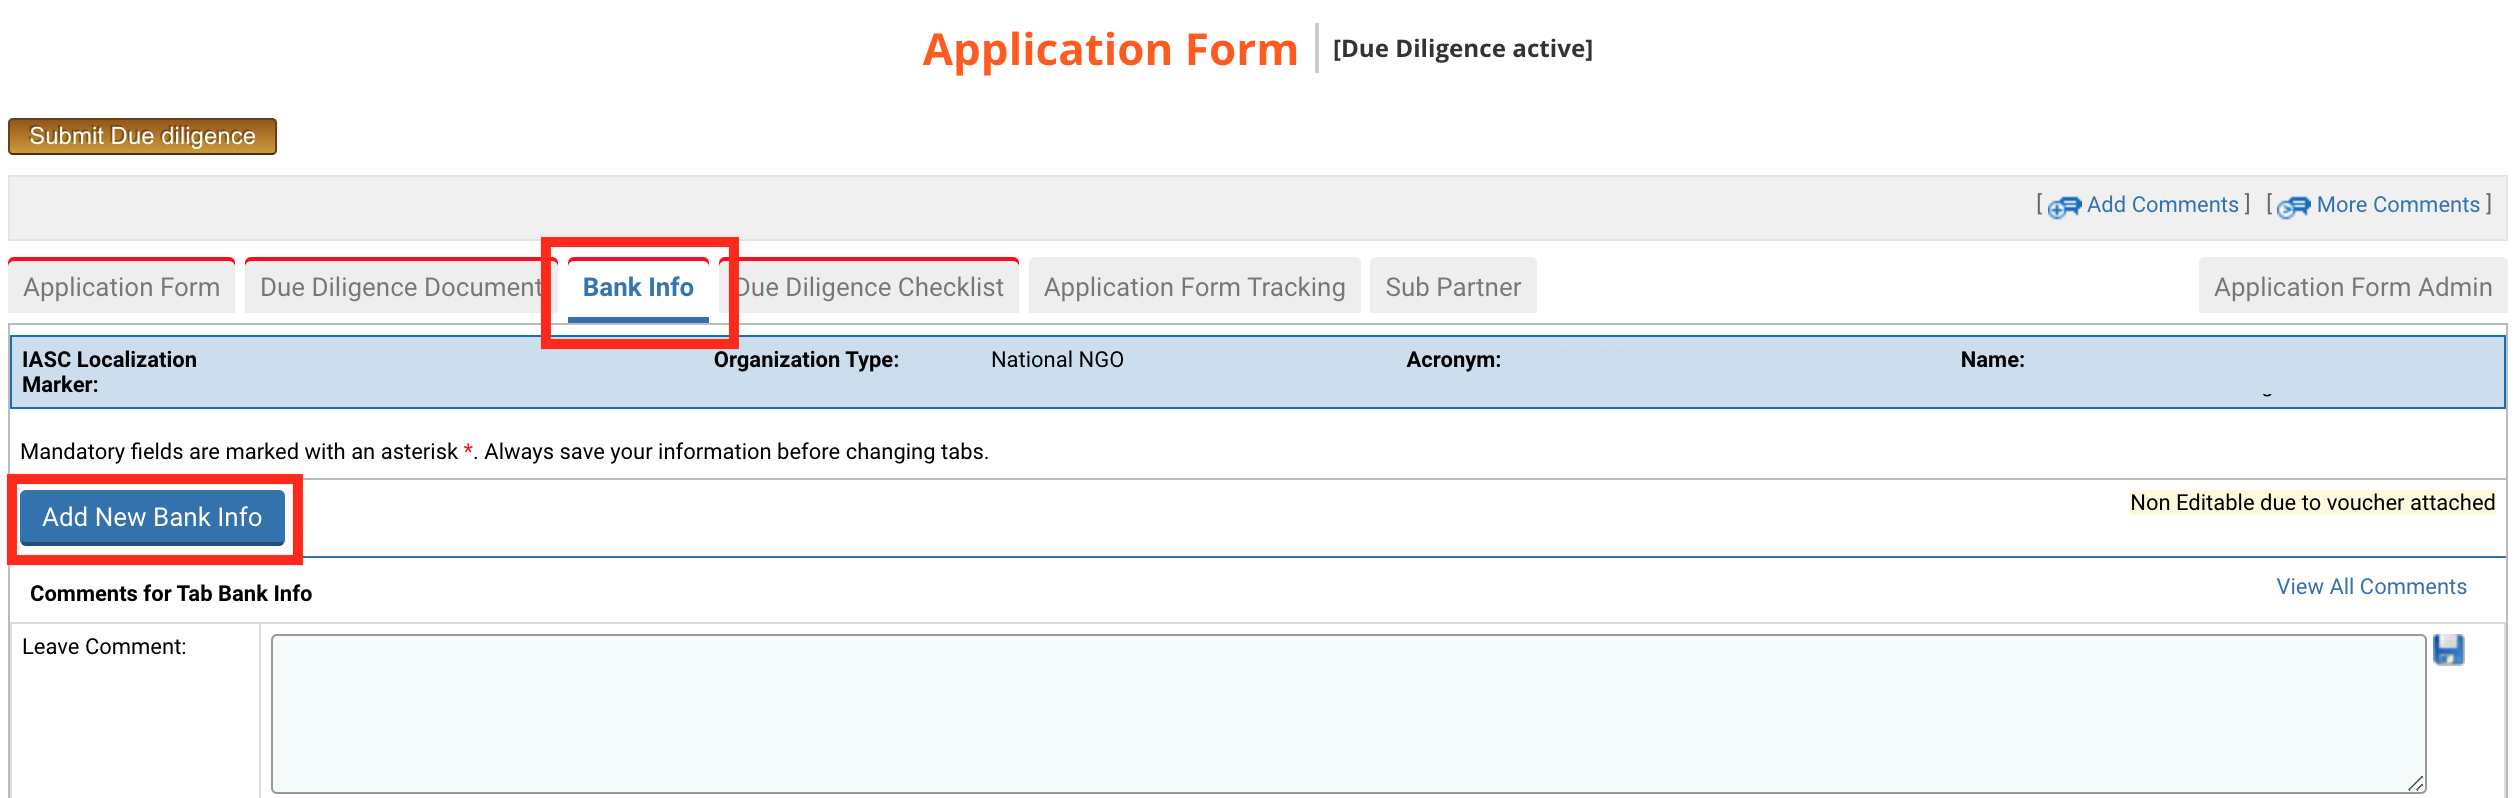
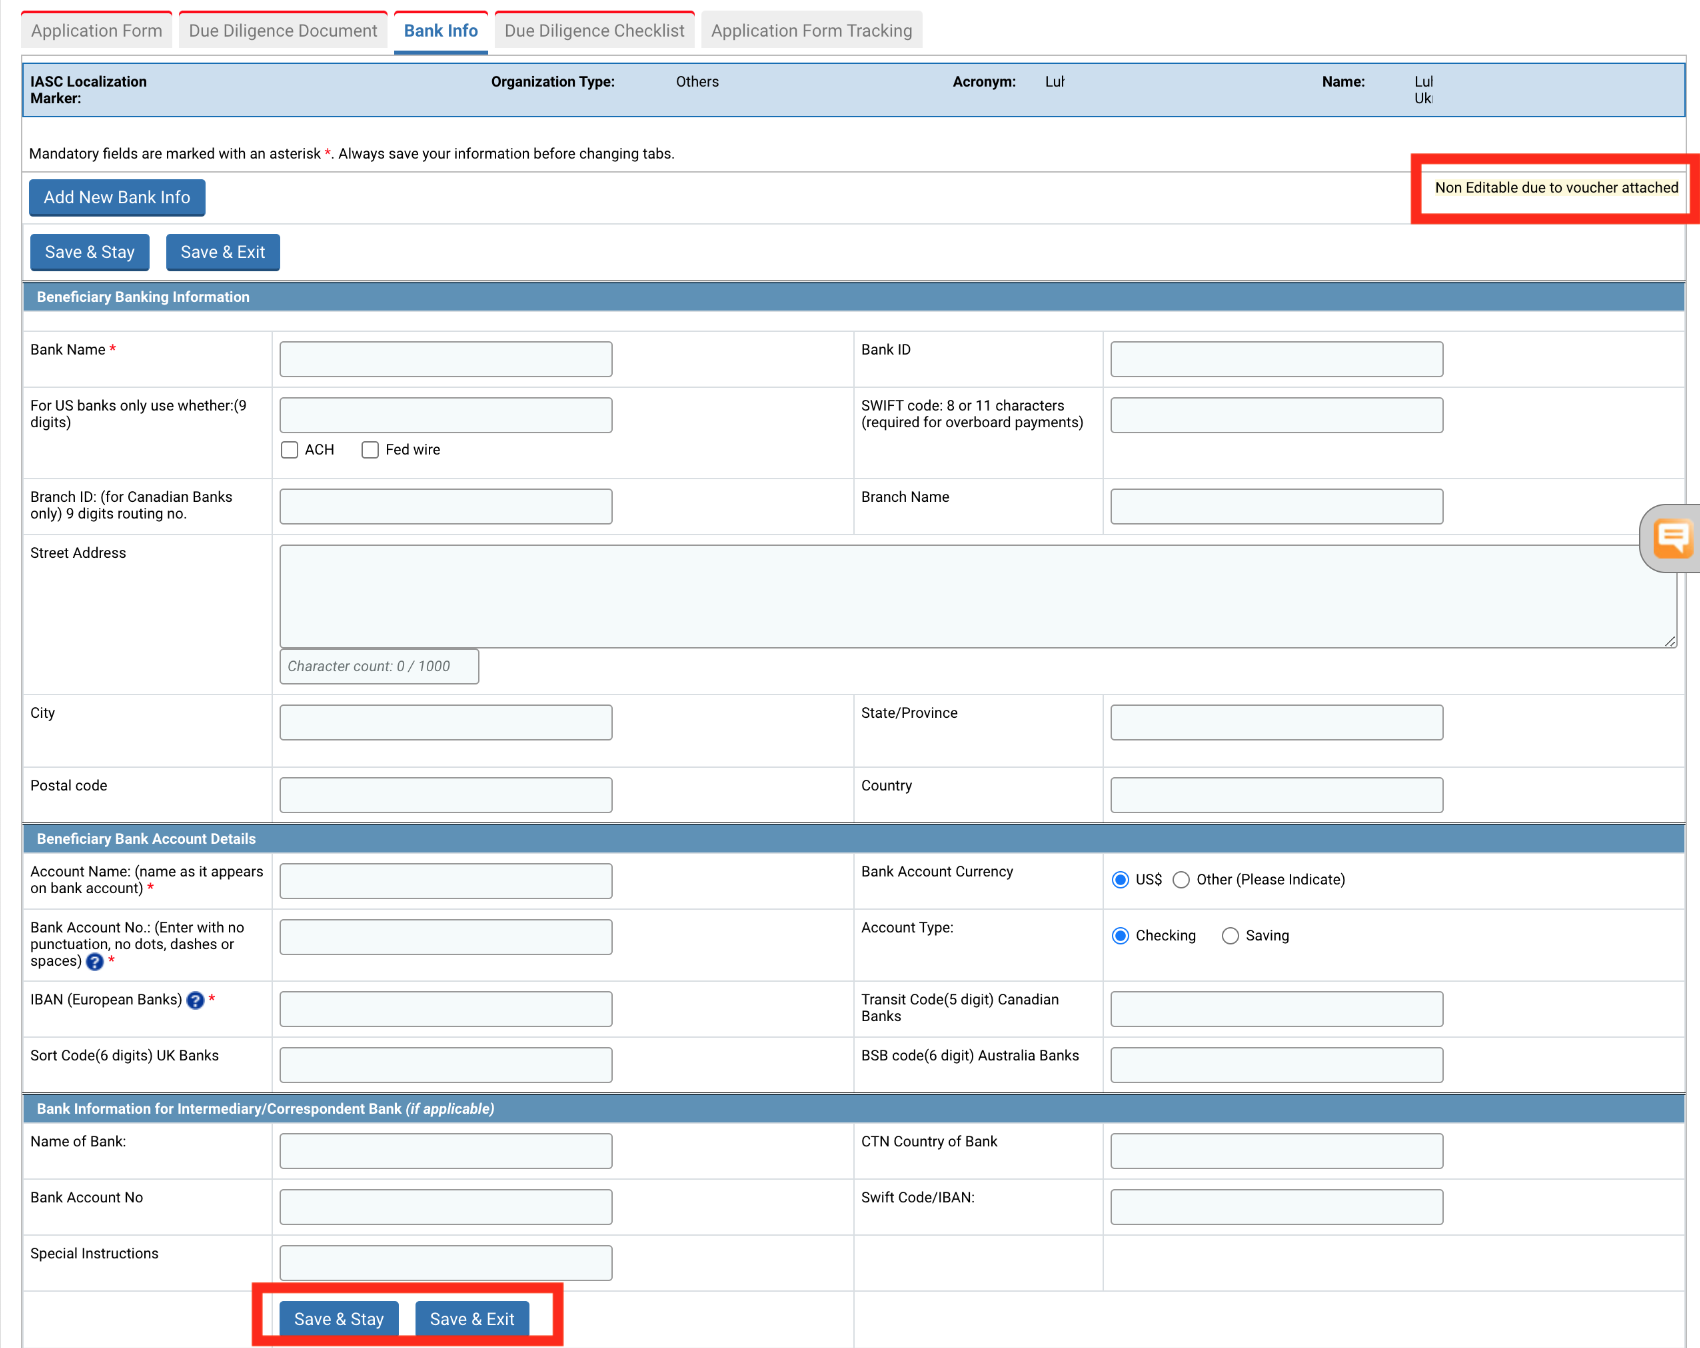
4) Bank Info
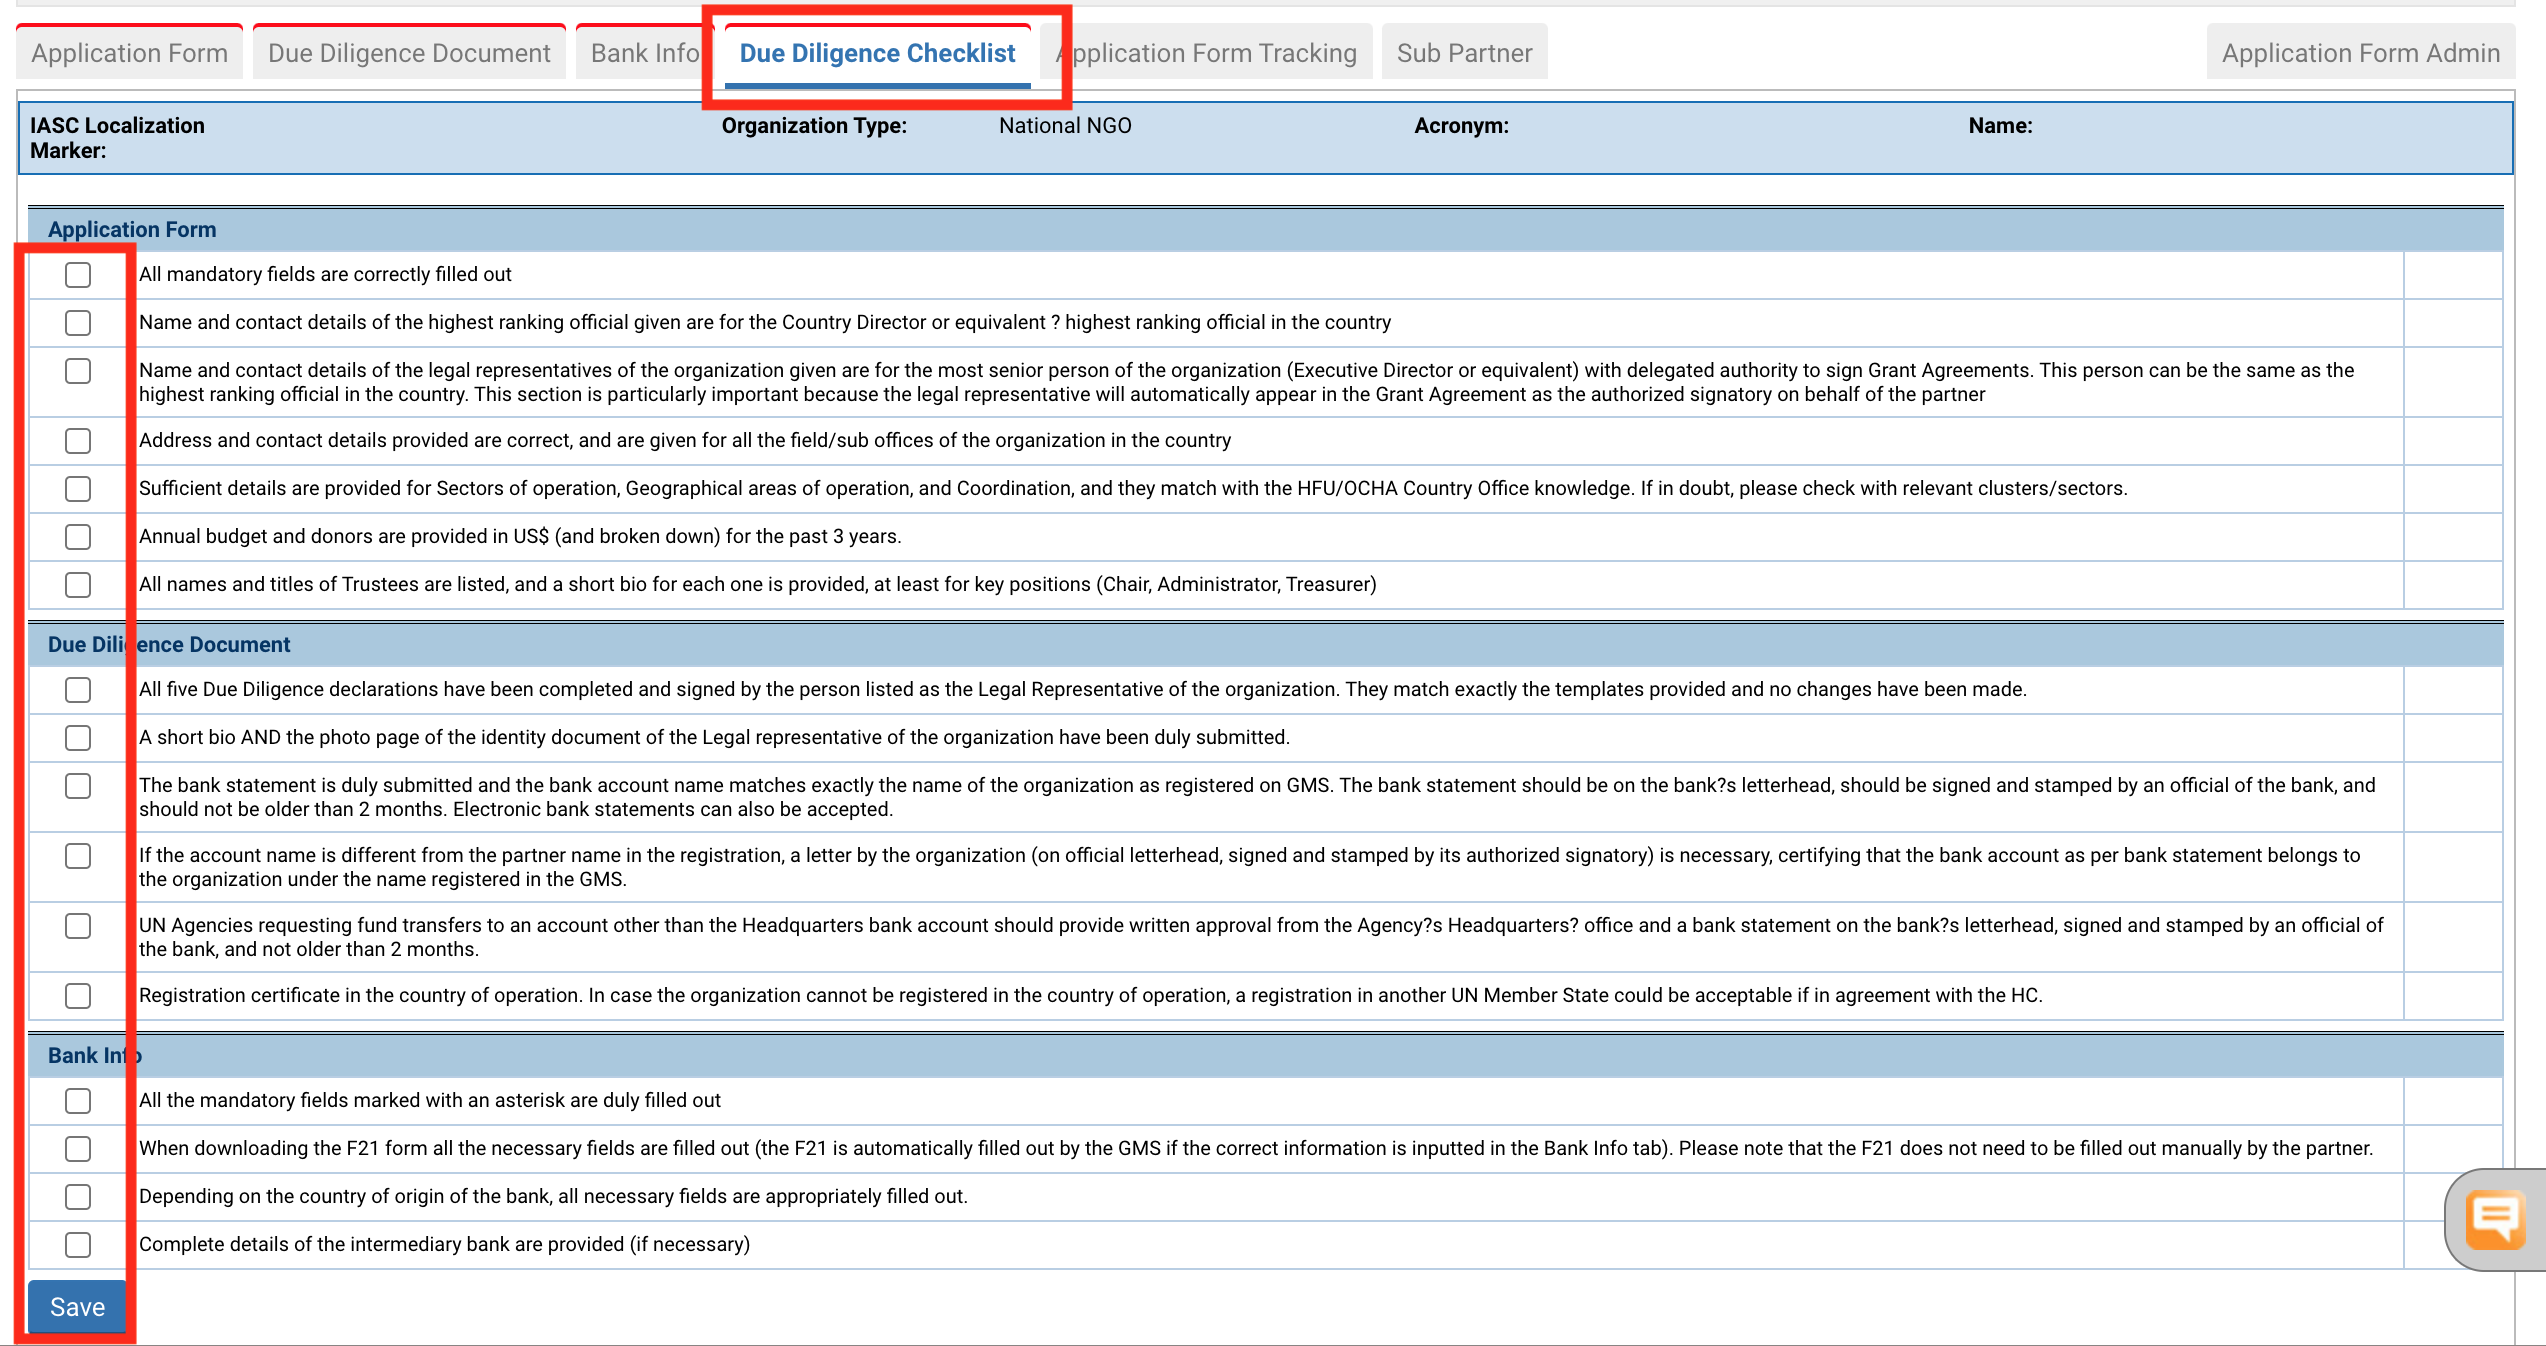
5) Due diligence checklist
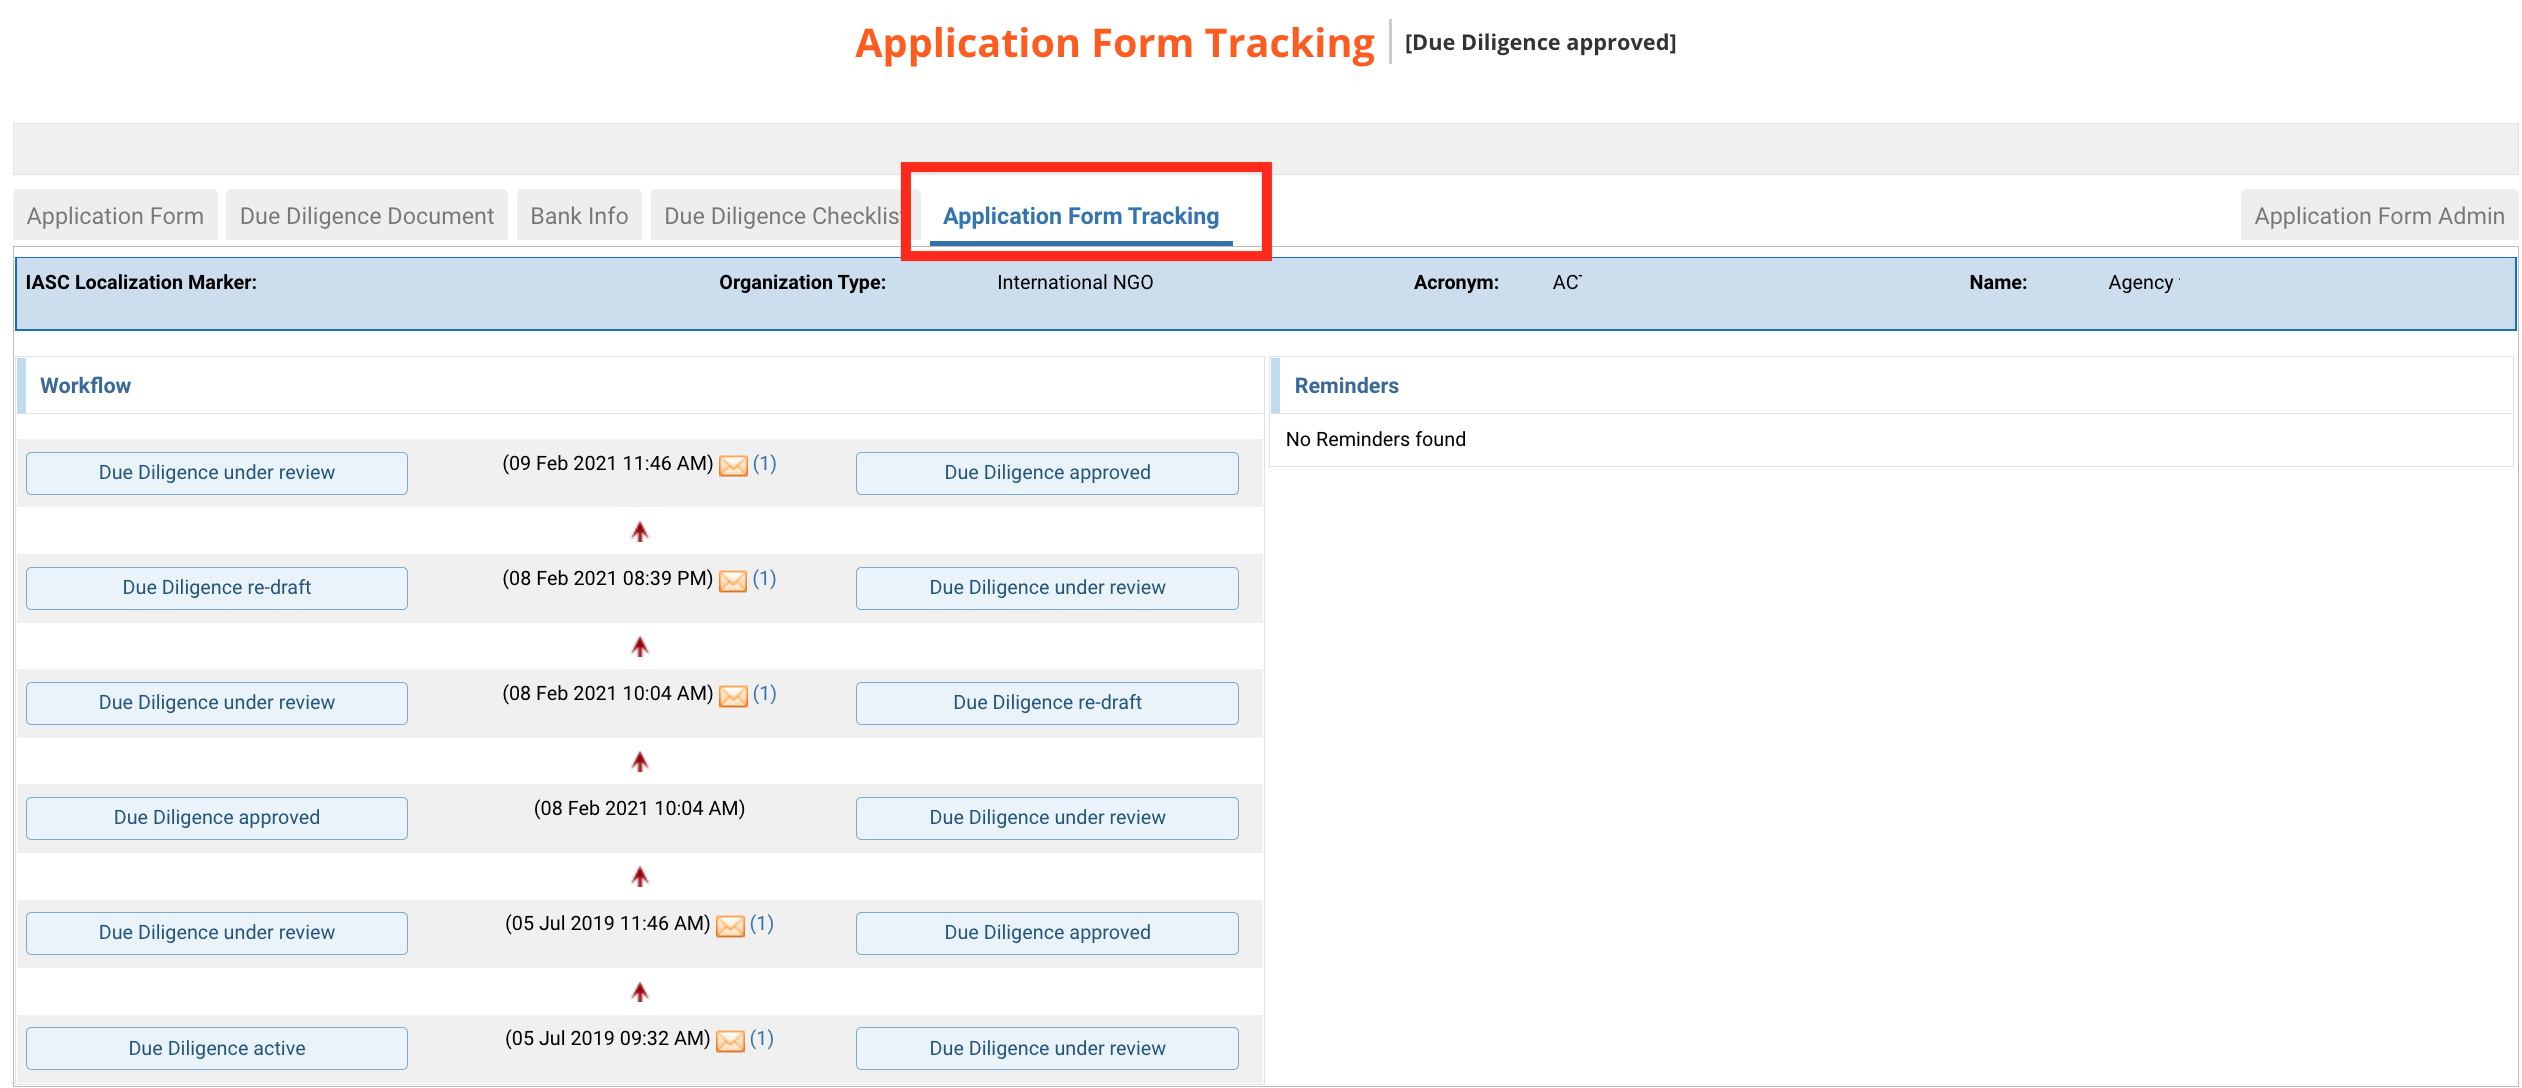
6) Application form tracking
7) Sub-Partner
a) Sub-Partner found
b) Sub-Partner not found
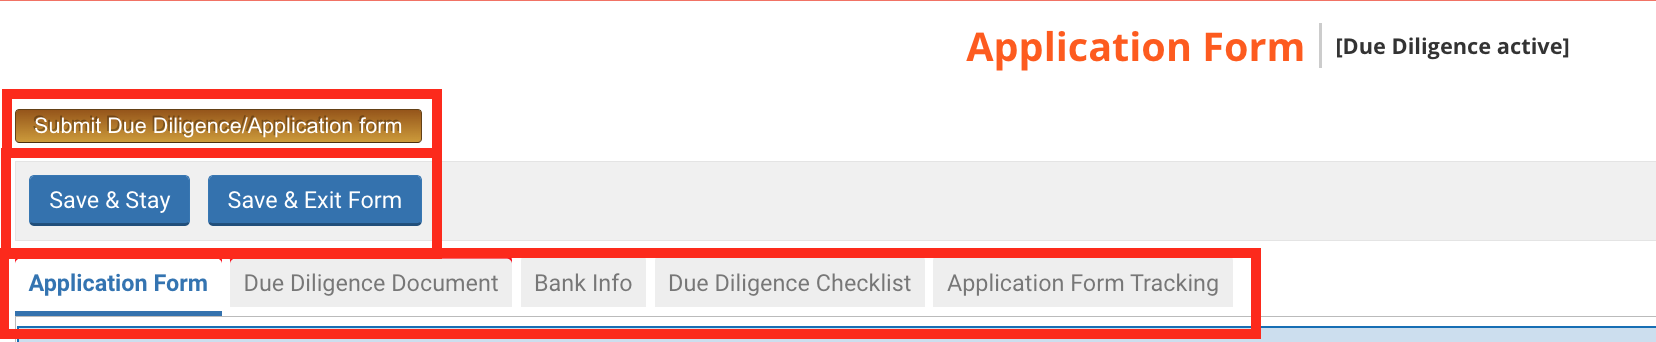
III) Submitting the due diligence application
1) Edit the bank info
2) Edit the contact info
After submitting the due diligence application, HFU will thoroughly review the information as it is critical to ensuring effective risk management. This is why due diligence applications can be rejected if the application is incomplete or if the implementing partner does not meet the minimum requirements. Implementing partners can then be asked to re-draft and re-submit their due diligence application.
Please note: it is at the discretion of each Country Based Pooled Fund (CBPF) to add any mandatory or optional requirements to the registration and due diligence stage. Each CBPF can decide whether the registration and due diligence steps are open to any interested prospective implementing partners, or strictly by invitation.
|
OneGMS Focus: Agency Compliance Business Role When approving a partner OneGMS user, the HFU should ask the organisation whether they would like to restrict access to the due diligence. If so, the HFU will assign the specific user a Compliance business role. As a result, only the designated person(s) within the organisation can access the due diligence. Please note: if no one was assigned the Compliance business role, everyone within the organisation with a OneGMS access will be able to access the due diligence. |
-
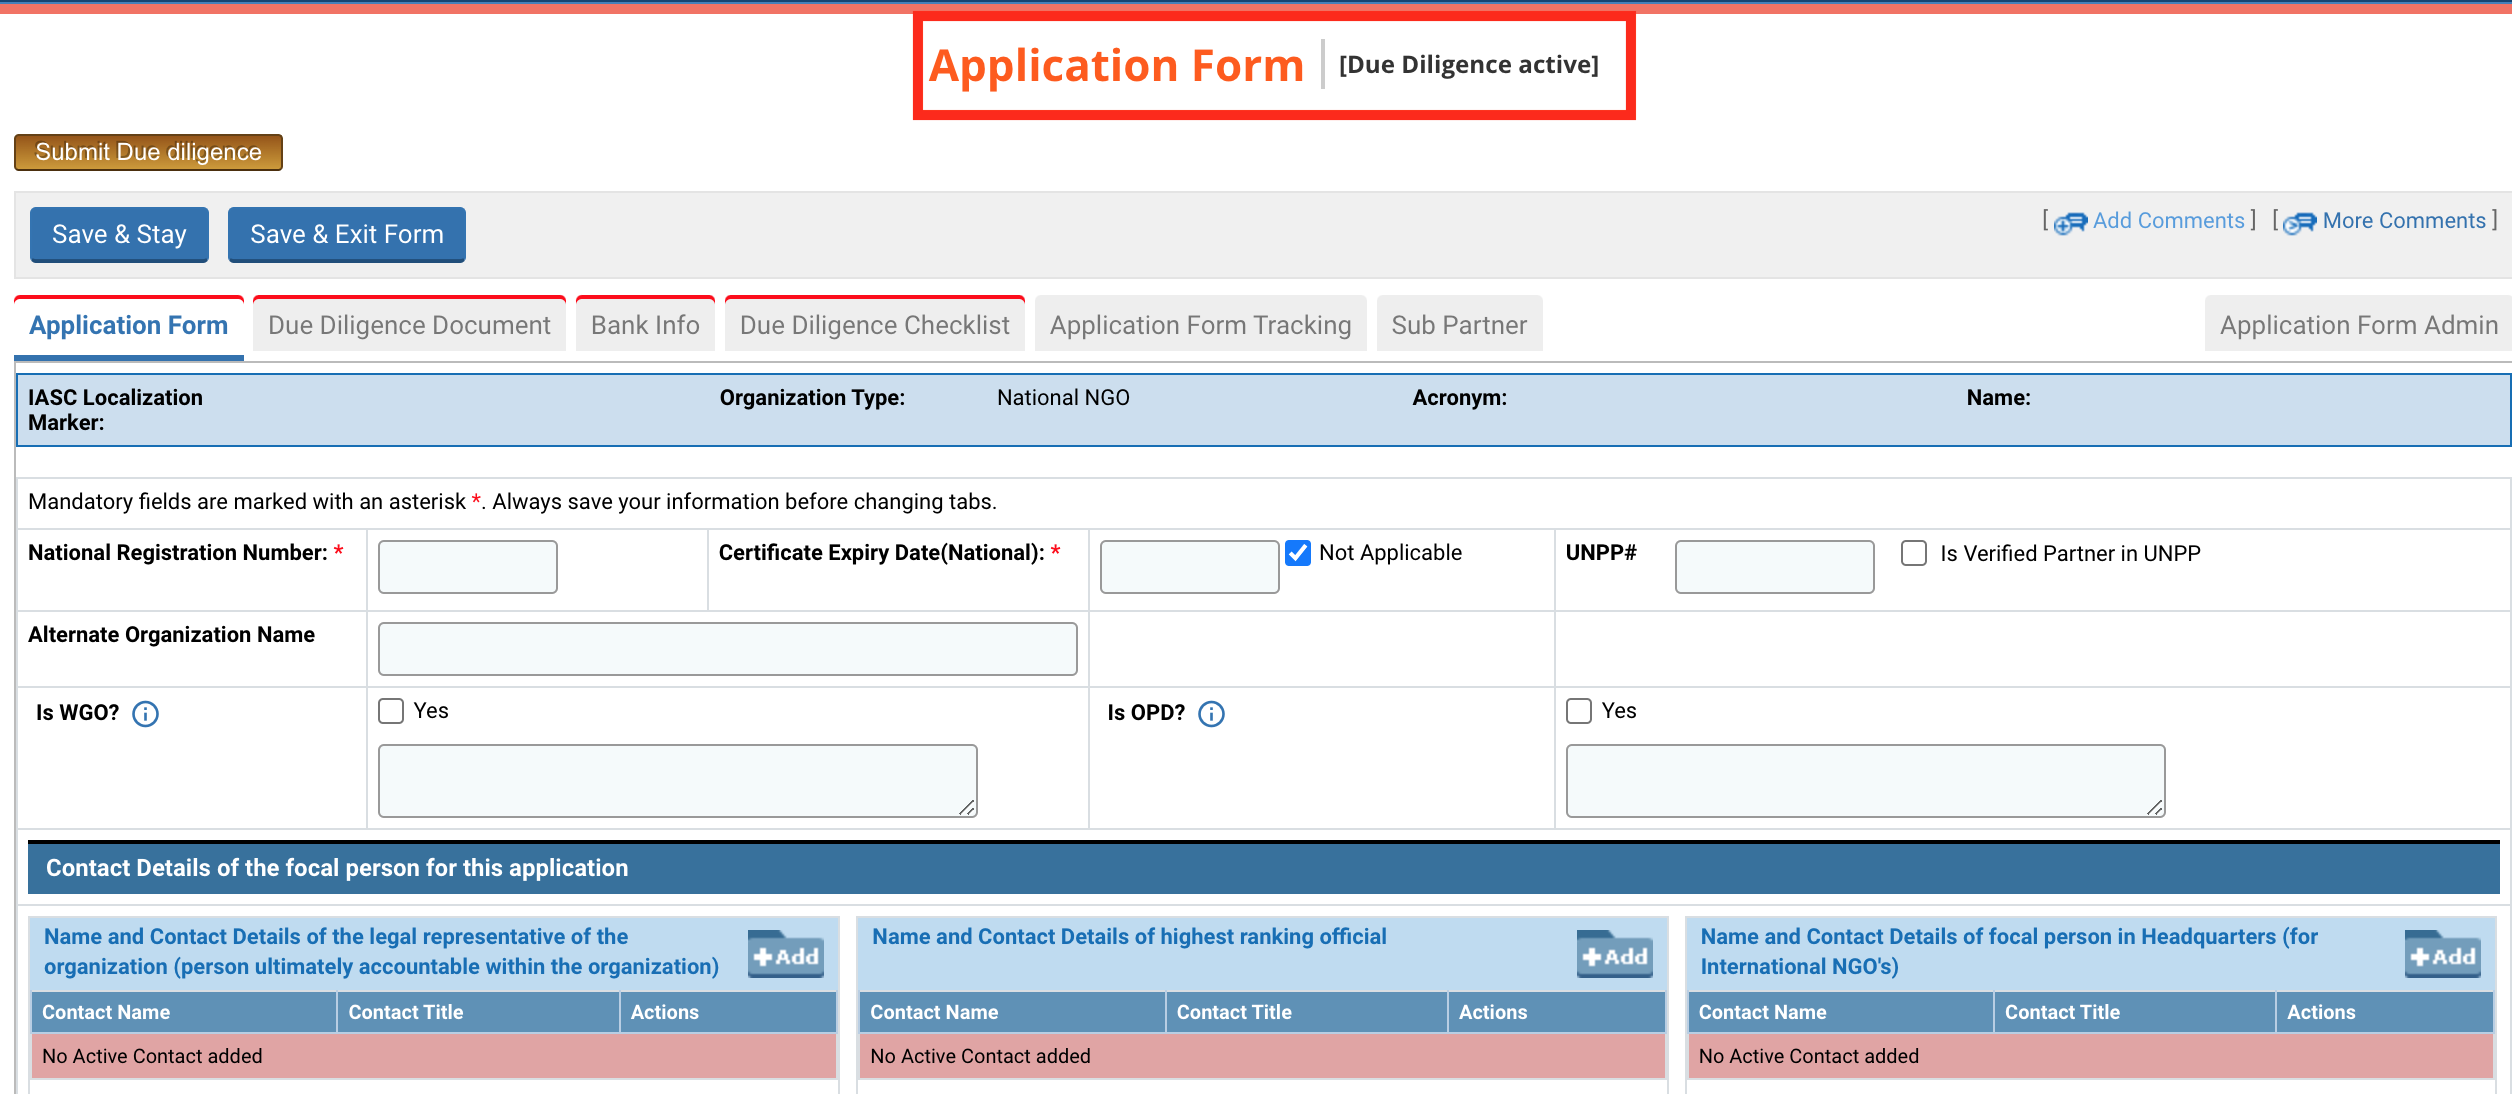
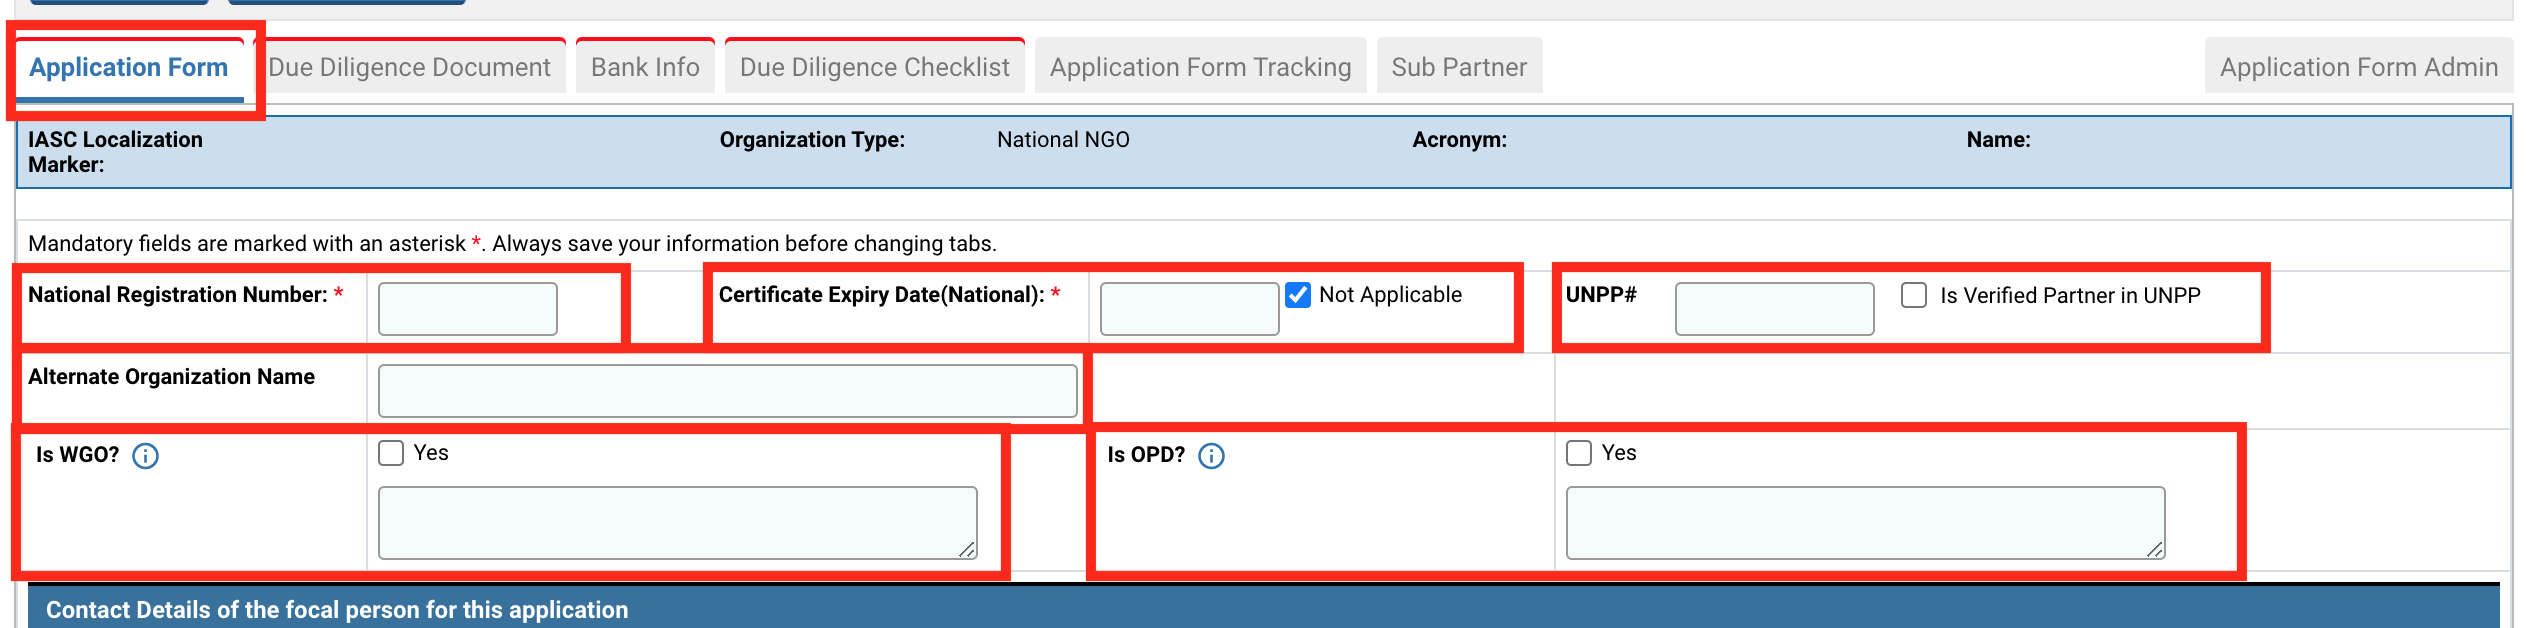
National Registration Number: enter the registration number that the organization uses for national registration.
-
Certificate Expiry Date: select from the calendar the certificate expiry date as indicated on the national or international registration certificate. Check the box ‘Not Applicable’ if there is no certificate expiry date.
-
Alternative Organization Name : enter the alternative name that the organization uses.
-
UNPP#: enter the UNPP number provided after you registered your organization in the UN Partner Portal.
-
Is WGO? (only for national and international organizations): tick this box if the organization is a Women’s and/or Girl’s Organisation. Its leadership and staffing should be made up of women and/or girls, comprising a minimum of 75% of the board, executive positions and staff/volunteers, with a mandate to advance gender equality and women’s and/or girls’ rights and empowerment.
-
Is OPD? (only for national and international organizations): tick this box if the organization is an organisation of persons with disabilities. It should be rooted in and committed to the Convention of the Rights of Persons with Disabilities (CRPD) and should fully respect the principles and rights that it affirms. OPDs must be led, directed and governed by persons with disabilities. A clear majority of the membership should be persons with disabilities.
-
International Registration Number : Enter the registration number the organization uses for international registration
-
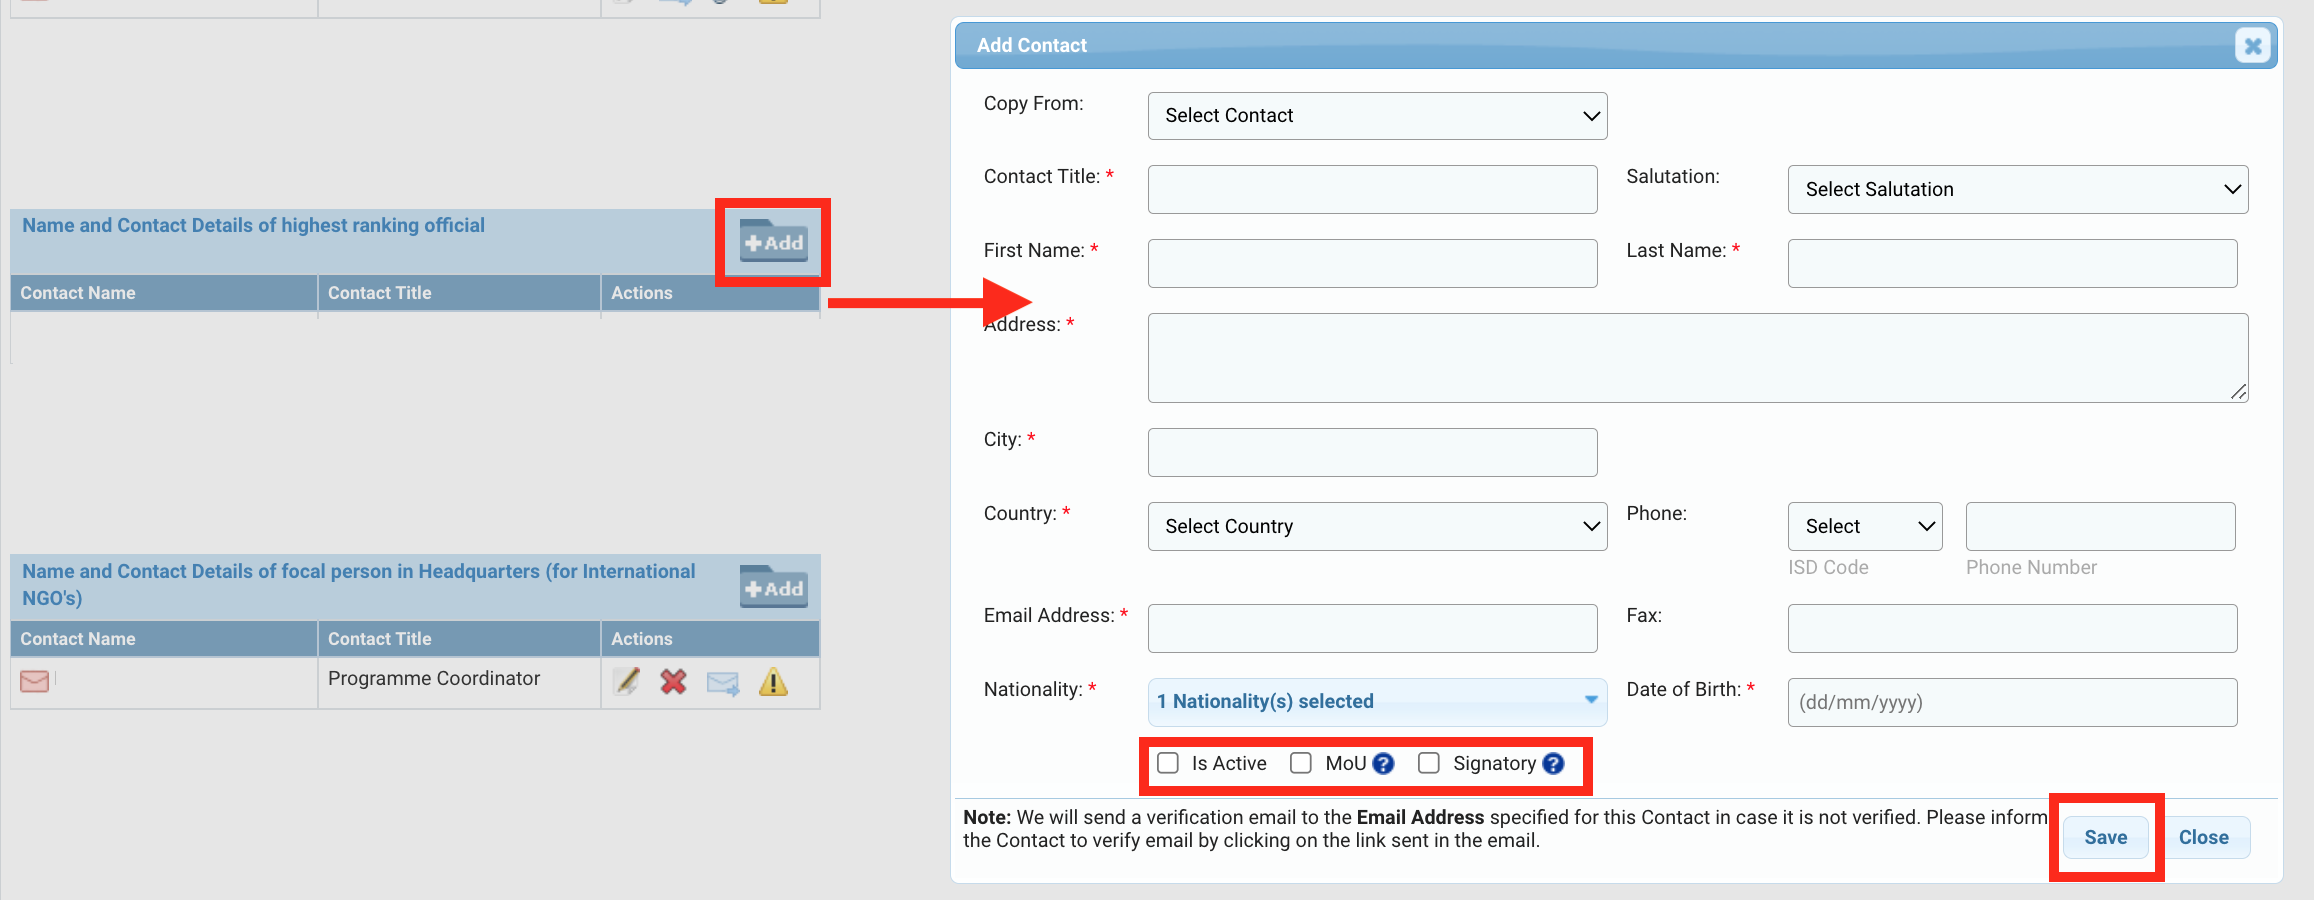
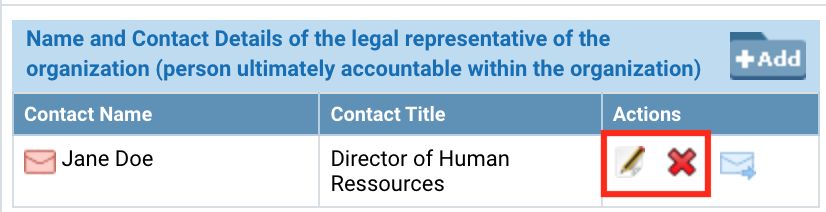
Name and Contact Details of the Legal Representative of the Organization [Add Contacts] button: click to provide organization's legal representative contact details.
-
Name and Contact Details of highest ranking official [Add Contacts] button: click to provide organization's highest ranking officer's contact details.
-
Name and Contact Details of focal person in Headquarters (for International NGOs) [Add Contacts] button: for international NGOs, click to provide the focal person's contact details within the organization's headquarters.
-
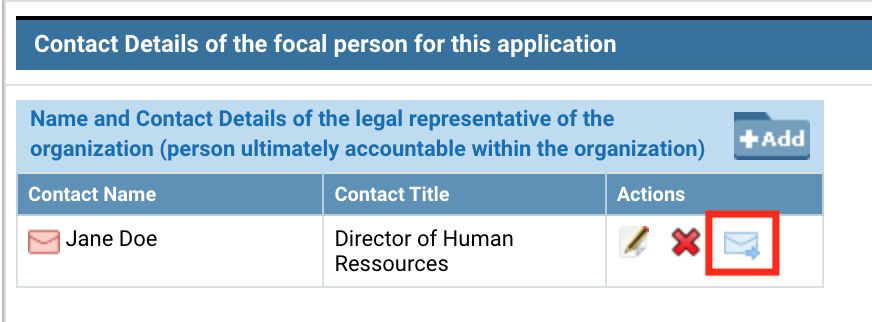
Contact Details of focal person of this application [Add Contacts] button: click to provide organization's focal person contact details
-
List of Active Signatories : The active signatories identified in the previous contact tabs are automatically computed in this box.
-
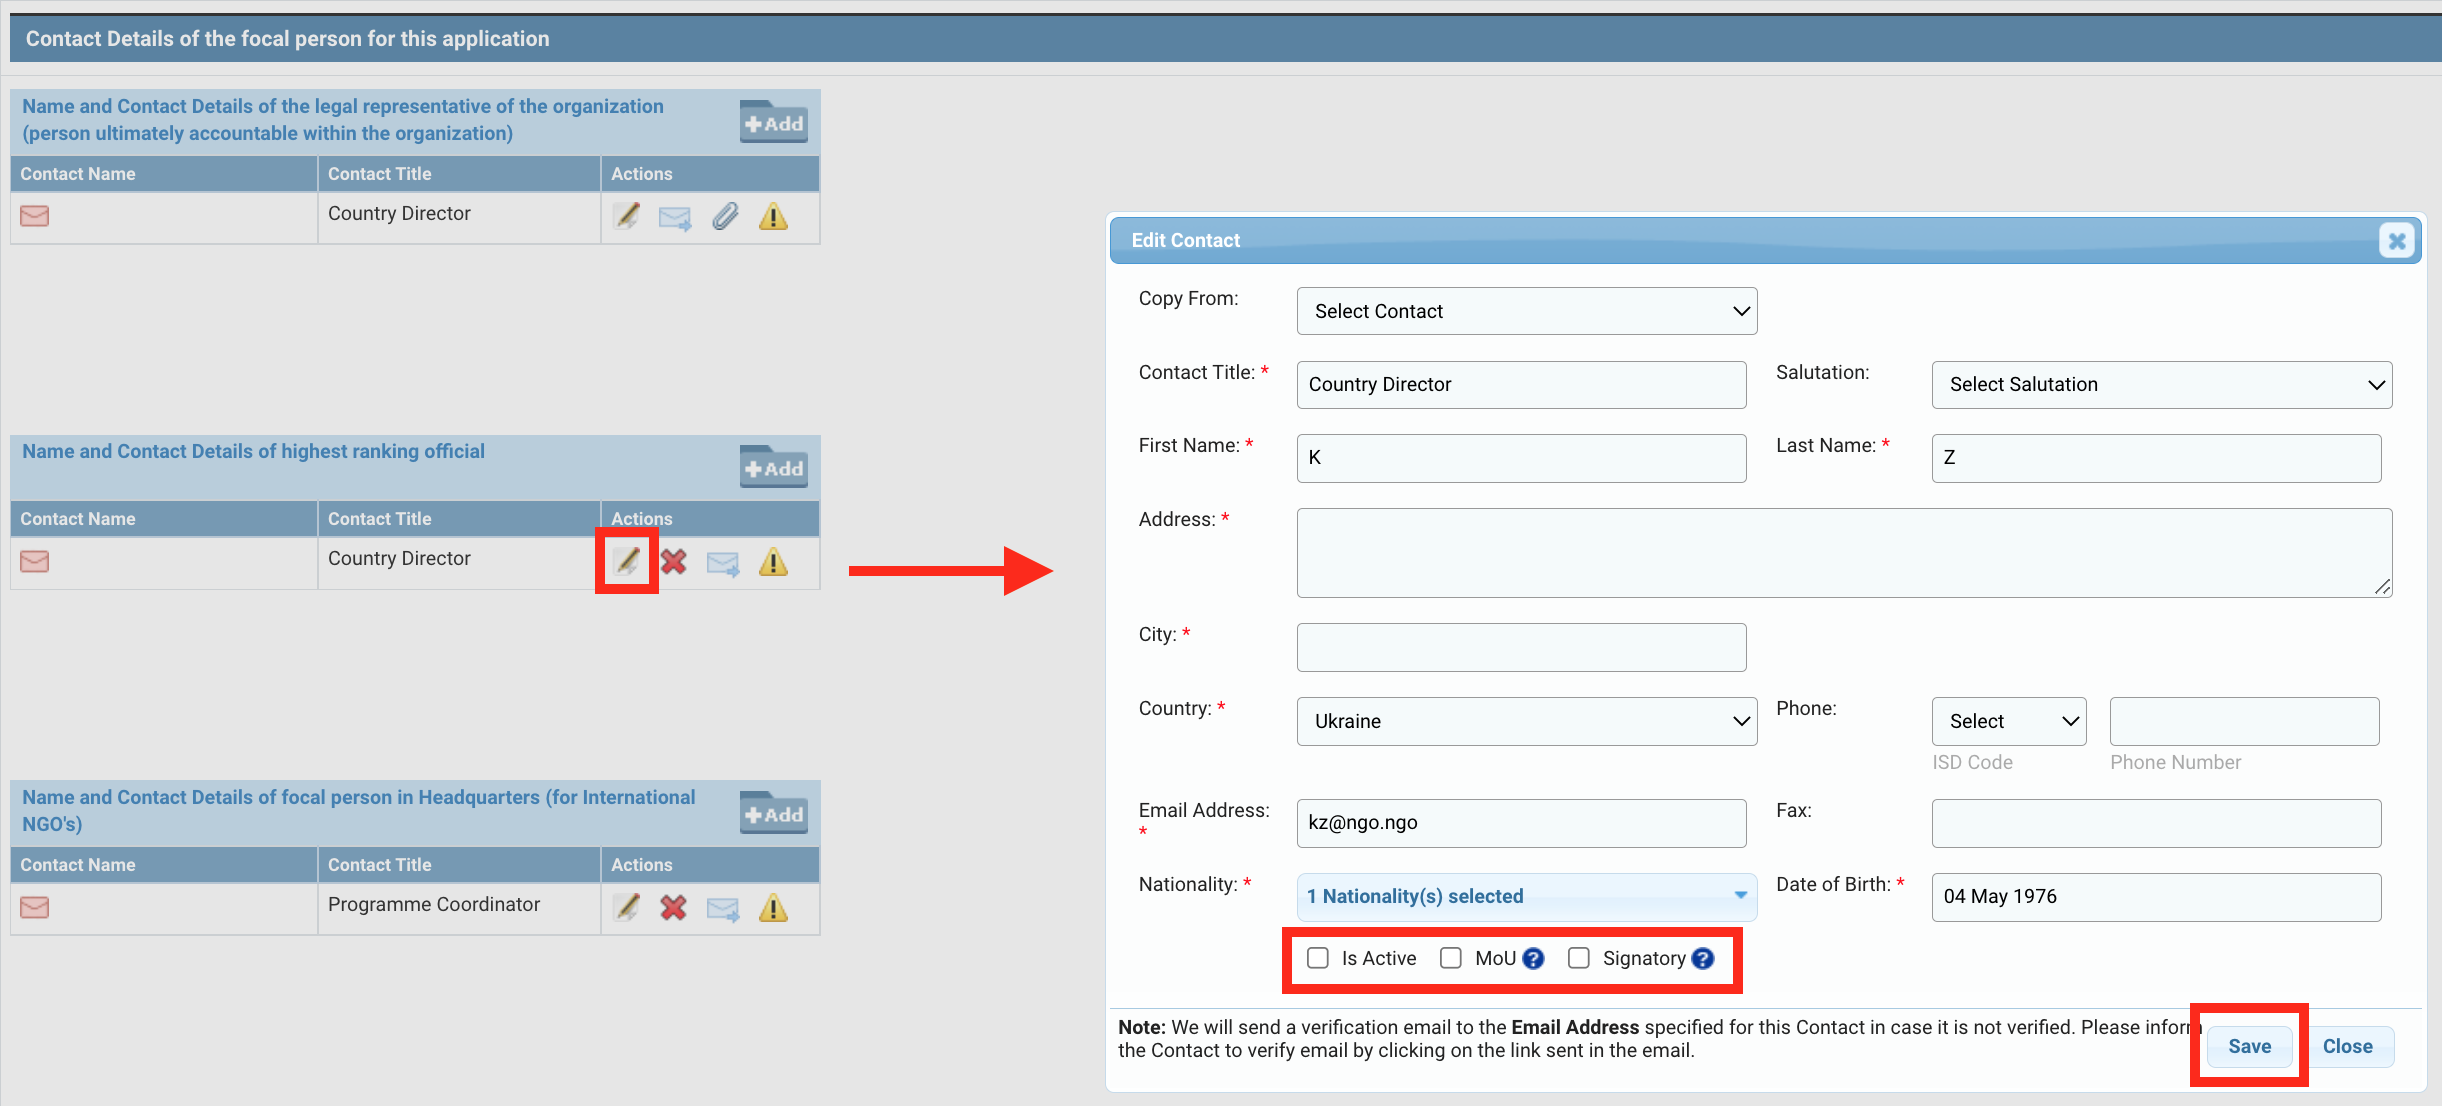
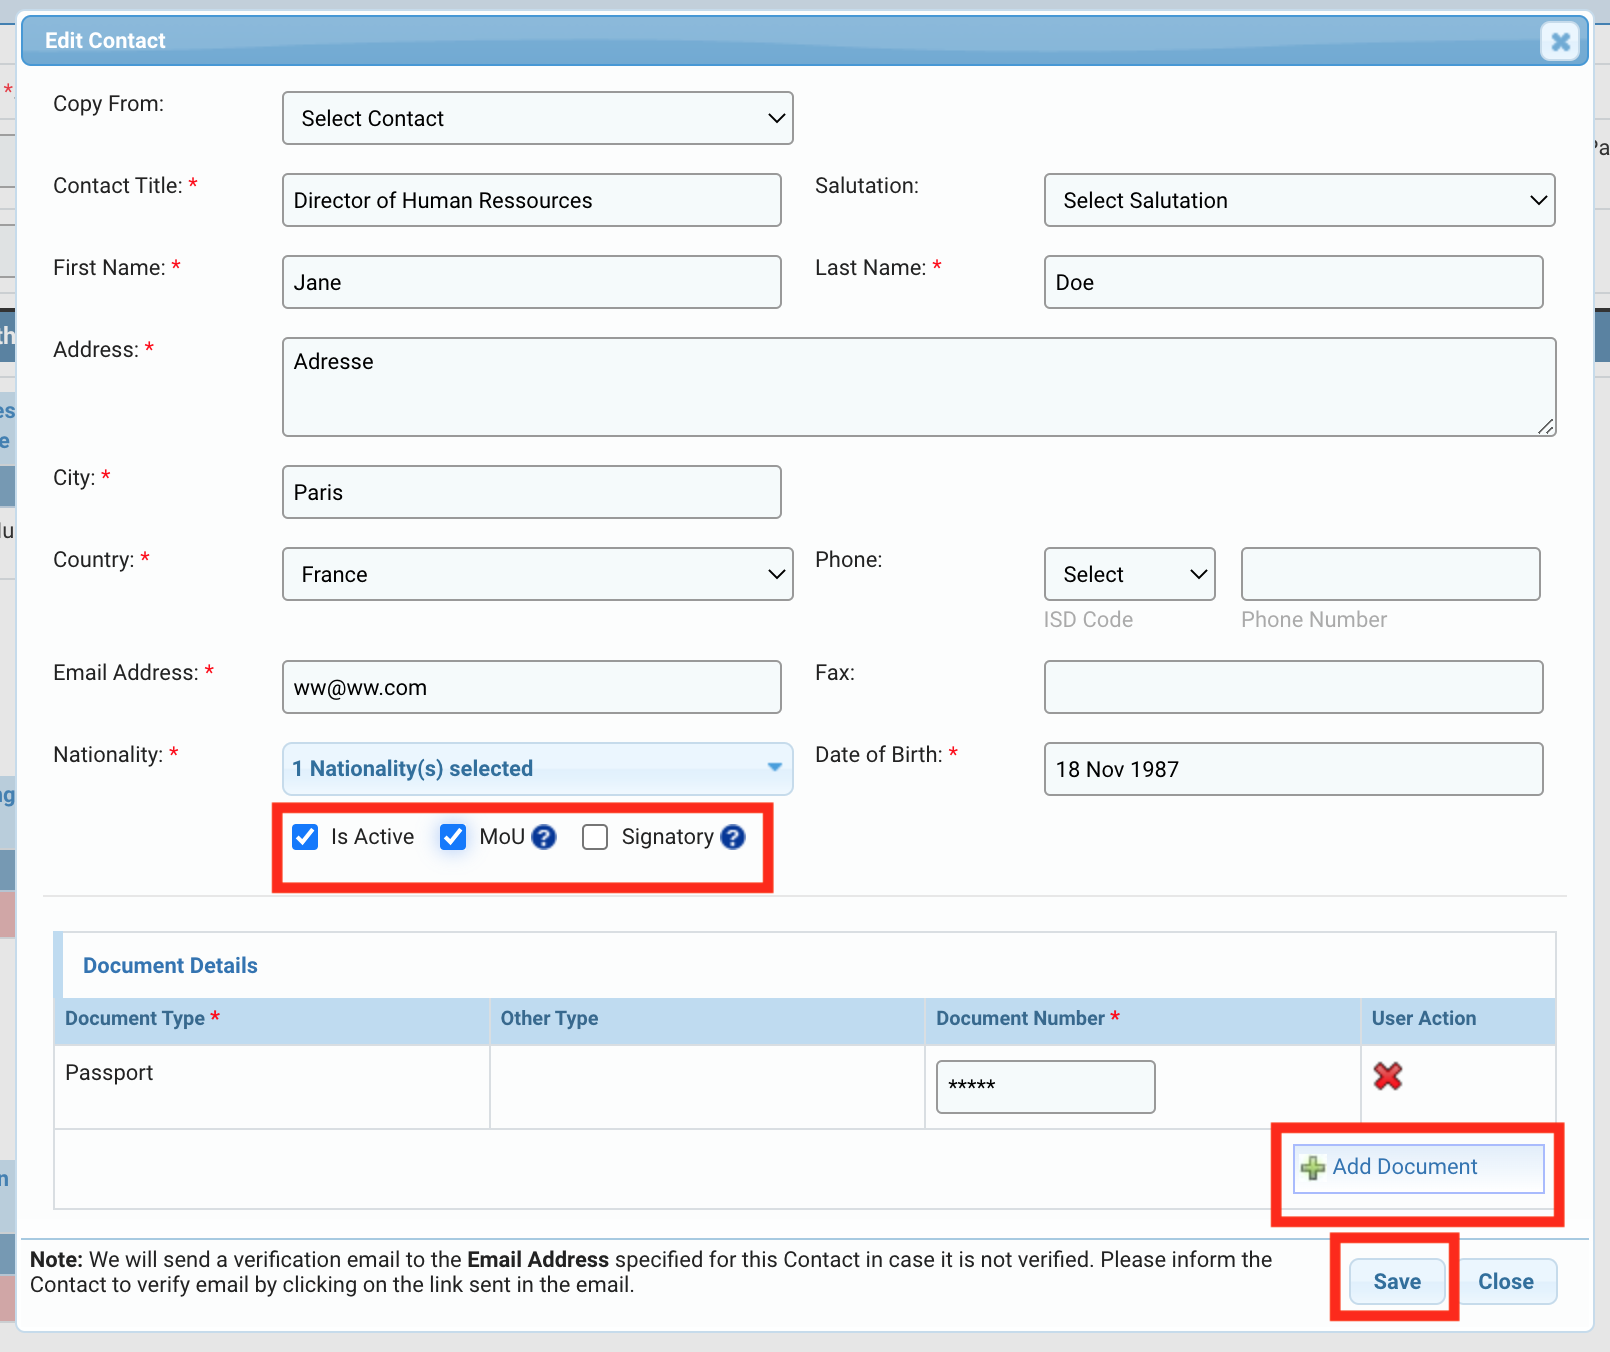
Copy From: should you want to copy an existing contact person's contact details.
-
Fill out the rest of the contact details. please note that any field with an asterisk sign * are required fields.
-
Document Details : add an official identification document number (e.g. passport) to the contact. if you wish to remove a document, click on
 in the column ‘User Action’.
 -
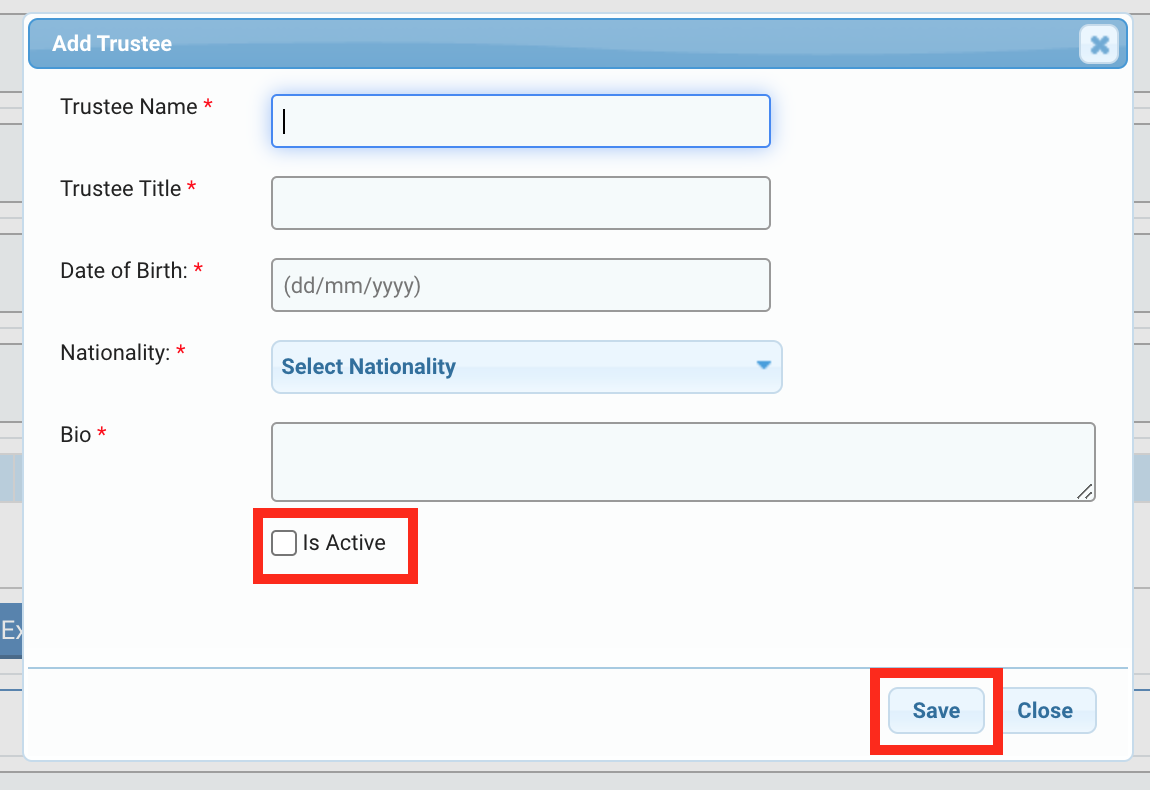
After filling out the contact details, please ensure the 'Is Active' checkbox is selected, and click on [Save] to save the contact details.
| Please Note: collected information enables OCHA to confirm the identity of the implementing partners representatives, which is a legal requirement of the Grant Agreement. However, all information saved on the OneGMS are subject to UN/OCHA – Data confidentiality policy. To know more about this policy, please refer to the UN website privacy notice, the UN website Terms of Use, and OCHA’s draft Data Responsibility Guidelines. |
List of Active Signatories
- The ‘MoU’ box should be ticked if the contact is the legal signatory of the Grant Agreement and the project’s reports. Signatory contacts will be generated in the Grant Agreement upon projects’ approval. Only one person from the partner’s organization can sign the Grant Agreement, however, implementing partners can provide several MoU options in the due diligence application.
- The ‘Signatory’ box should be ticked if the contact is the legal signatory of financial reports of the project.
- A Signatory/MoU contact doesn’t need to be identified as such multiple times. Ticking the Signatory/MoU box once is enough for the system to identify the contact as Signatory/MoU.
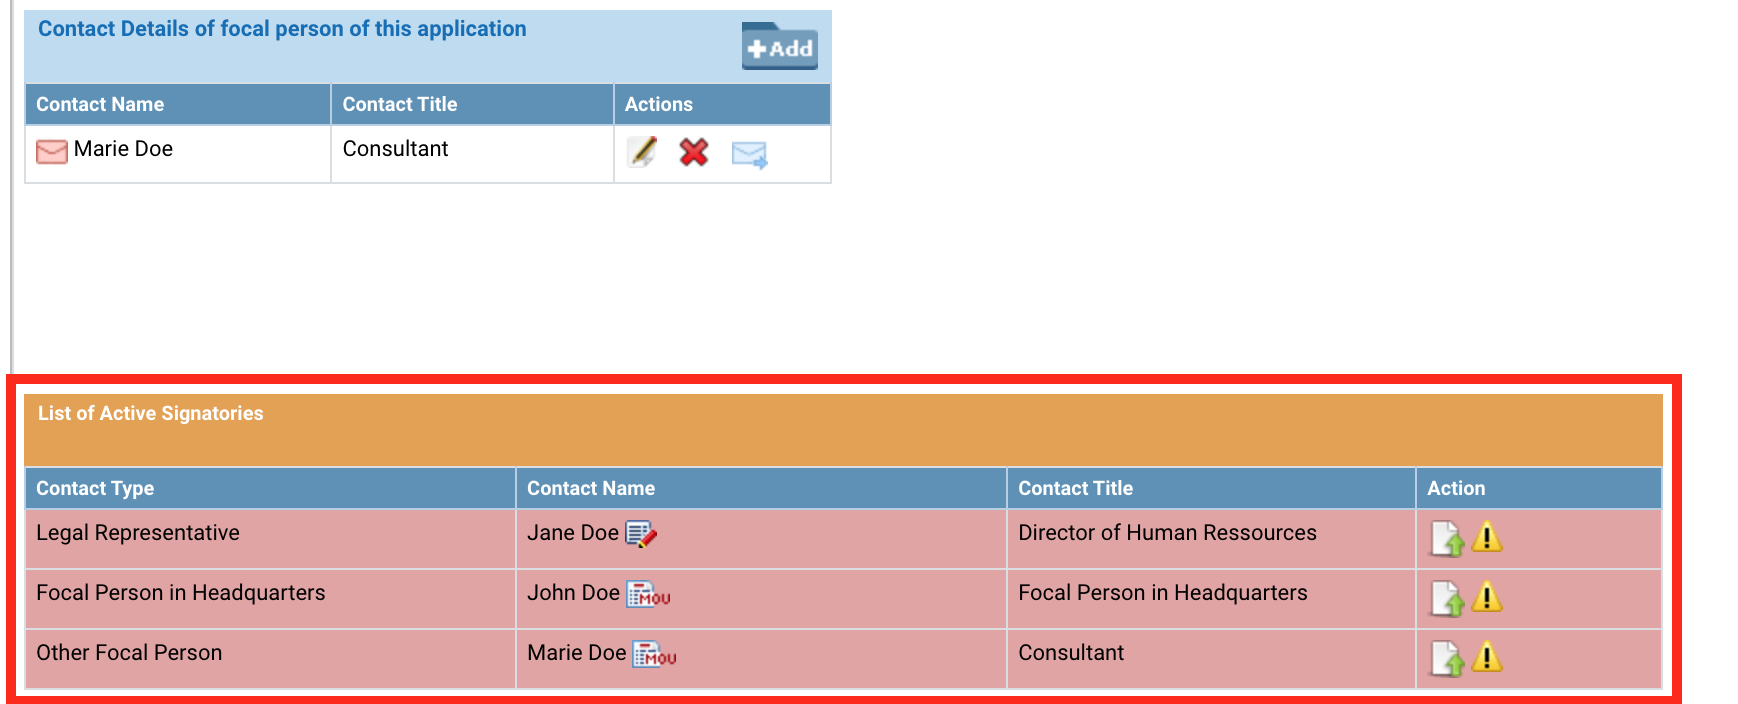
For these active signatory contacts as listed in this box, you will be requested to upload a scanned copy of their ID under the List of Active Signatories. To do so, click on the ![]() icon in the action column of the Active Signatories section, select the identity document from your desktop and click on [Upload].
icon in the action column of the Active Signatories section, select the identity document from your desktop and click on [Upload].
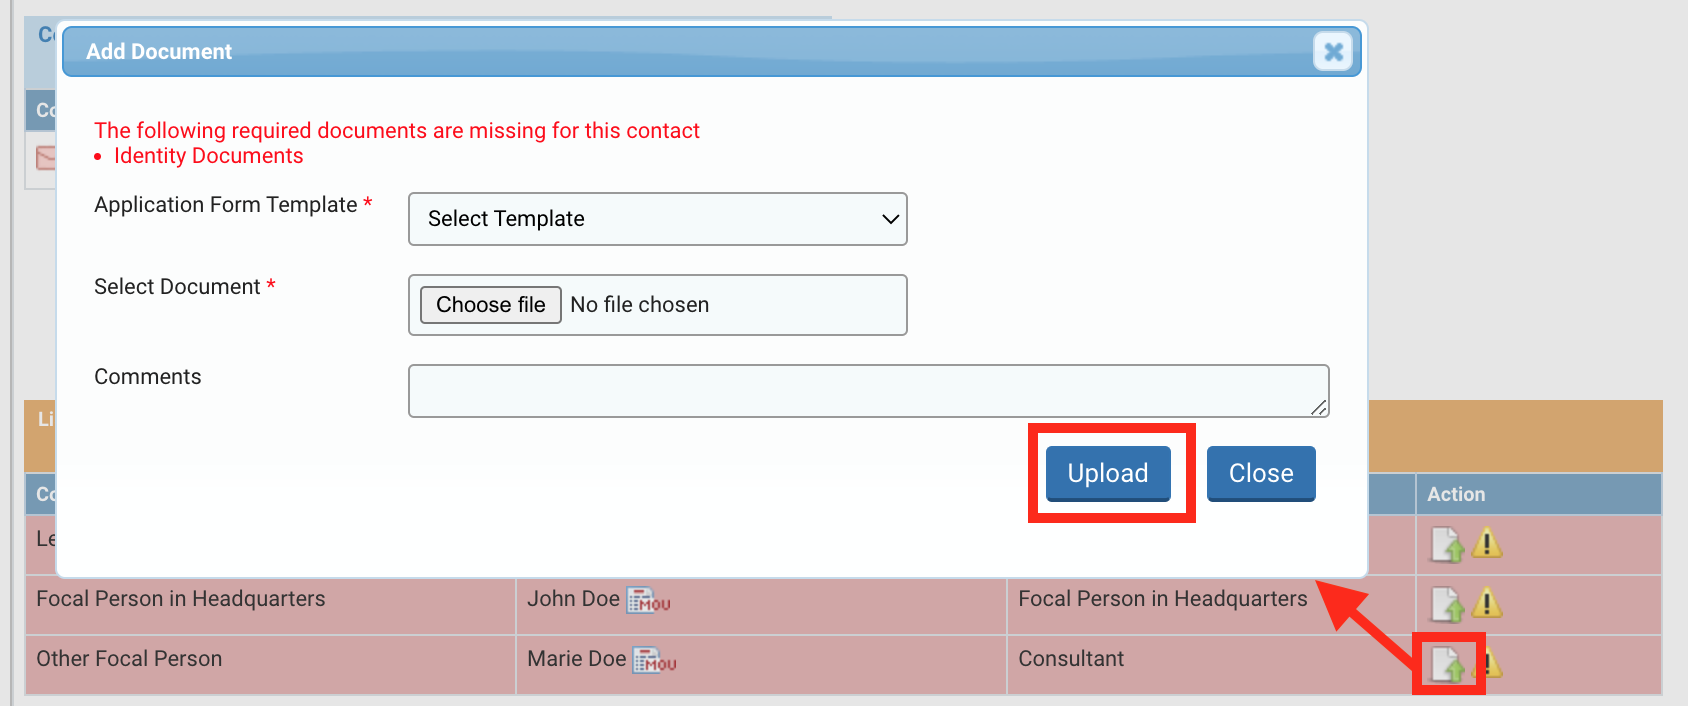
Please note: the system will display an error icon in the action column of the signatory contact, and the line will be red, if the related information is incomplete. For instance, if there is no attached document.To be able to send your Due Diligence to the Humanitarian Financing Unit for review, make sure that all fields are filled in, that the contact is active and the necessary ID document is attached.
|
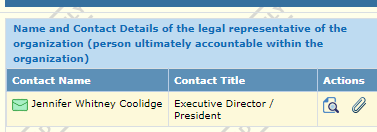
OneGMS Focus: Email Verification In order to validate the contacts saved in this form, the system requests email verification. All contacts added during the Due Diligence process will receive an email with a link to confirm their email address. Users must click on the link to confirm their email address. Please note that the link is only valid for a limited number of days. If the link is no longer valid, you can send a second verification email by clicking on this blue icon
|

-
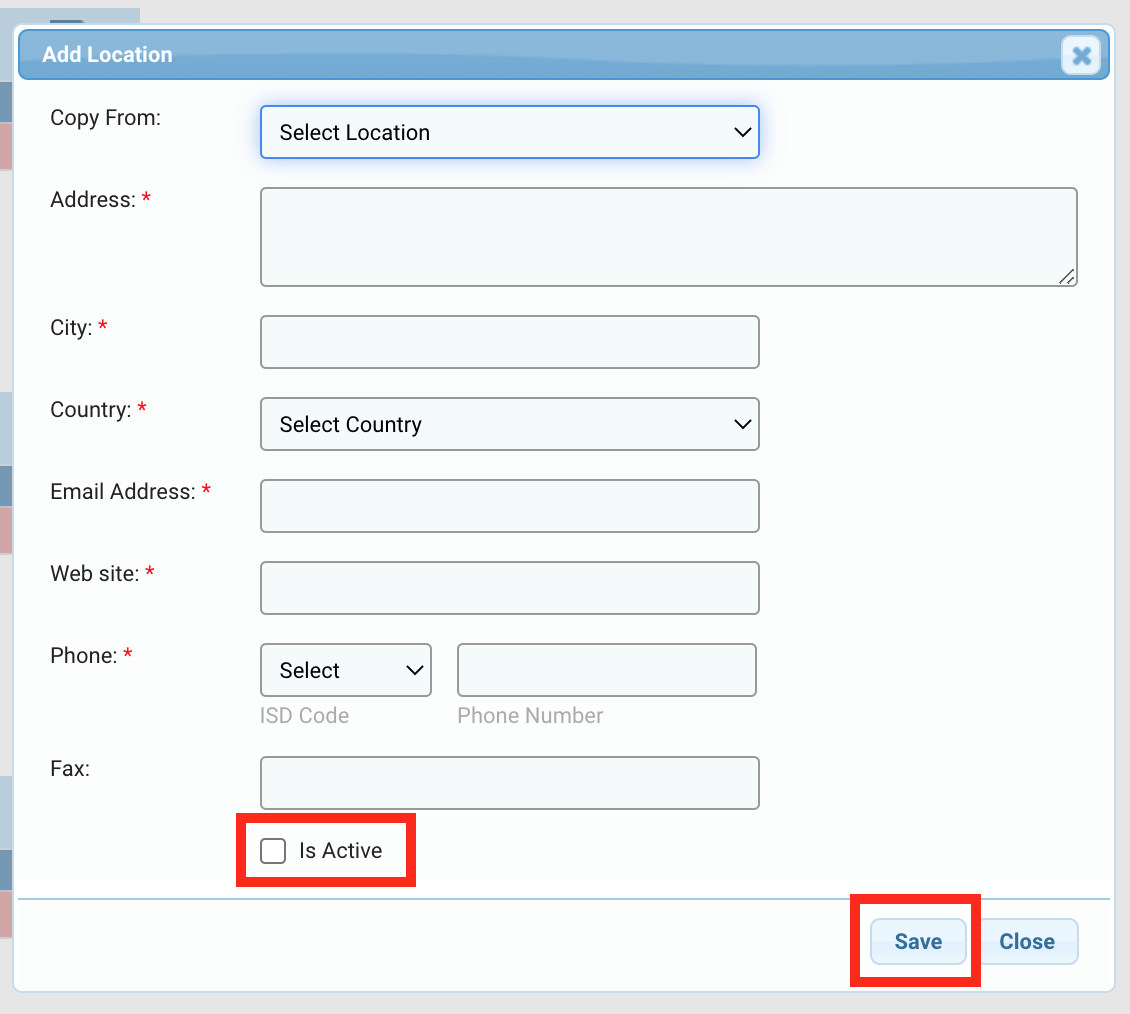
Address and Contact Details for Organization Headquarters : click on [Add] to provide the address and contact details for the Organization Headquarters.
-
Address and Contact Details of Main Office: click on [Add] to provide the address and contact details of the Organization’s main office.
-
Address and Contact Details for Sub Office : click on [Add] to provide the address and contact details for the Organization’s sub-office.
-
Copy From: should you want to copy an existing location details already created.
-
Fill out the rest of the location details
-
After filling out the location details, please ensure the 'Is Active' checkbox is selected, and click on [Save] to save the location
-
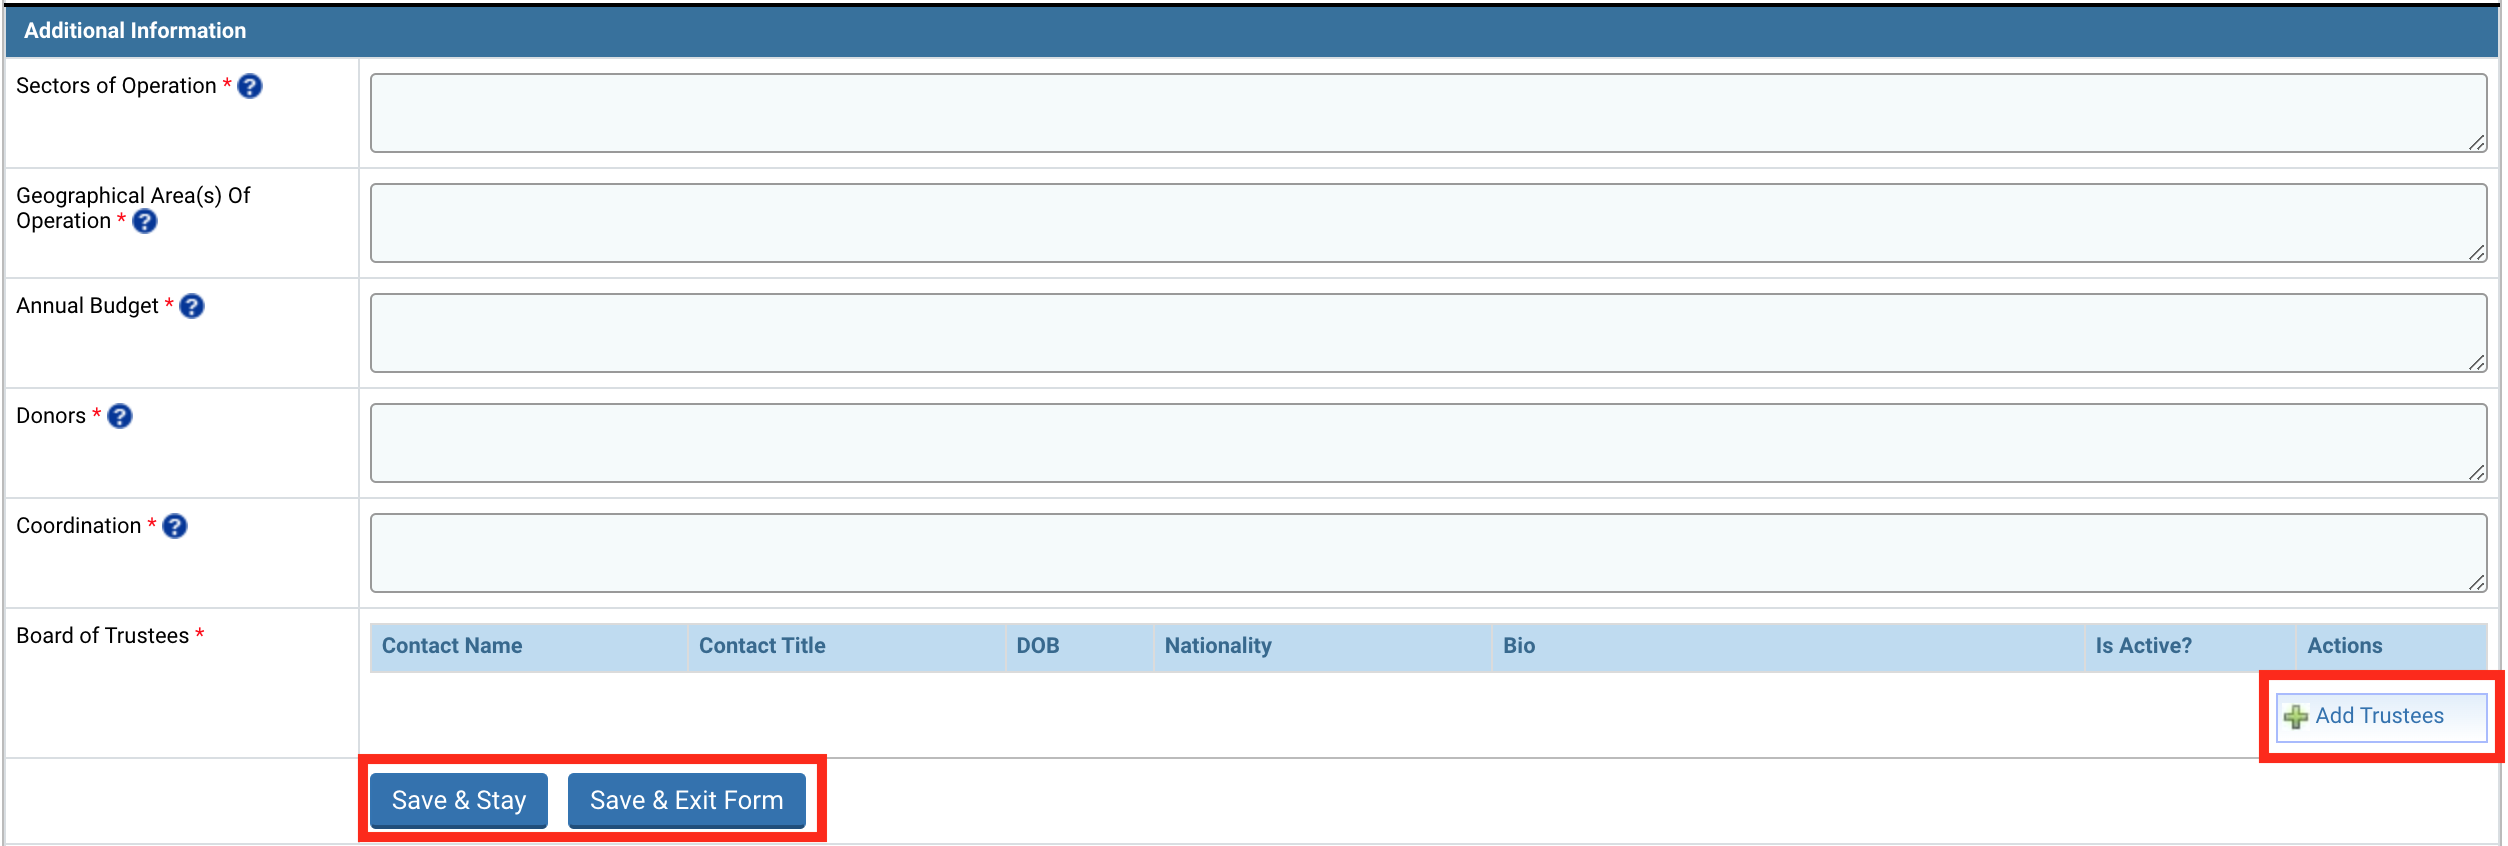
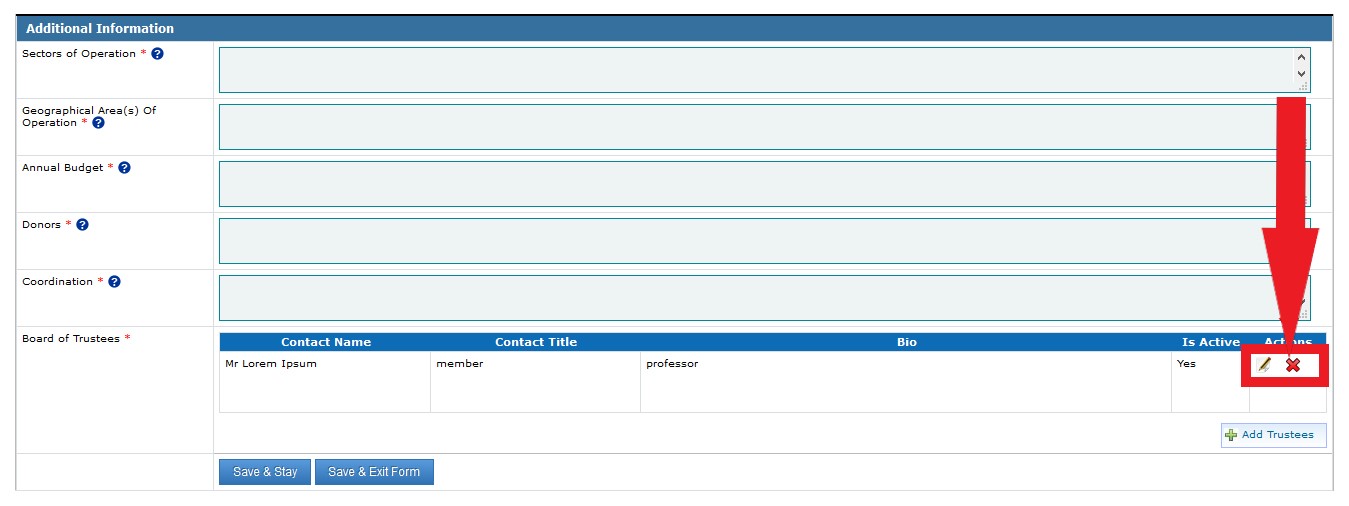
Sectors of Operation: enter the key areas of expertise, including number of years of experience.
-
Geographical Areas of Operation: enter the provinces and districts where your NGO currently has operations.
-
Annual Budget: enter the annual budget of the organization for the last 3 years.
-
Donors: enter the list of donors of the organization, in the country you are registered in, for the last 3 years.
-
Coordination: enter your organization's membership of coordination bodies including Clusters / Sector working groups, NGO consortia, etc.
-
Board of Trustees (Add Trustees pop-up window): enter the contact details of your organization’s trustees.
-
Trustee's Name : enter the trustee’s name.
-
Title : enter the trustee’s title.
-
Date of Birth: enter the trustee’s date of birth.
-
Nationality: select the trustee’s nationality.
-
Bio: enter a short biography of the trustee.

-
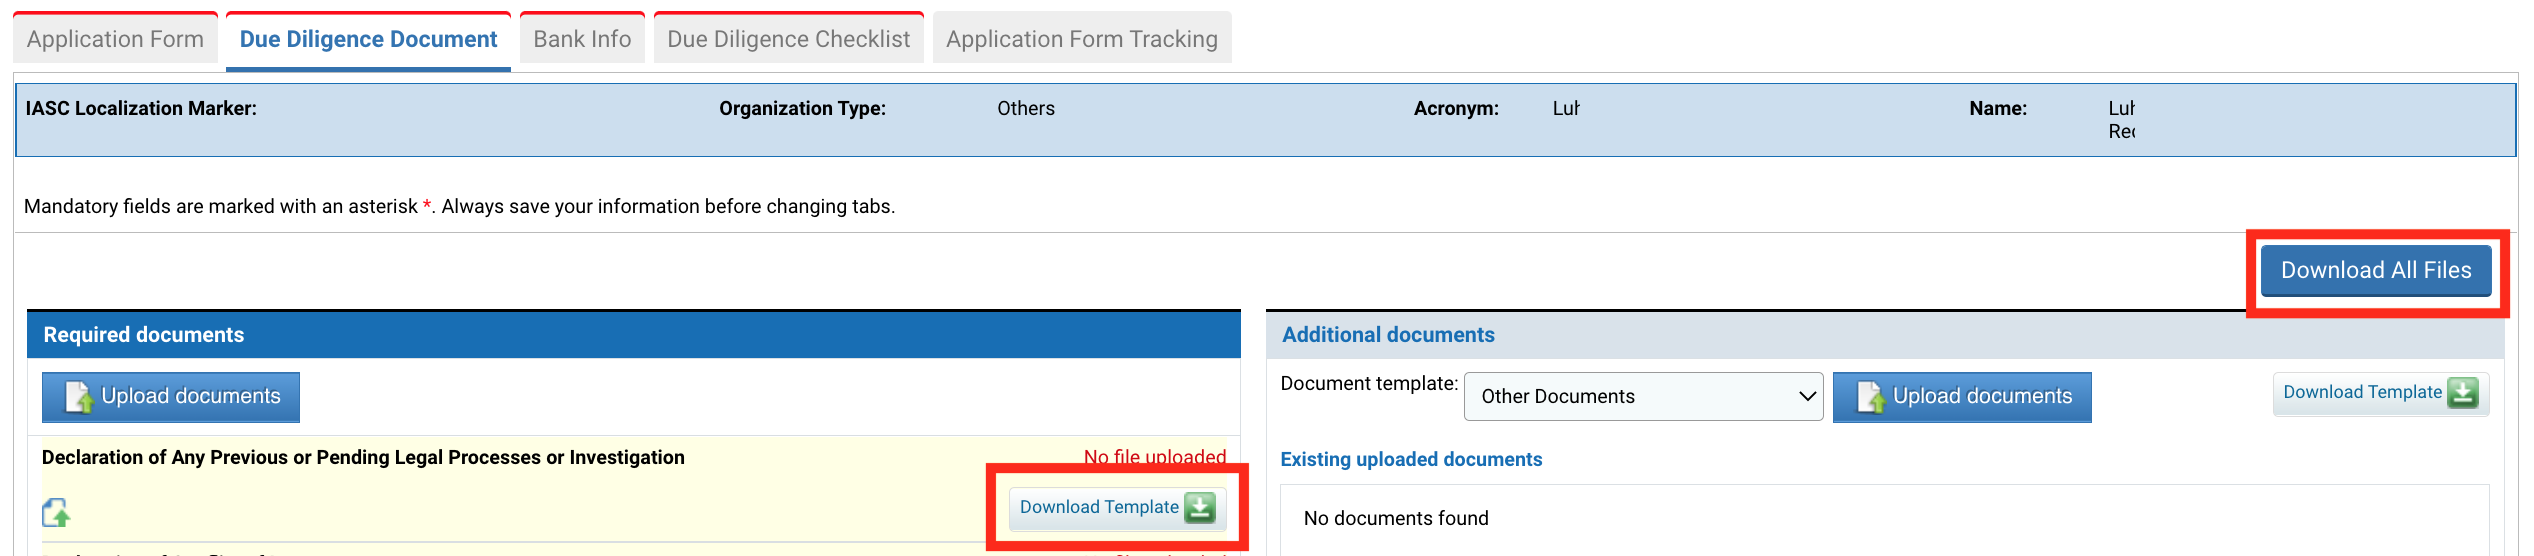
Template name: by default, the name of the downloaded template.
-
Comments: you can leave a comment about the file.
-
Choose file: click on this button to select the file on your computer.
-
Upload File: click on this command to upload the file into the OneGMS.
-
Template Name: by default, the name of the downloaded template.
-
Comments : write comments about the file.
-
Choose file: click on this button to select the file on your computer.
-
Upload File: click on this command to upload the file into the OneGMS.
-
Bank Name *: name of the Beneficiary bank.
-
Bank ID: bank ID associated with the Beneficiary bank.
-
For US banks only use whether: (9 digits):
-
ACH (checkbox): provide the Automated Clearing House (ACH) code.
-
Fed wire (checkbox): provide the Fedwire bank code.
-
-
SWIFT code: 8 or 11 characters (required for overboard payments): provide the unique identification code.
-
Branch ID: (for Canadian Banks only) 9 digits routing no: provide the branch ID.
-
Branch Name: name of the bank's branch name.
-
Street Address: name of the street where branch is located.
-
City: name of the city where the branch is located.
-
State / Province: name of the State/Province of the bank branch.
-
Postal Code: postal code of the bank branch location.
-
Country: name of the country where the branch is located.
-
Account Name (name as it appears on bank account): name as appearing in the account name of the bank.
-
Bank Account Currency (radio buttons: US$ or Other): select the bank account currency.
-
Bank Account No (Enter with no punctuation, no dots, dashes or spaces): provide the bank account number.
-
Account Type (radio buttons: Checking or Saving): select the Account type.
-
IBAN (European Banks): provide the International Bank Account Number.
-
Transit Code (5 digit) Canadian Banks: provide the Transit code.
-
Sort Code (6 digits) UK Banks: provide the Sort Code.
-
BSB code (6 digits) Australia Banks: provide the BSB code.
-
Name of Bank: provide the name of the bank.
-
CTN country of bank: provide the CTN country of the bank.
-
Bank Account No: provide the bank account number.
-
Swift Code: provide the unique identification code.
-
Special instructions: provide special instructions, if applicable.

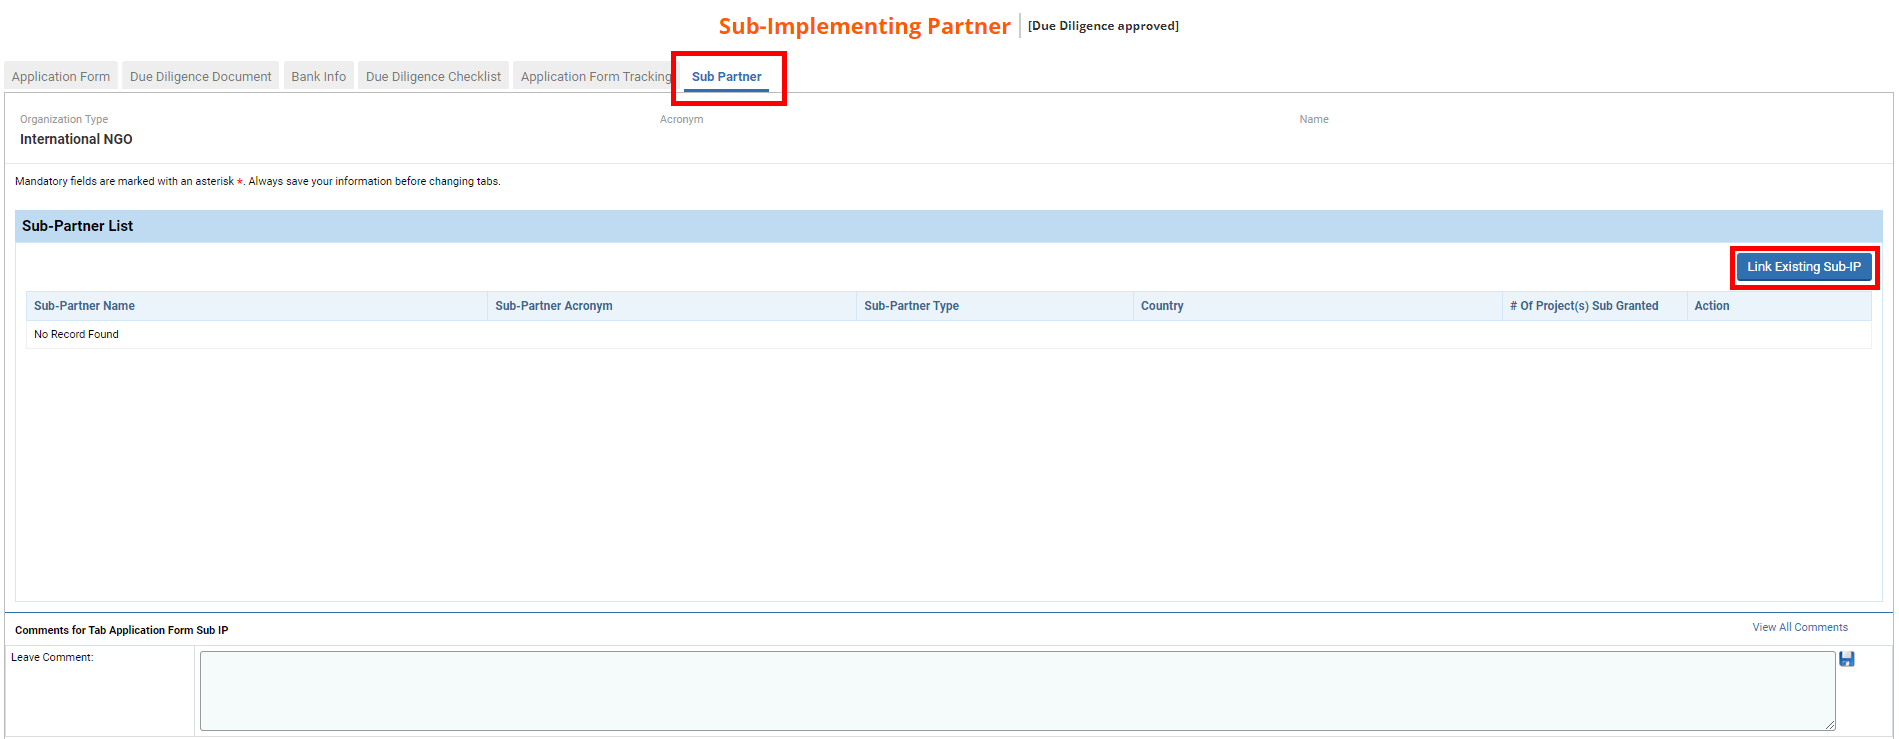
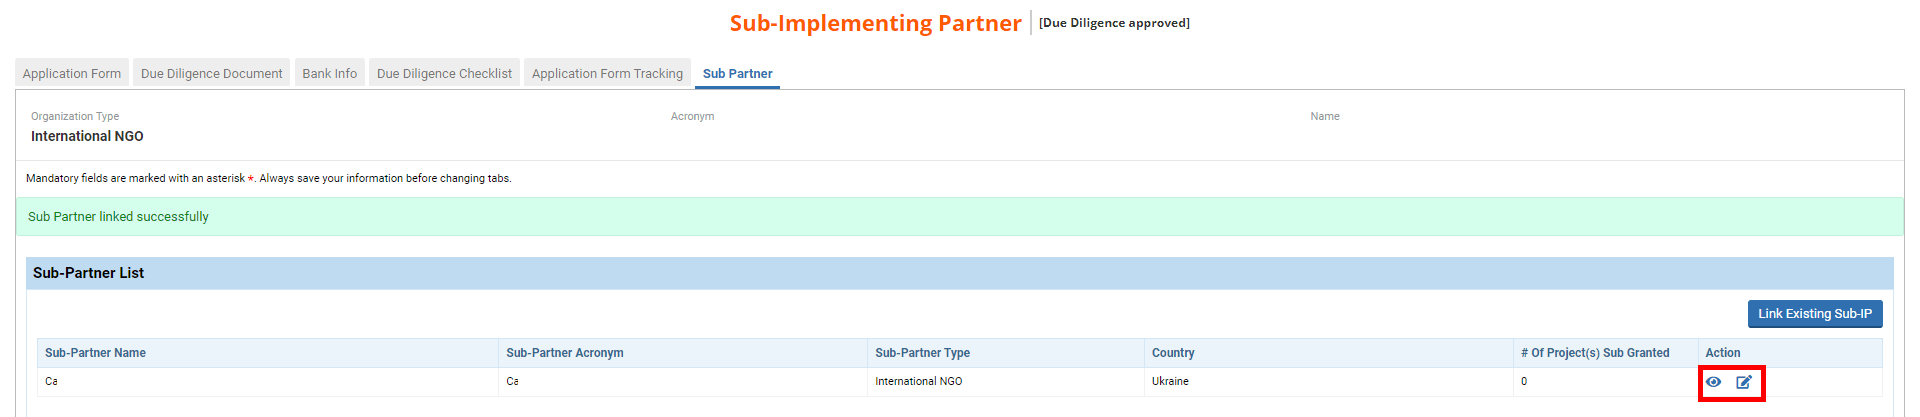
In this tab, you will be able to add a sub partner that will implement the project with your organization. To link a sub-Partner, click on [Link Existing Sub-IP].
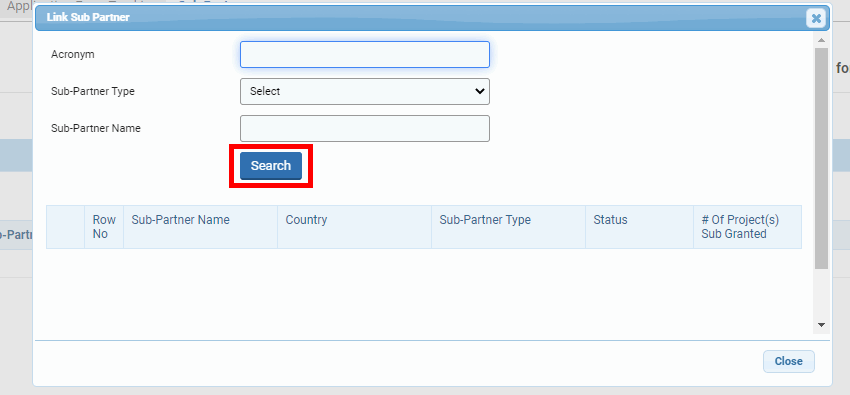
On the pop-up window indicate either the Acronym, the Sub-Partner Type or Name of the sub-partner you wish to add and click on [Search].
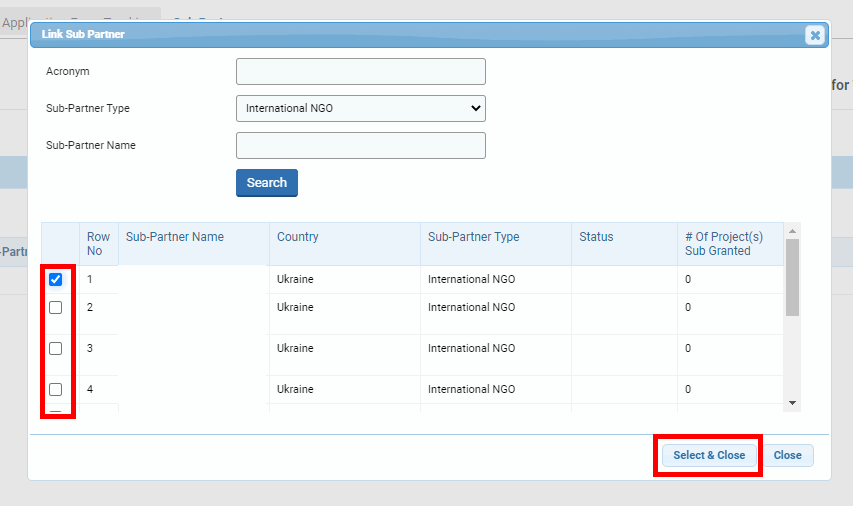
Tick the box of the sub-partner you wish to link to your organization and click on [Select & Close].
Once added, you can click on this icon ![]() to see the organisation’s detail and on
to see the organisation’s detail and on ![]() to edit the organisation’s detail. Click here to read the article about the sub-partner registration page.
to edit the organisation’s detail. Click here to read the article about the sub-partner registration page.
If you cannot find your sub-partner in the list, you will have to register it. To do so, tick the box ‘I confirm that the search results do not show my Sub-Partner' and click on [Add New].
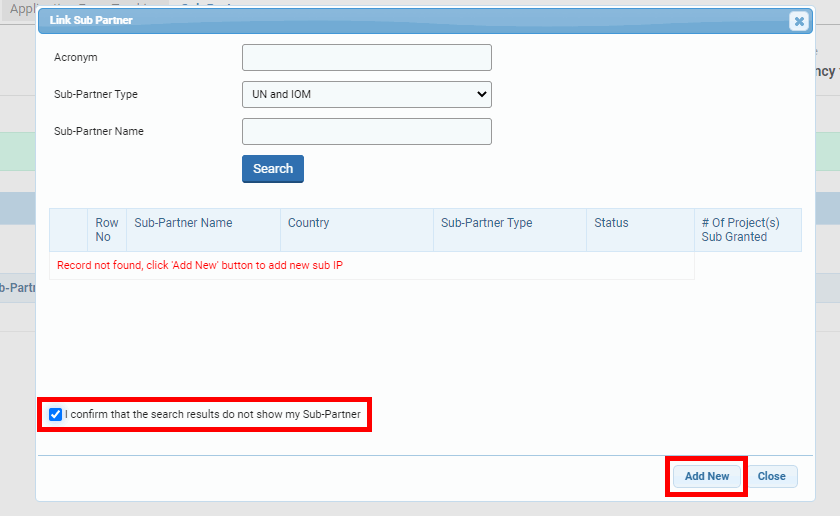
This will redirect you to the Sub-Partner Registration page, where you will be able to register your sub-partner. To know how to do so, please click here to read the dedicated article.
Once you have registered your sub-partner, you will have to search again for it to link it to your organisation. To know how to do it, please click here.
-
After submission, HFU did not approve the application, and requested the implementing partner to re-draft the due diligence application form. The application form will automatically revert from being ‘read only’ to editable. Implementing partners should follow the HFU’s recommendations and submit the due diligence application a second time.
-
After submission, HFU approved the due diligence application. However, the implementing partner wants to change its due diligence information. They must contact their country HFU which will reactivate the application form. The implementing partner can then fill in the new information and submit the new draft for review to HFU.