
Please note, this page is only accessible to the HFU Admin user role. If you wish to configure Quick Filters, please contact gms-support@un.org to be granted the HFU Admin user role.
I) What are the Quick Filters on the GMS? Top
There are on the GMS several modules where users can search through and access the project’s instances data, for instance for listing purposes, or to find a specific project.
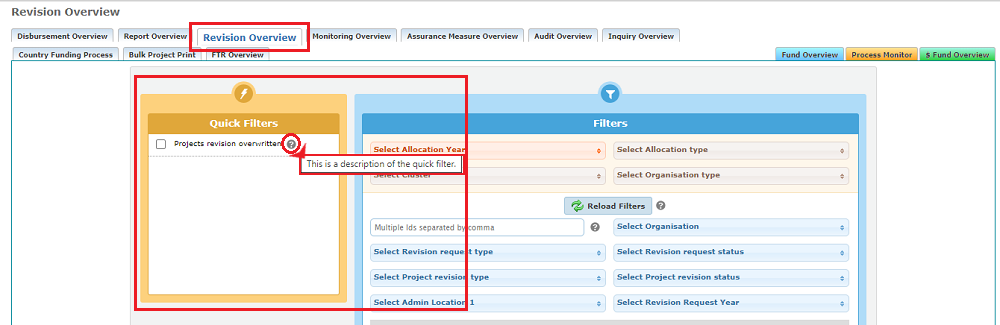
To generate the list of projects, users can use filters to tailor the findings to their search options. For instance, in the screenshot below, we used the ‘Revision Overview’ module and applied several filters.

The Quick Filters concept gives HFU Admin users the flexibility to create their own set of quick filters, depending on their search needs.
When configured, the Quick Filters window appears in the module’s Overview page as shown in the screenshot below.
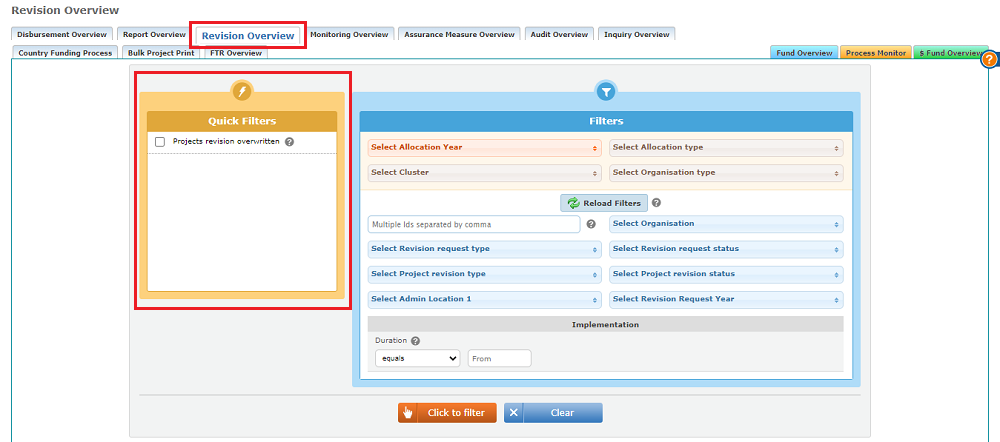
In our example, we added a check box ‘projects revision overwritten’. This means that if users check this box and clicks on [click to filter], only the overwritten revisions will be displayed.
*Please note that it is also possible to apply the [revision overwritten] filter with the regular filters’ section. However, it is quicker to only have one check box to tick.
Hence the Quick Filter concept is also here to provide a quick application of a filter which is often used, without having to scroll down the filter drop-down list to find the filter.
Quick Filters can be configured for the following modules:
- Project Overview (the filter section below the advance switchboard in the Home Page)
- Report Overview
- Revision Overview
- Audit Overview
- Disbursement Overview
- Monitoring Overview
II) How to manage quick filters? Top
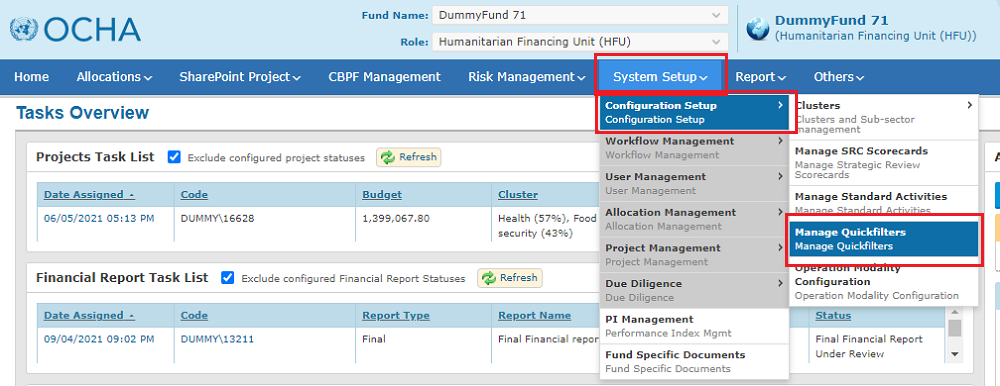
To add, edit or delete quick filters, follow this navigation: System Setup > Configuration Setup > Manage Quick Filters
Please note, this page is only accessible to the HFU Admin user role. If you wish to configure Quick Filters, please contact gms-support@un.org to be granted the HFU Admin user role.
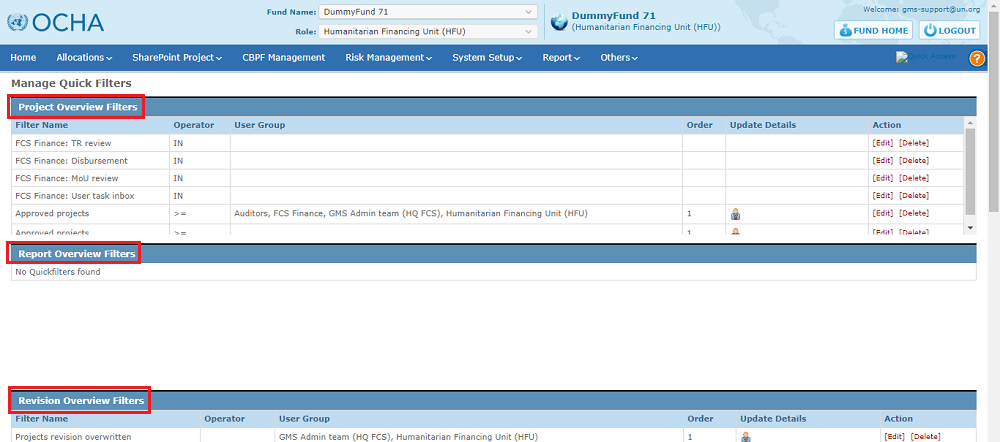
In this page, you can see the list of the Overview modules along with the related Quick Filters, if any.

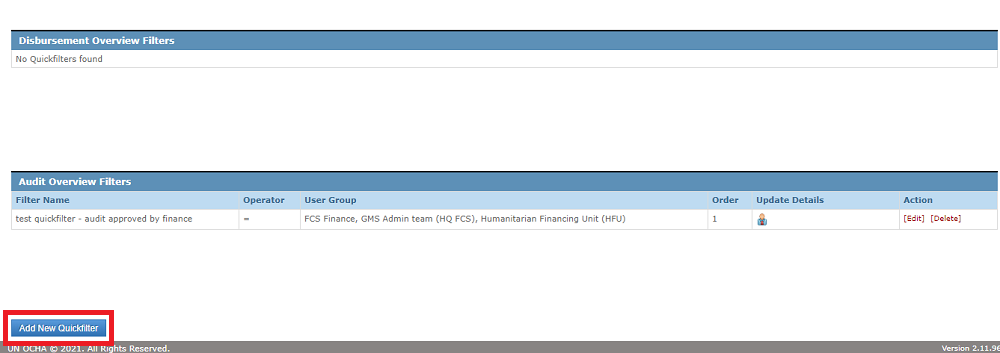
To add a new Quick Filter, go to the bottom of this page, and click on [Add new Quick Filter].
In the ‘Add/Edit Quick Filter page’, fill the mandatory and optional fields, following the guidance provided below the screenshot.
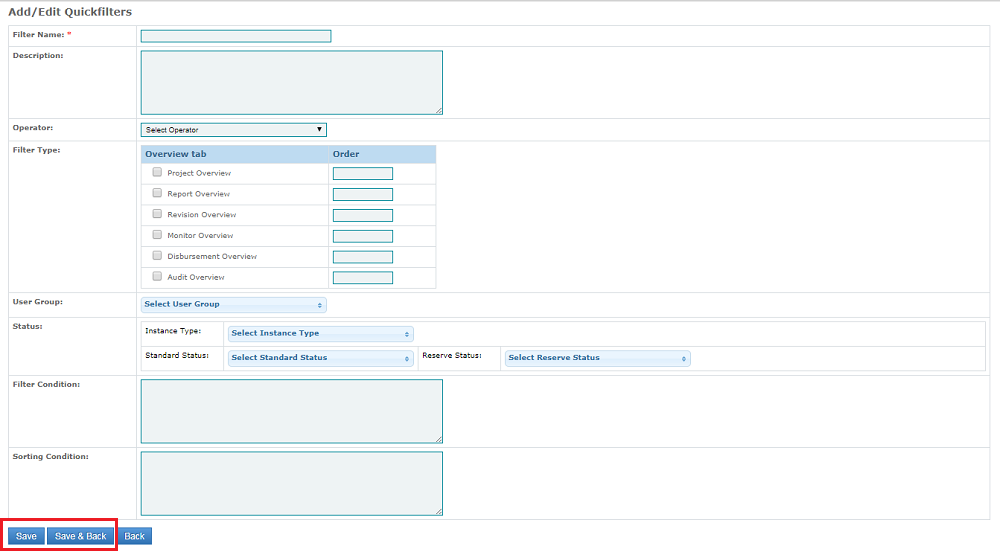
Fields description:
- Filter Name (mandatory - text box): Enter the name of the quick filter to be created.
- Description (text box): Enter the description of the filter. This description will be displayed by hovering on the question mark icon next to the filter (see screenshot below)
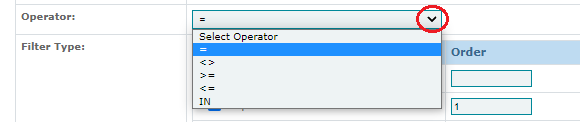
- Operator (drop down box): Select the operators desired for the filter from the provided list.
|
Quick GMS Focus on operators: the operator is linked to the status condition of the quick filter. For instance, if you select "=" as operator, and then "project draft" in the status option, this will filter only the projects in draft. If you select ">" and "project draft", this will filter all project that have moved above the "project draft" stage of the workflow.
|
- Filter Type – Overview tab (check box): Select the tabs for which the filter is applicable. If you wish to create a Quick Filter for all overviews, please tick all boxes.
- Filter Type – Order (checkbox): Please insert in this field a number (1, 2 etc.), this number represents the rank orders if there are several quick filters.
- User Group: (drop down box): Select the user group for which this filter is applicable.
- Status – Instance Type (drop down box): Select the instance type from the list provided.
- Status – Standard Status (drop down box): Select the standard statuses from the list provided.
- Status – Reserve Status (drop down box): Select the reserve statuses from the list provided.
- Filter Condition (text box): This section requires technical knowledge. Only GMS Admin user role can enter inputs in this box. This is not a necessary step in the quick filter configuration.
- Sorting Condition (text box): This section requires technical knowledge. Only GMS Admin user role can enter inputs in this box. This is not a necessary step in the quick filter configuration.
After configuring the quick filter, please click on [Save] or [Save and Back].
The quick filter will be added to the Overview module(s) (you will need to refresh the page to see the quick filter).
To edit a Quick Filter, go to the ‘Manage Quick Filter’ page, and click on [edit] of the Quick Filter line.

In the ‘Add/Edit’ quick filter page, edit the Quick Filter and click on [save]. To learn more on each of the fields on this page, please refer to this section of the article.

To delete a Quick Filter, go to the ‘Manage Quick Filter’ page, and click on [delete] of the Quick Filter line.
Please note, if the Quick Filter was configured for several Overviews, you need to delete the Quick Filter in all Overview Filter Section if you wish to delete it everywhere.
