I) Register a new Sub-Partner
1) Access the Sub-Partner Registration page from the Due Diligence
2) Access the Sub-Partner Registration page from the subgrants tab
3) Fill in the Sub-Partner Registration form
II) Edit a Sub-Partner
III) Link a Sub-Partner
The Sub-Partner Registration page allows you to add or edit a sub-implementing partner (Sub-IP)’s contact details. This can be particularly useful when partners have to add sub-partners. Indeed, a partner may need to add a Sub-IP against the ‘Subgrants’ tab of the project proposal and the ‘Sub-Partner’ tab of the Due Diligence. But if the Sub-IP is not already registered in the OneGMS, the partner will have to register it from the Sub-Partner Registration page. You can access this page from: 1) the Due Diligence or 2) the project proposal.
1) Access the Sub-Partner Registration page from the Due Diligence
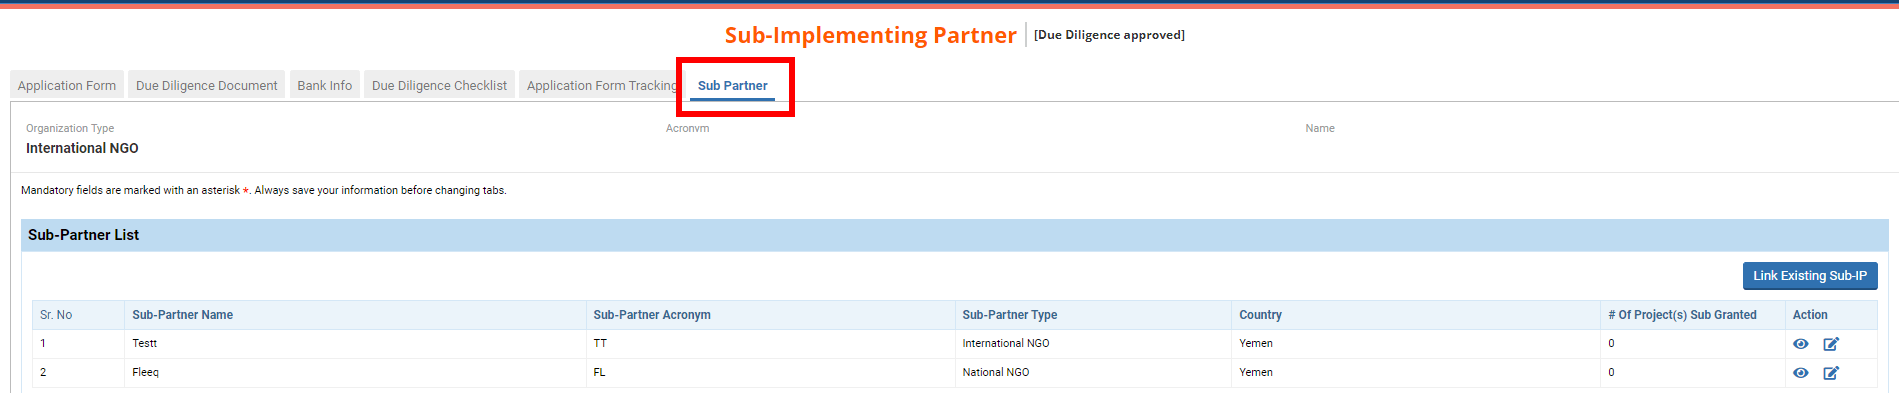
You can add sub-IPs from the ‘Sub-Partner’ tab of the Due Diligence.
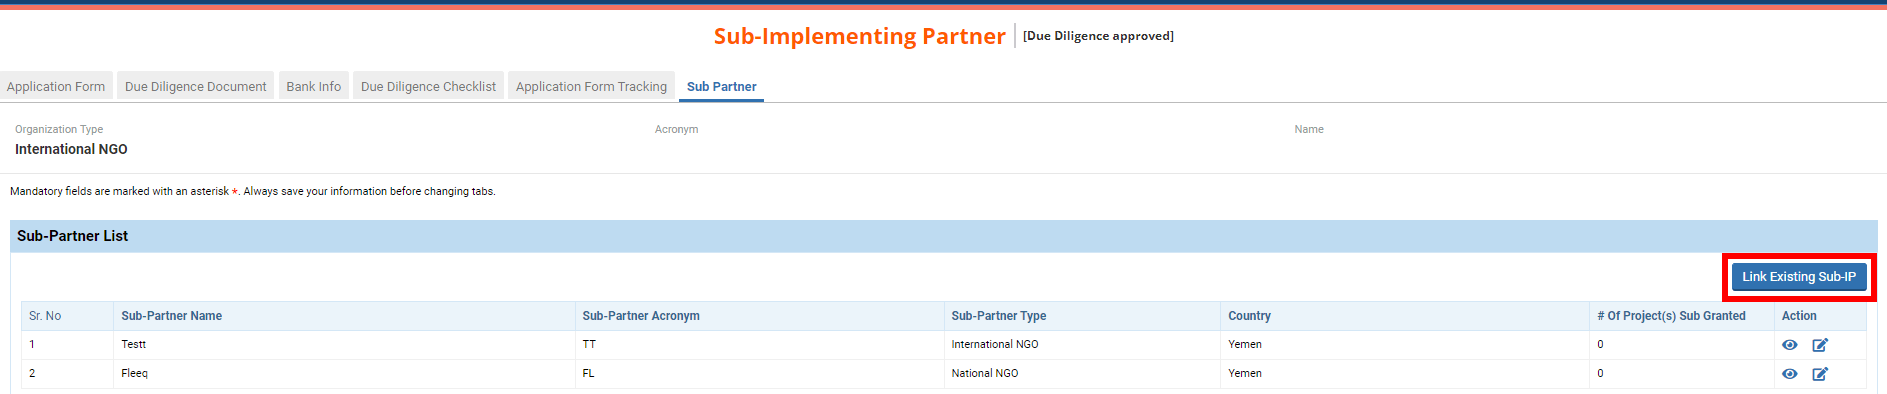
To do so, click on [Link Existing Sub-IP]. Even if you have never registered the Sub-IP, it is important to search for it first, to ensure that it has not been saved in the system and avoid creating a duplicate.
On the pop-up window, use the filters and click on [Search] to search for your Sub-IP.

If you find your Sub-IP, please click here to see how to link it to your organization.
If you do not find the Sub-IP, tick the box ‘I confirm that the search results do not show my Sub-Partner' and click on [Add New].
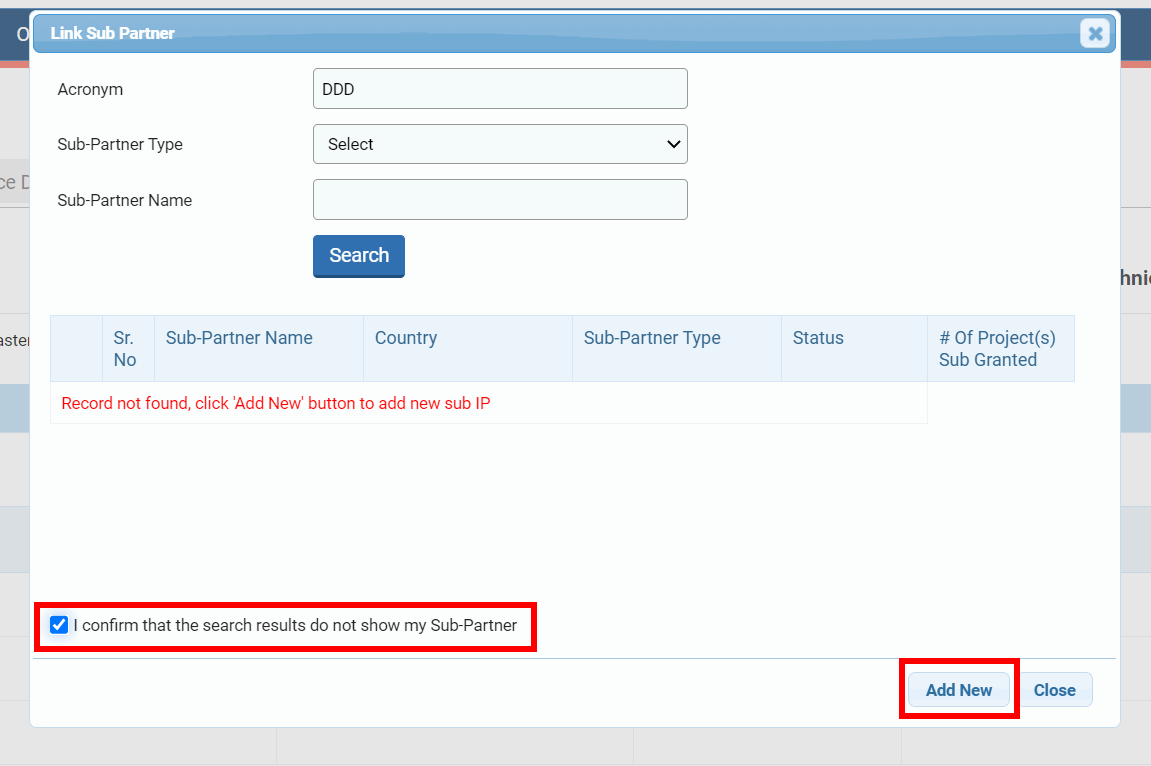
Upon clicking on [Add New], the Sub-Partner Registration page will open on a new tab of your browser. If you wish to know how to fill in this form, please click here. To read how to manage Sub-IPs from the Due Diligence, please click here.
2) Access the Sub-Partner Registration page from the subgrants tab
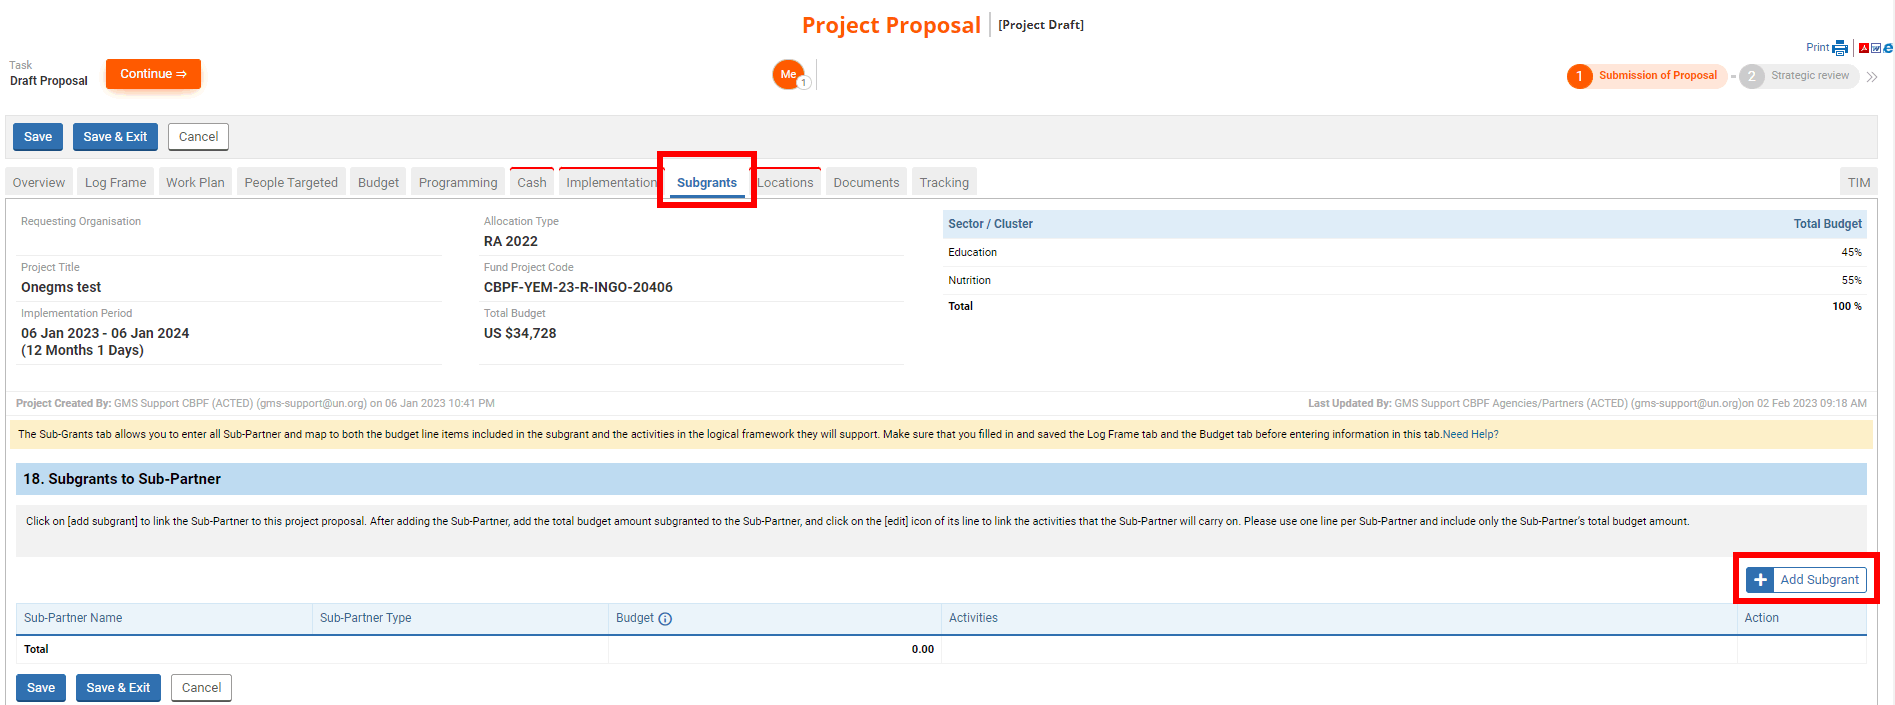
The 'Subgrants' tab allows you to enter all sub-implementing partners and map them to both the budget line items included in the subgrant, and the activities in the logical framework they will support.
To link a Sub-IP to a project, click on [Add Subgrant].
You can search for a subgrant partner by name and/or partner type by typing the partner’s name and/or selecting the partner’s type from the drop-down list. Then click on [Search].

If you do not find the correct partner in the search results, tick the box ‘I confirm that the search results do not show my Sub-Partner’ and click on the hyperlink ‘Click here to add a new partner’ to add a new partner.
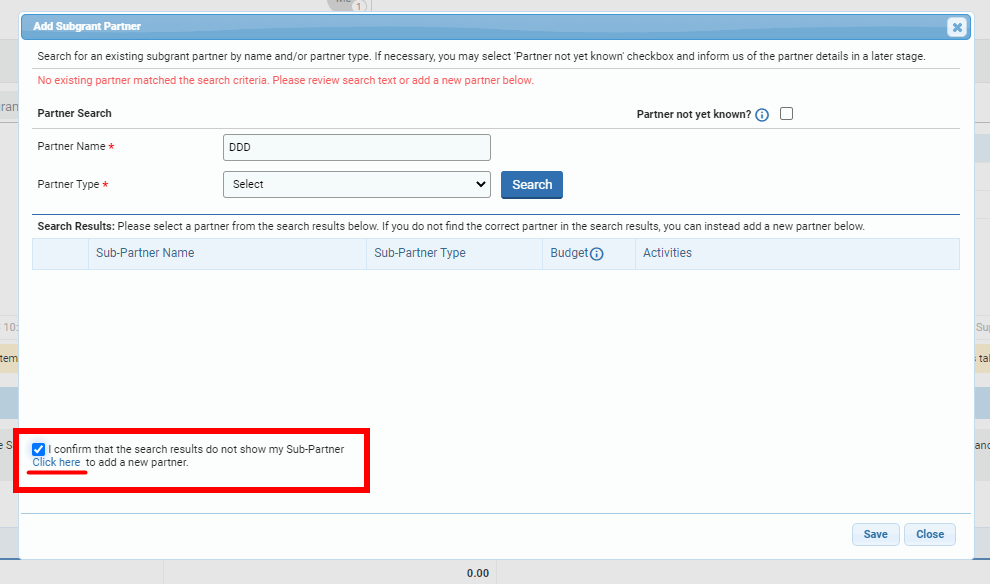
Upon clicking on the hyperlink, the Sub-Partner Registration page will open on a new tab of your browser.
3) Fill in the Sub-Partner Registration form
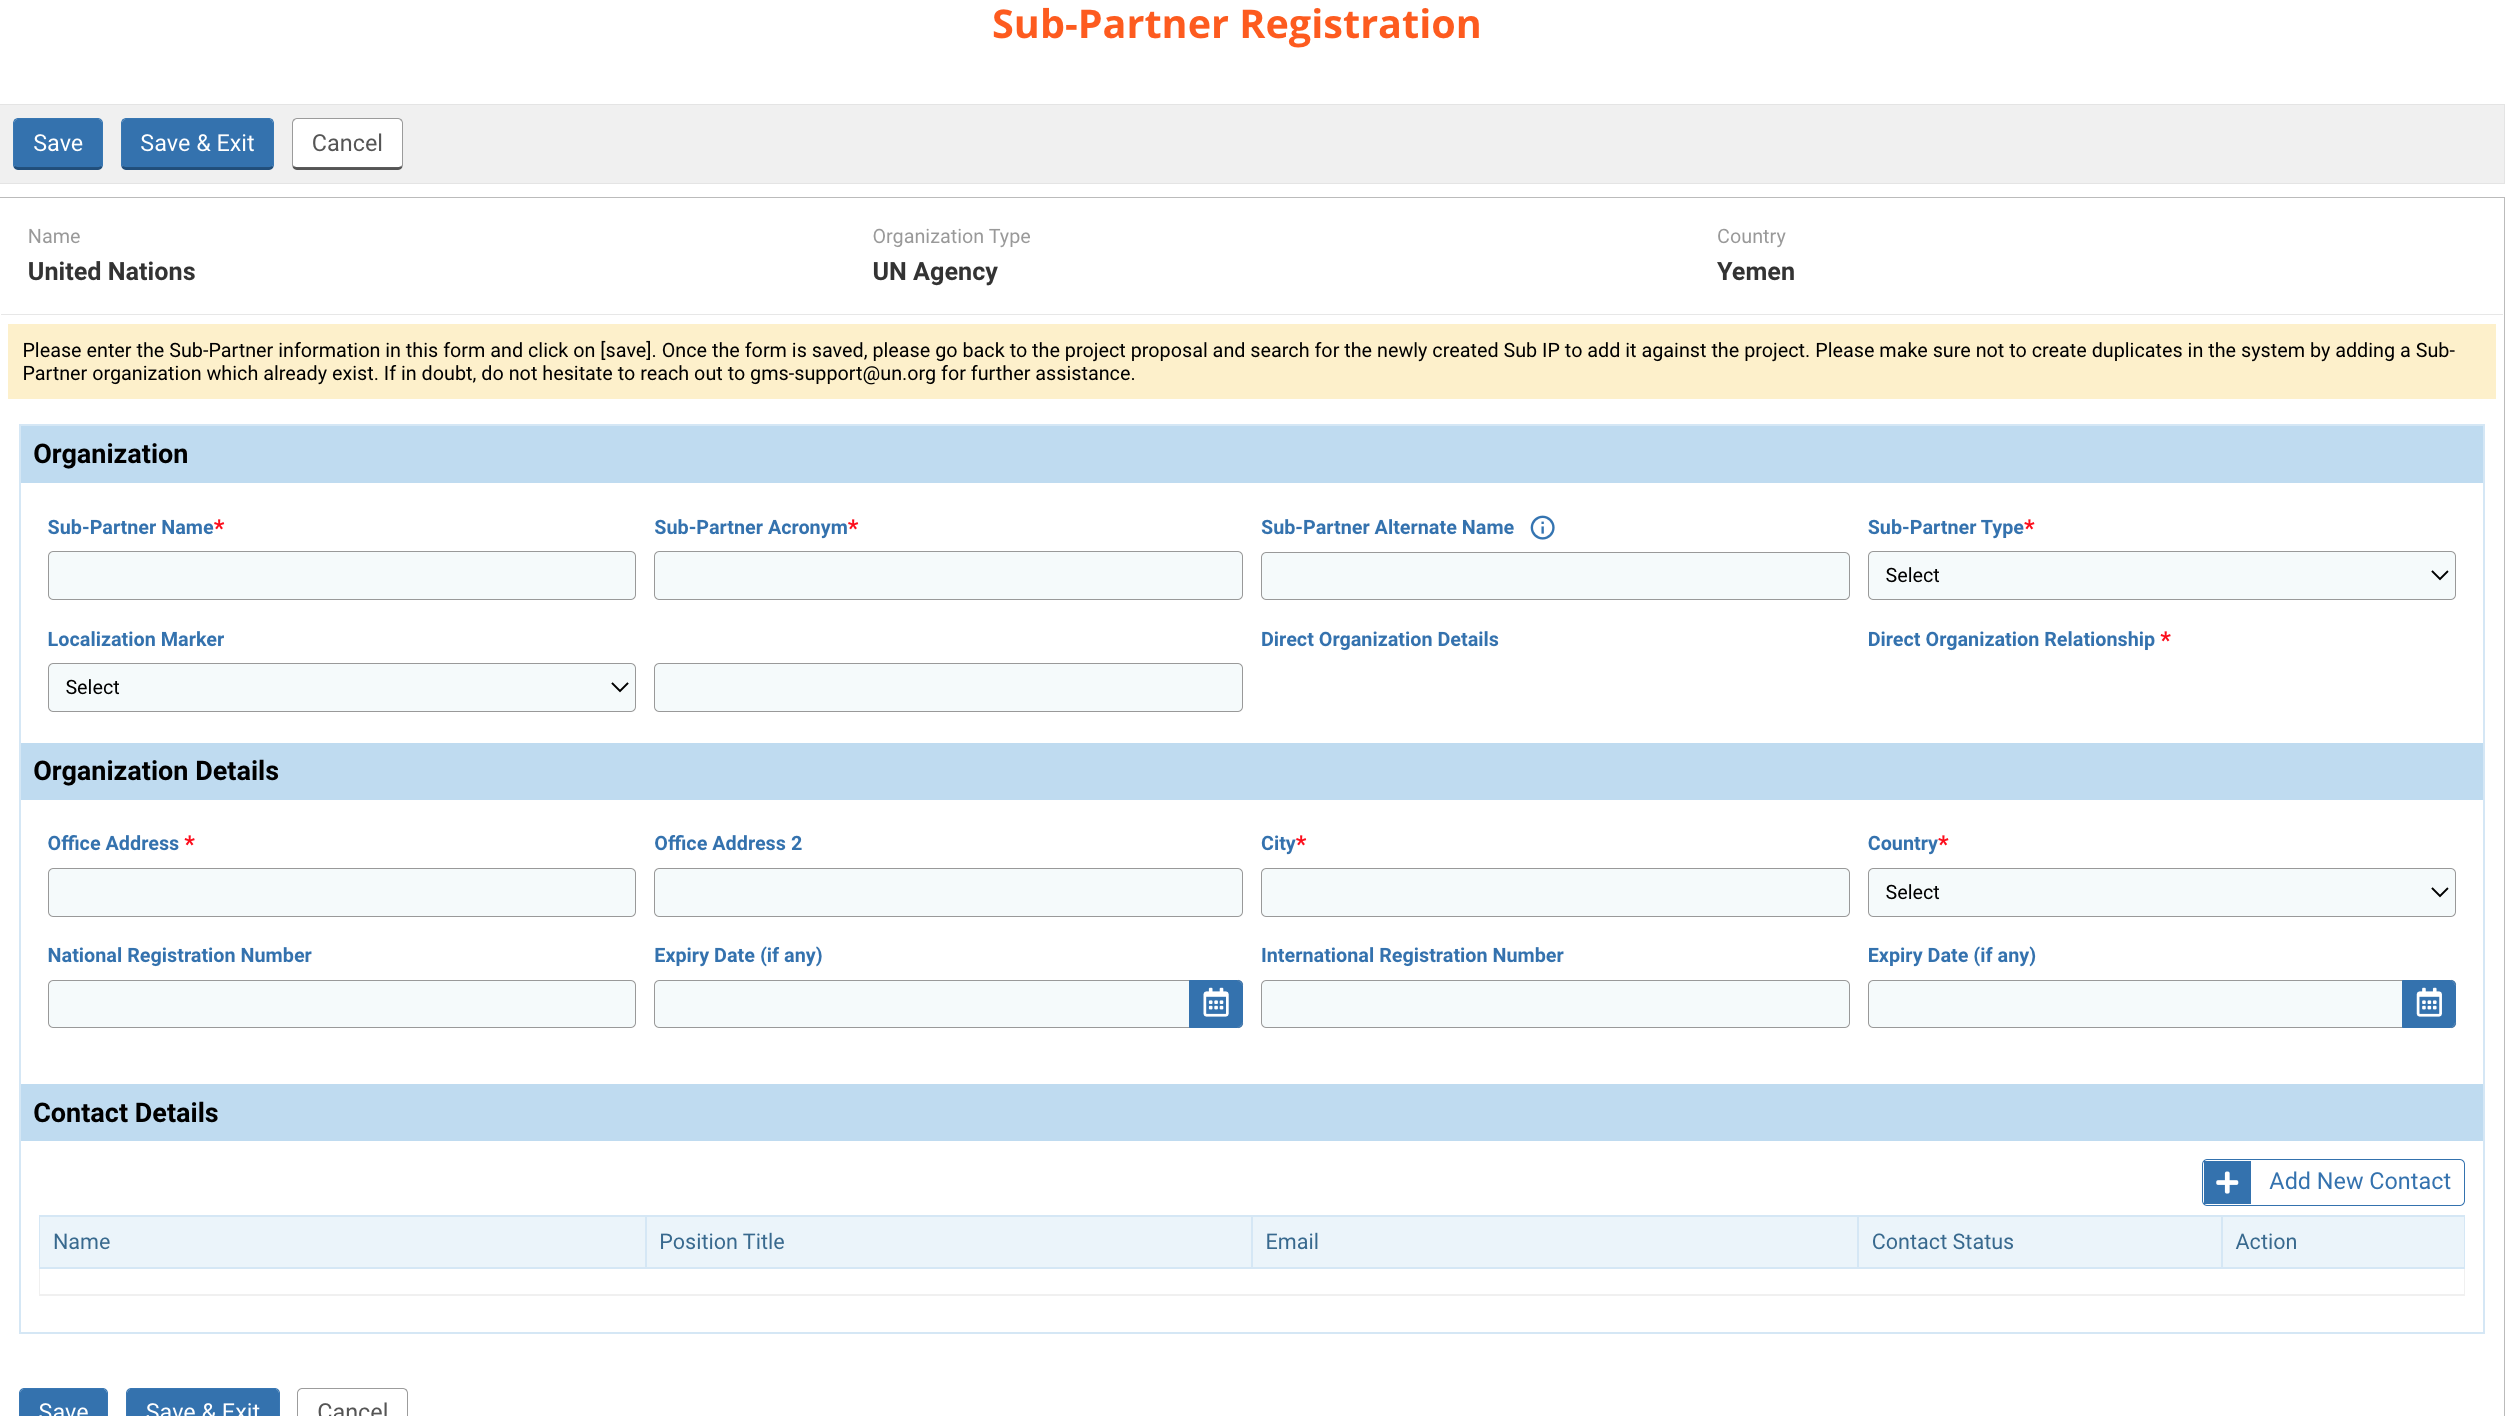
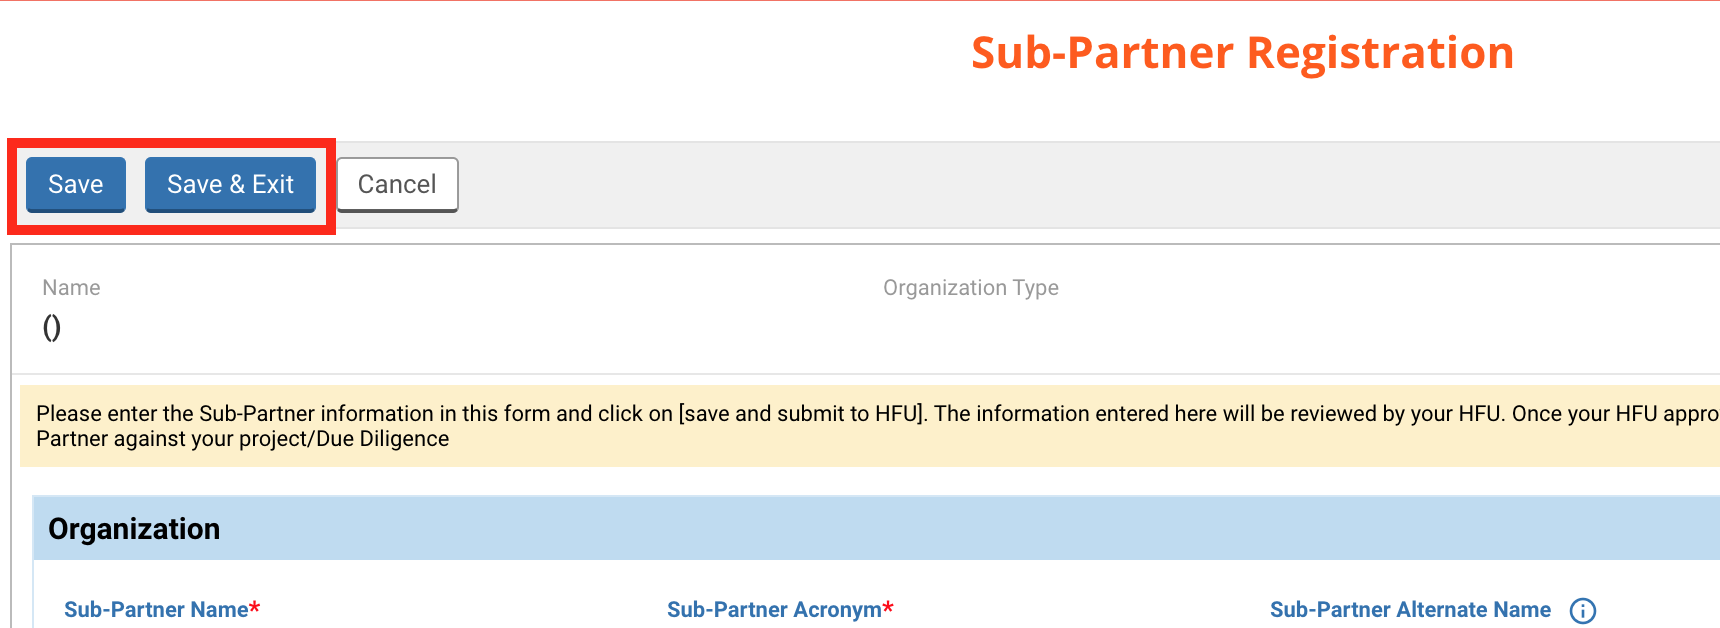
Fill in the form and click on [Save] to save your sub-partner. All fields marked with a red asterisk * are mandatory.
The header:
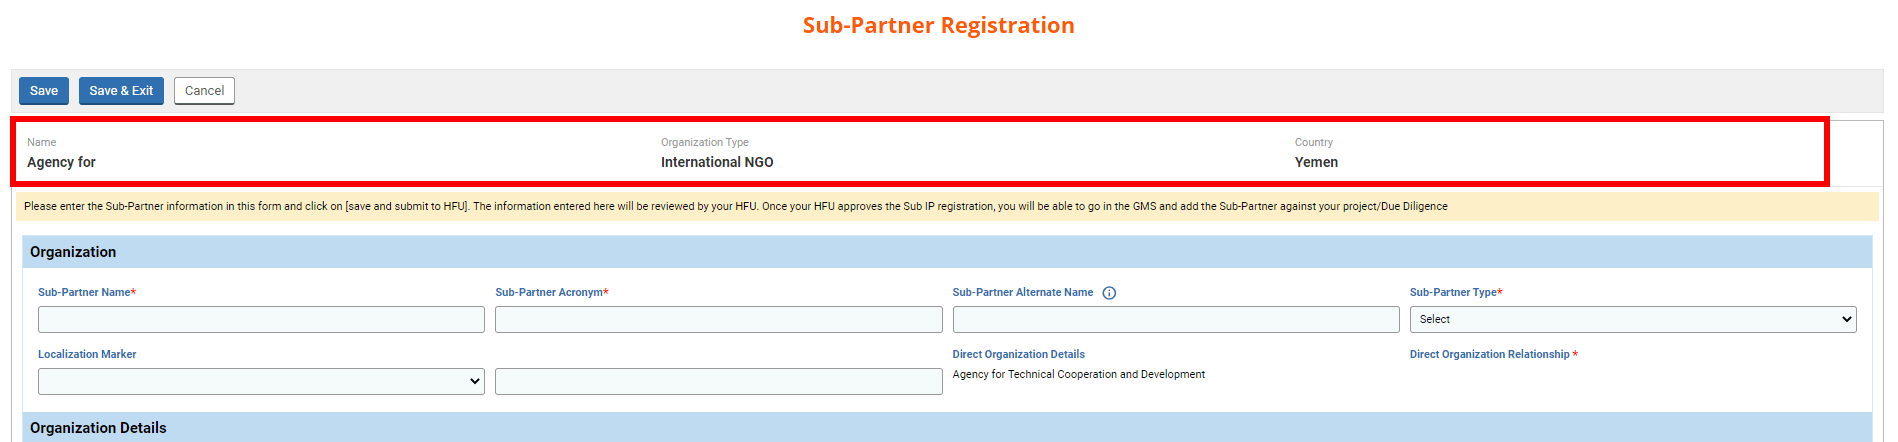
The header displays the name and the organization type of your organization as well as the fund from which you are registering the sub-partner.
Organization

Fields description:
- Sub-Partner Name *: enter the name of your sub-partner.
- Sub-Partner Acronym *: enter the acronym of your sub-partner.
- Sub-Partner Alternate Name: you may enter the alternate name of the organization if any. It could be, for instance, the name mostly used in the country’s language.
- Sub-Partner Type *: select from the drop-down list the type of the sub-partner.
- Localization Marker: you may choose amongst the different options which one applies to the sub-partner as relevant to their type.
- Direct Organization Details: the name of your organization will be automatically displayed.
- Direct Organization Relationship *: will be updated soon
Organization Details

Fields description:
- Office Address *: indicate the address of the sub-partner’s office.
- City *: indicate the city.
- Country *: select from the drop-down list the country.
- National Registration Number: indicate the national registration number of the sub-partner, if any.
- Expiry Date: if the national registration number has an expiry date, select it from the calendar.
- International Registration Number: indicate the international registration number of the sub-partner, if any.
- Expiry Date: if the international registration number has an expiry date, select it from the calendar.
- Is WGO? (only for national and international NGOs): tick this box if the organization is a Women’s and/or Girl’s Organisation. Its leadership and staffing should be made up of women and/or girls, comprising a minimum of 75% of the board, executive positions and staff/volunteers, with a mandate to advance gender equality and women’s and/or girls’ rights and empowerment.
- Is OPD? (only for national and international NGOs): tich this box if the organization is an organisation of persons with disabilities. It should be rooted in and committed to the Convention of the Rights of Persons with Disabilities (CRPD) and should fully respect the principles and rights that it affirms. OPDs must be led, directed and governed by persons with disabilities. A clear majority of their memberships should be persons with disabilities.
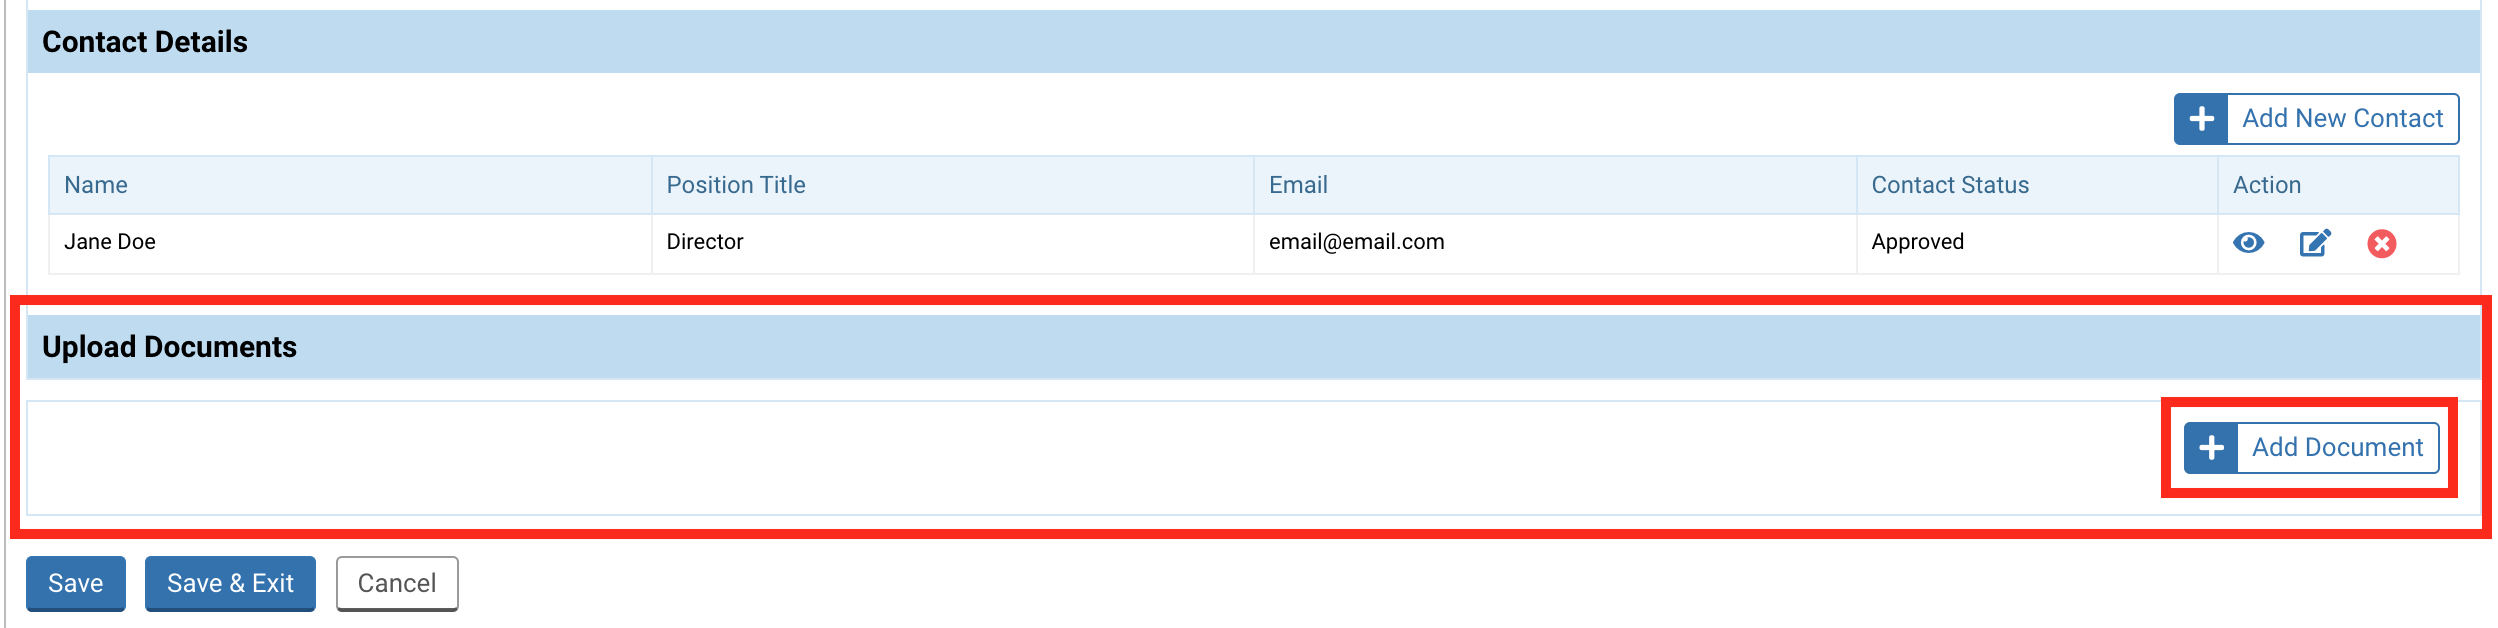
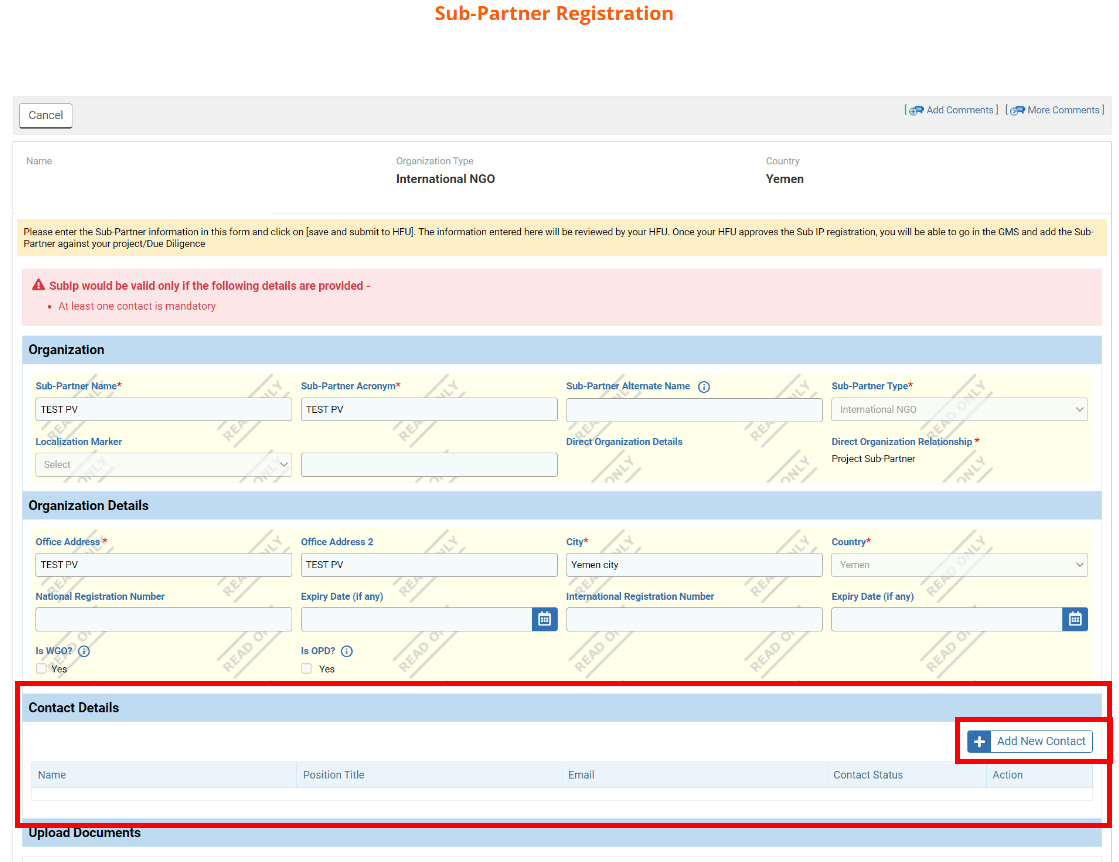
Contact Details
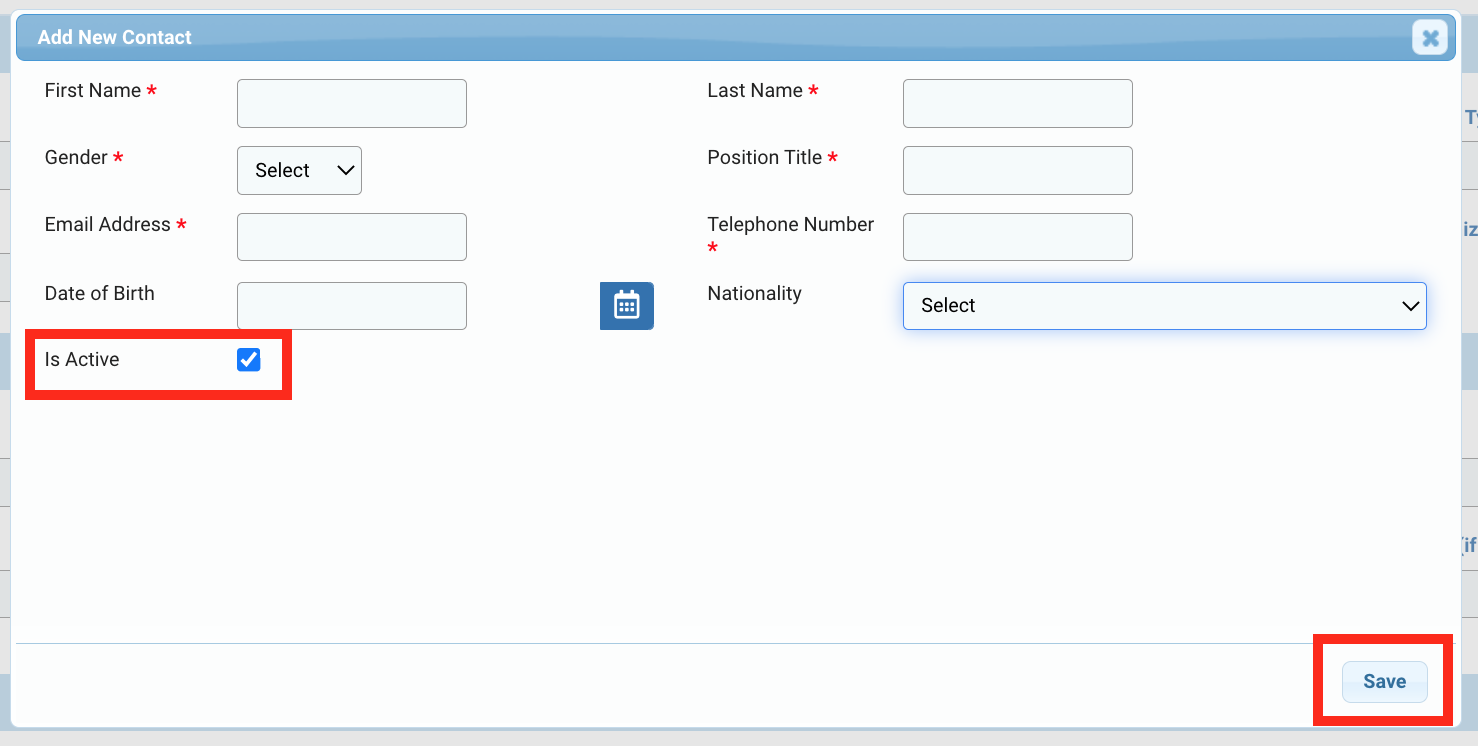
To add the contact details of the sub-partner, click on [Add New Contact].

Fill in all mandatory fields and ensure that the box ‘Is Active’ is ticked.
Once added, you can click on this icon ![]() to edit the contact, on this icon
to edit the contact, on this icon ![]() to delete the contact and this icon
to delete the contact and this icon ![]() to view the contact.
to view the contact.

Once you have added the new sub-ip, do not forget to save the page, as the system will not automatically save your data.
Upload Documents
Upon saving, a new section will be displayed at the end of the page: ‘Upload Documents’
Please note: it is mandatory to add the registration certificate of the sub-ip. You can also add any additional document you find relevant.
To upload a document, click on [Add Document].
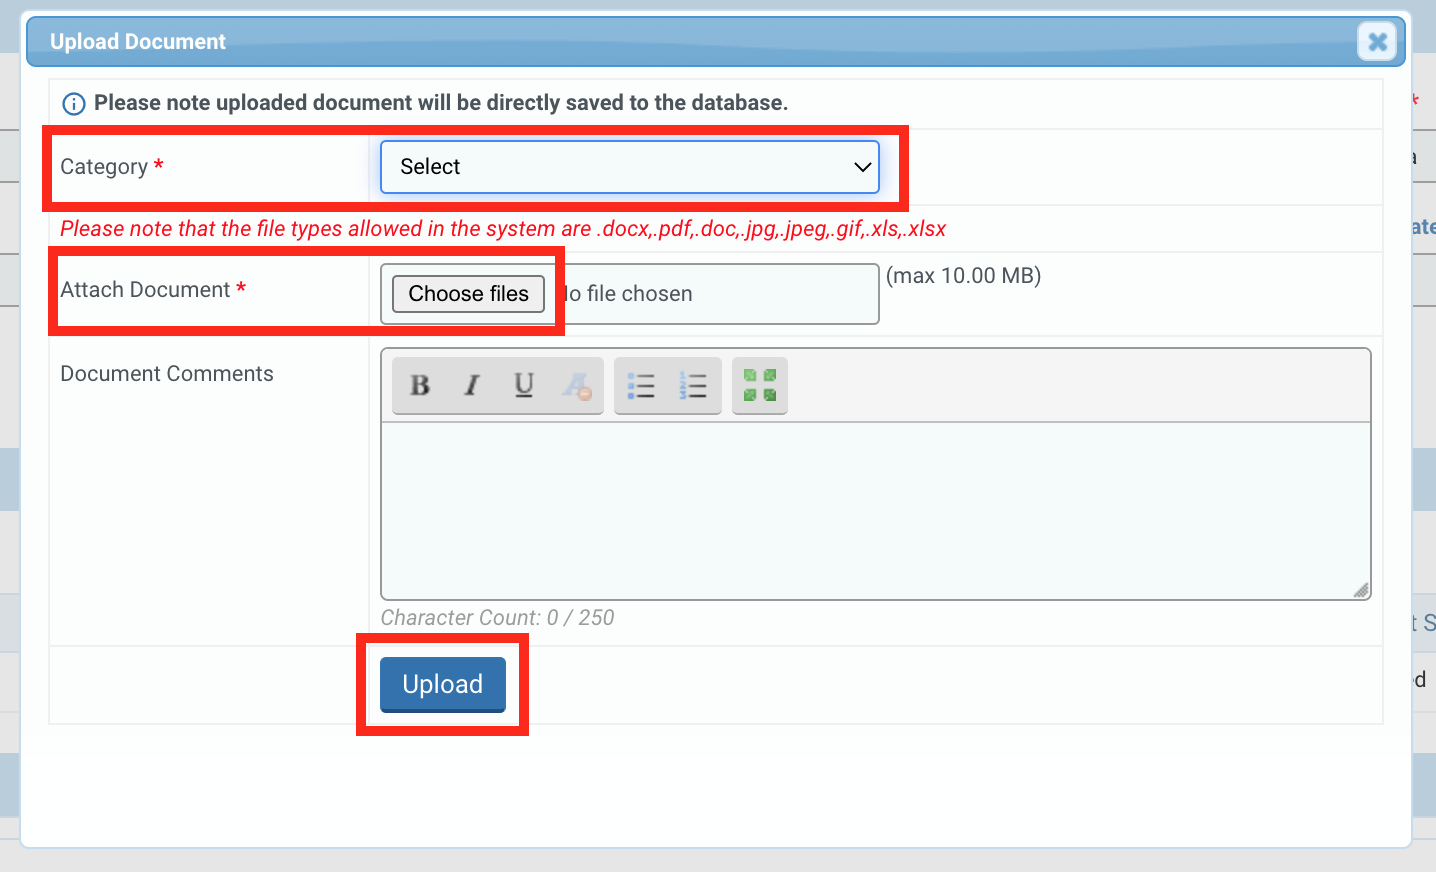
On the pop-up window, select from the drop-down list the category of the document you wish to upload and click on [Choose File] to upload the file from your computer.
Please note: if you select the category “Others” please explain the nature of the document in the comment section.
Then click on [Upload] to upload and save the document.
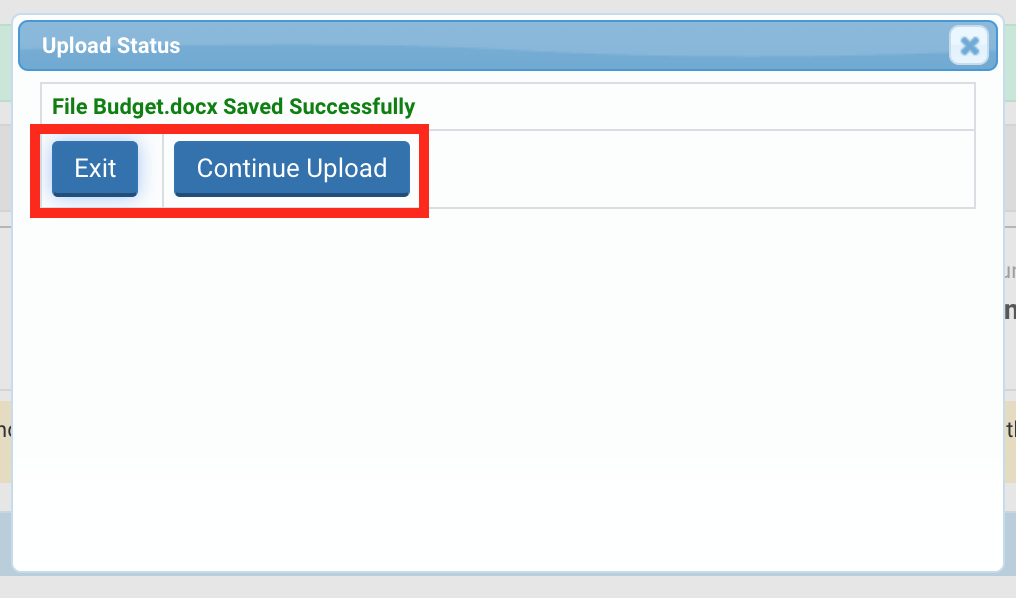
After clicking on [Upload], a pop-up window will appear. Click on [Exit] if you do not want to upload an additional document or on [Continue Upload] to upload more documents.
Once you have added all the necessary documents, do not forget to save the page, as the system will not automatically save your data.
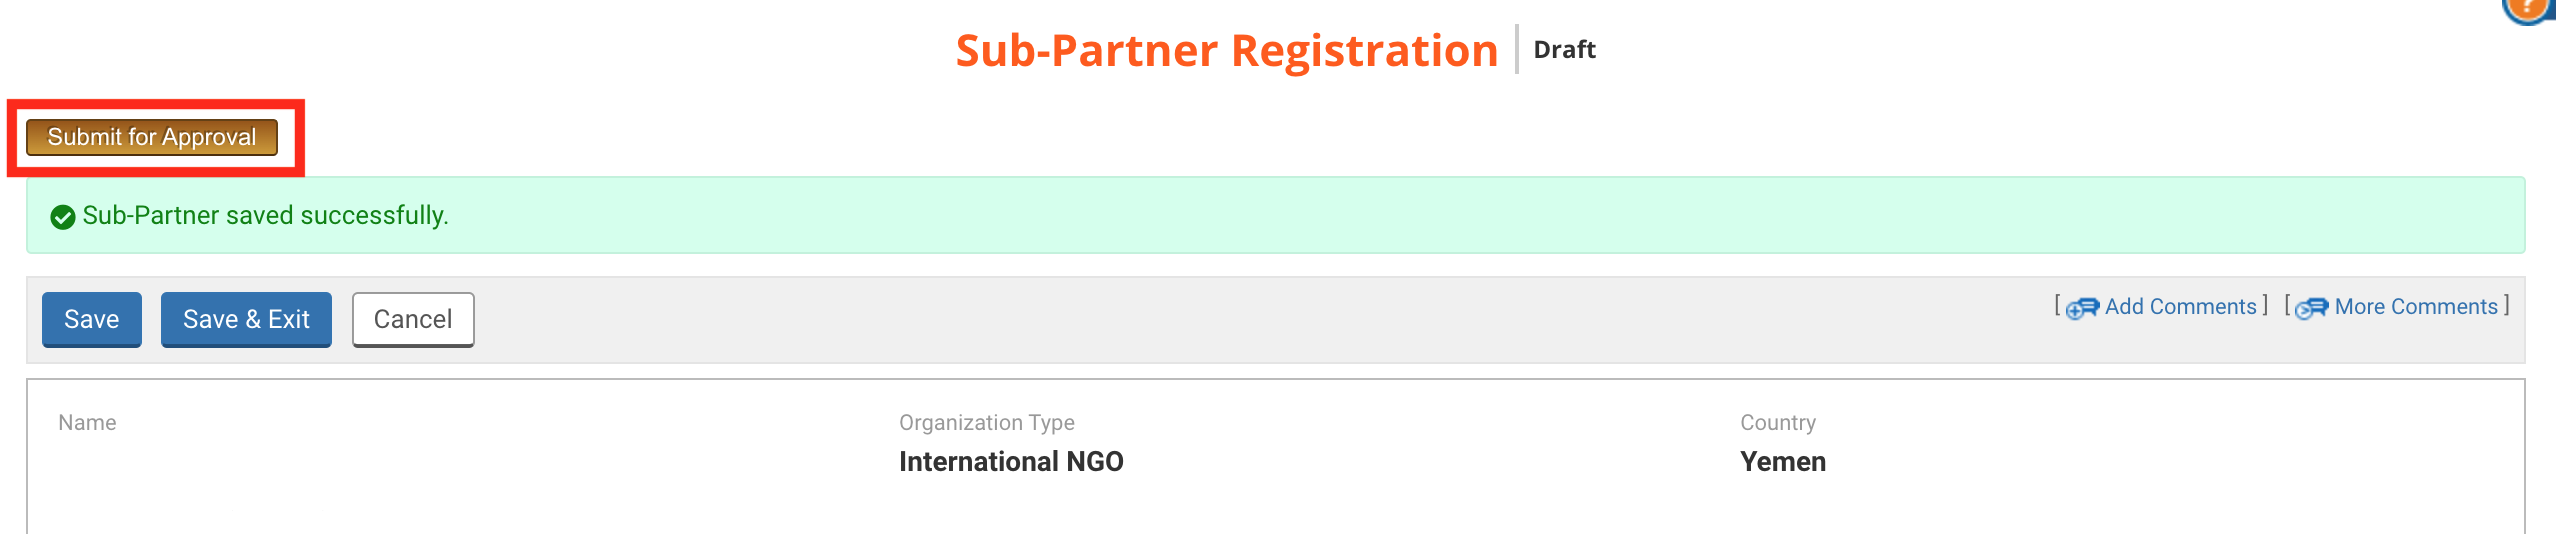
You can now submit the sub-partner to the HFU for approval by clicking on [Submit for Approval].
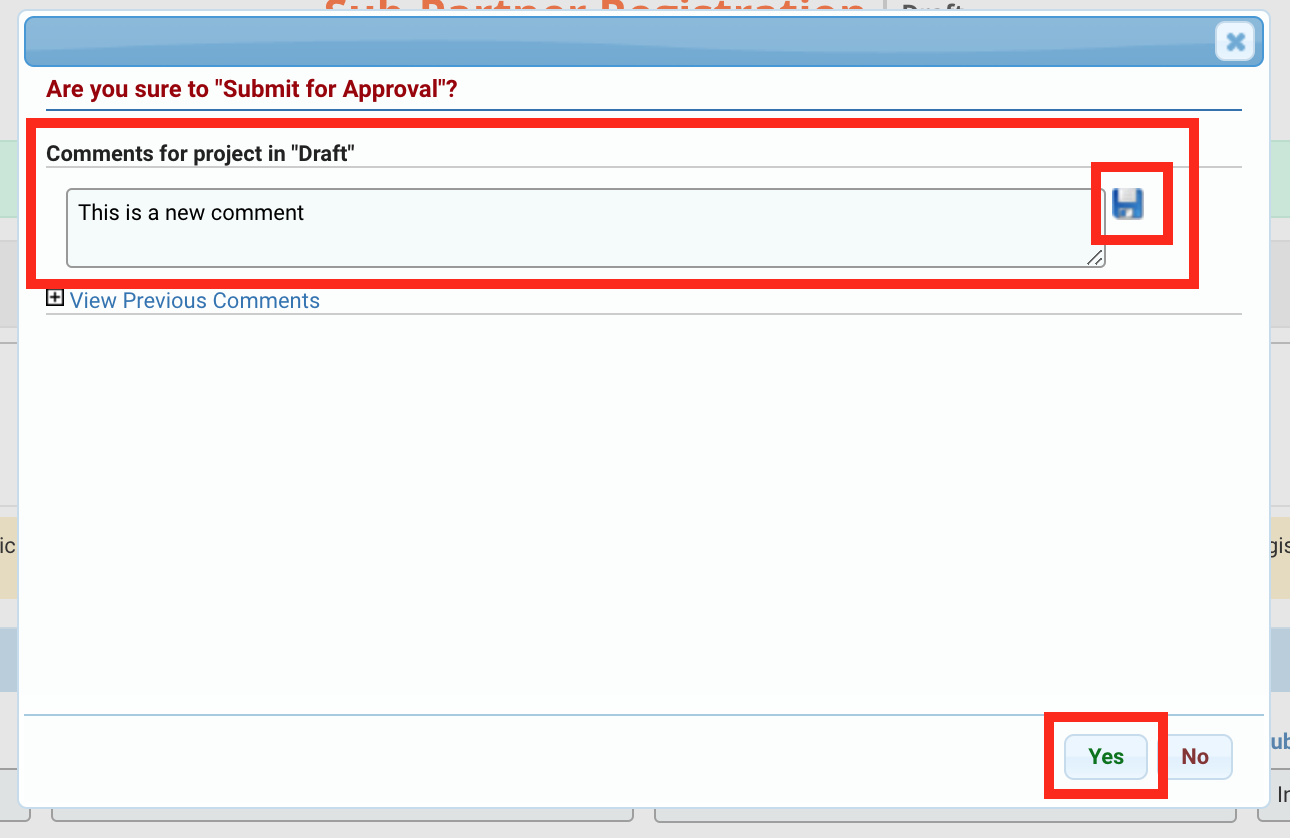
After you click on this button, a pop-up window will be displayed. You can leave a comment pertaining to this action to the attention of the HFU in the comment section. Do not forget to click on this icon ![]() to save your comment before submitting the sub-ip for approval.
to save your comment before submitting the sub-ip for approval.
Then click on [Yes] to submit the sub-implementing partner.
Once you have submitted the sup-implementing partner for approval, it will be automatically added to the ‘Sub Partner’ tab of the Due Diligence form. Please contact your HFU to notify them that a new sub-ip needs to be reviewed in the due diligence.
If the sub-implementing partner was approved by the HFU, you will only be able to edit the contact section. To edit any other information, you will need to ask your HFU to send it back to you for correction. You will then be able to access it from the ‘Sub-Partner’ tab of the Due Diligence. To edit it, click on the edit icon ![]() .
.

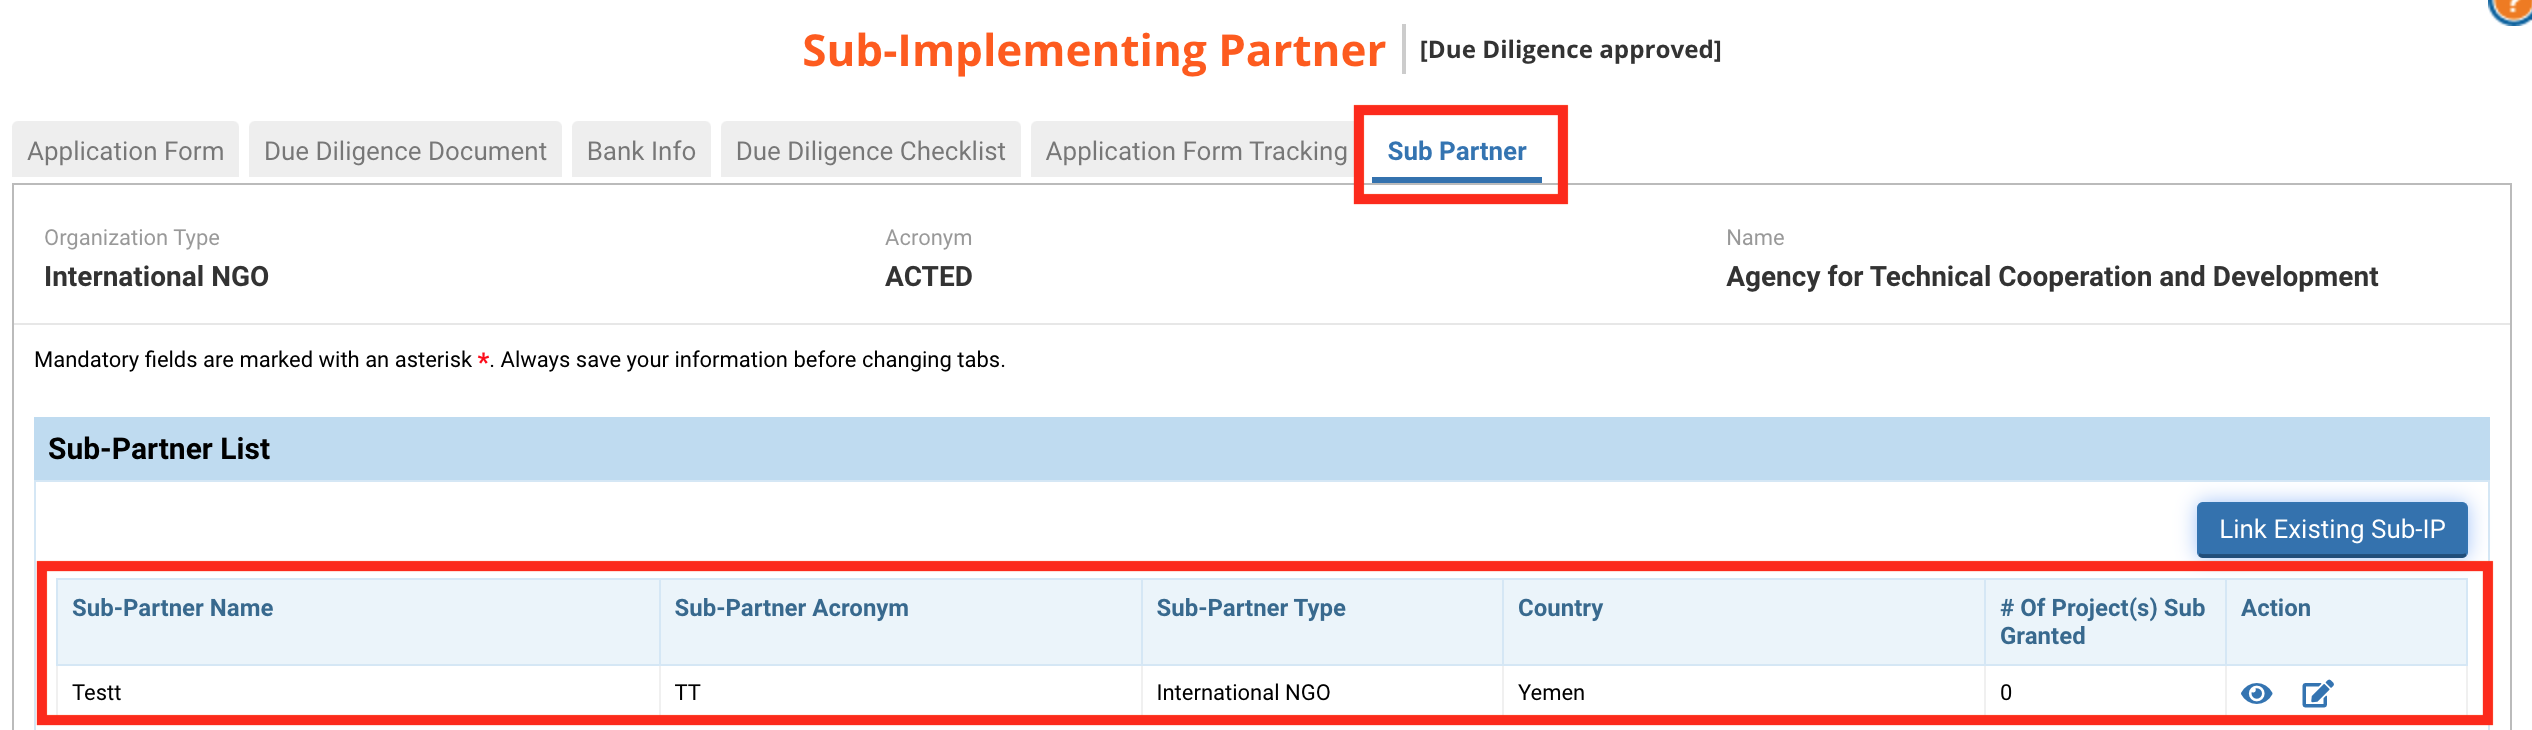
All Sub-Partners linked to your organization are displayed in the ‘Sub-Partner’ tab of the Due Diligence. If you have linked a sub-partner to a project, it will be displayed in the ‘Subgrants’ tab of that project. From this tab, you will be able to search for and add a Sub-IP even if it is not linked. To link a Sub-IP that is already registered in the system to your organization, click on [Link Existing Sub-IP].

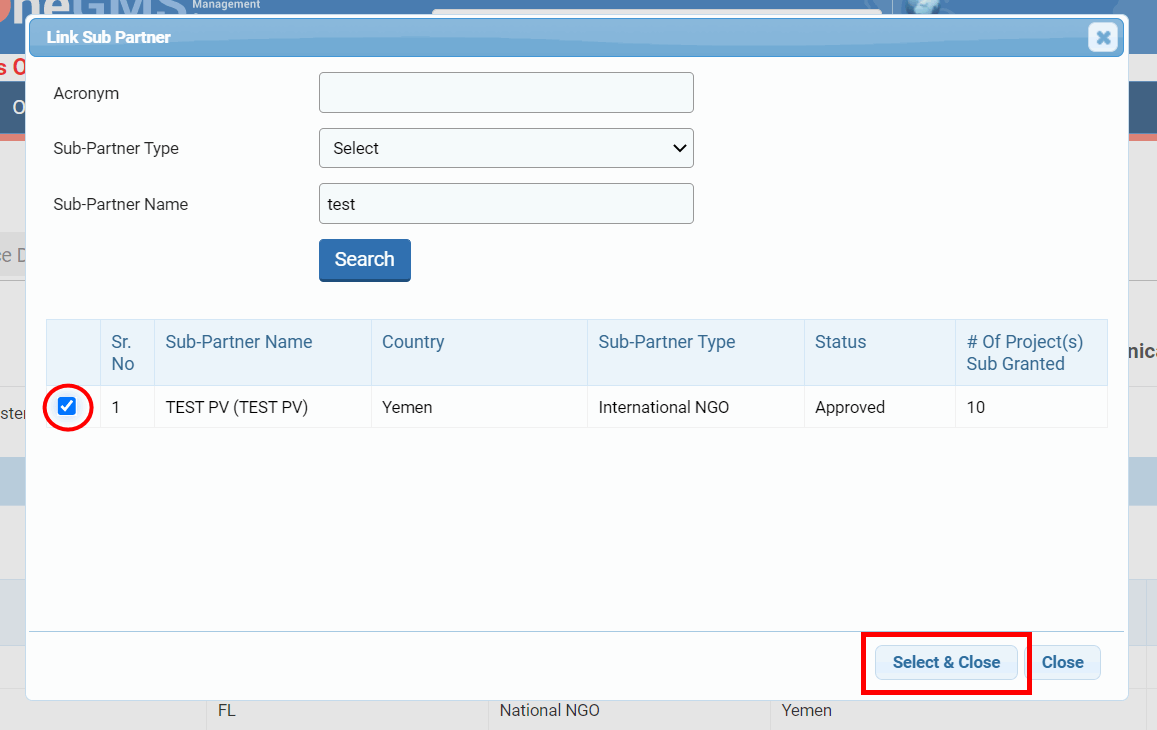
On the pop-up window, use the filters and click on [Search] to search for your Sub-IP.
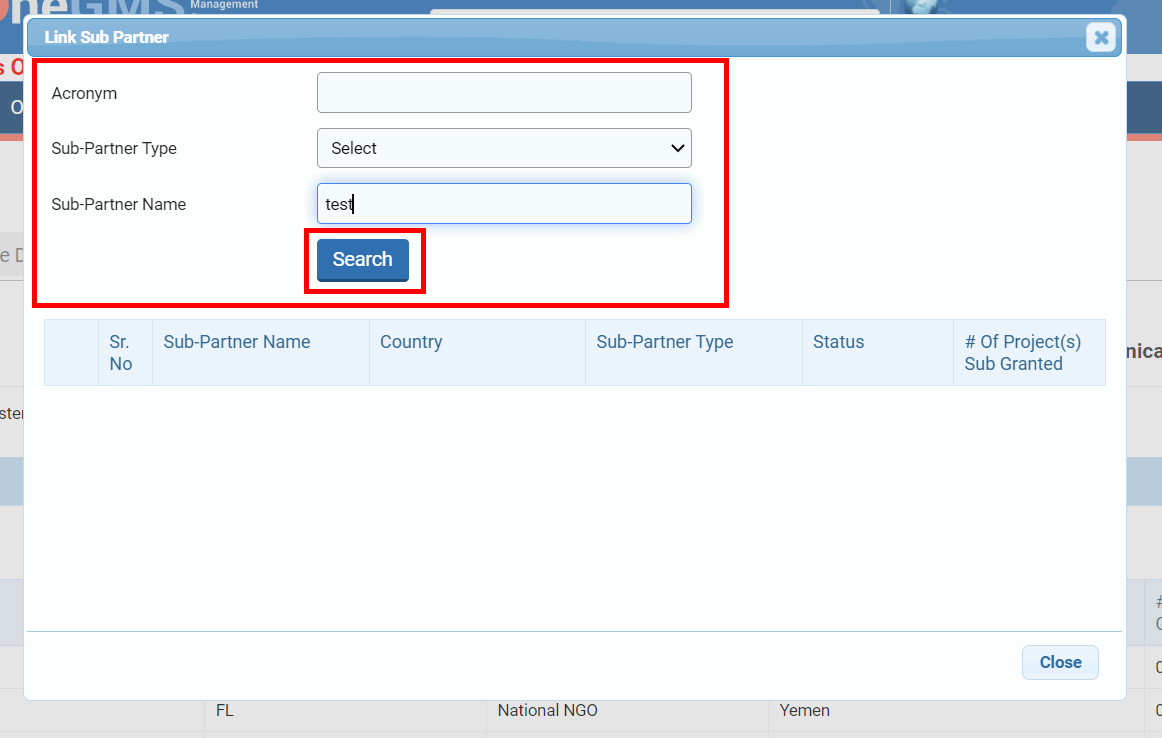
Tick the box of the Sub-IP you wish to link to your agency and click on [Select & Close].
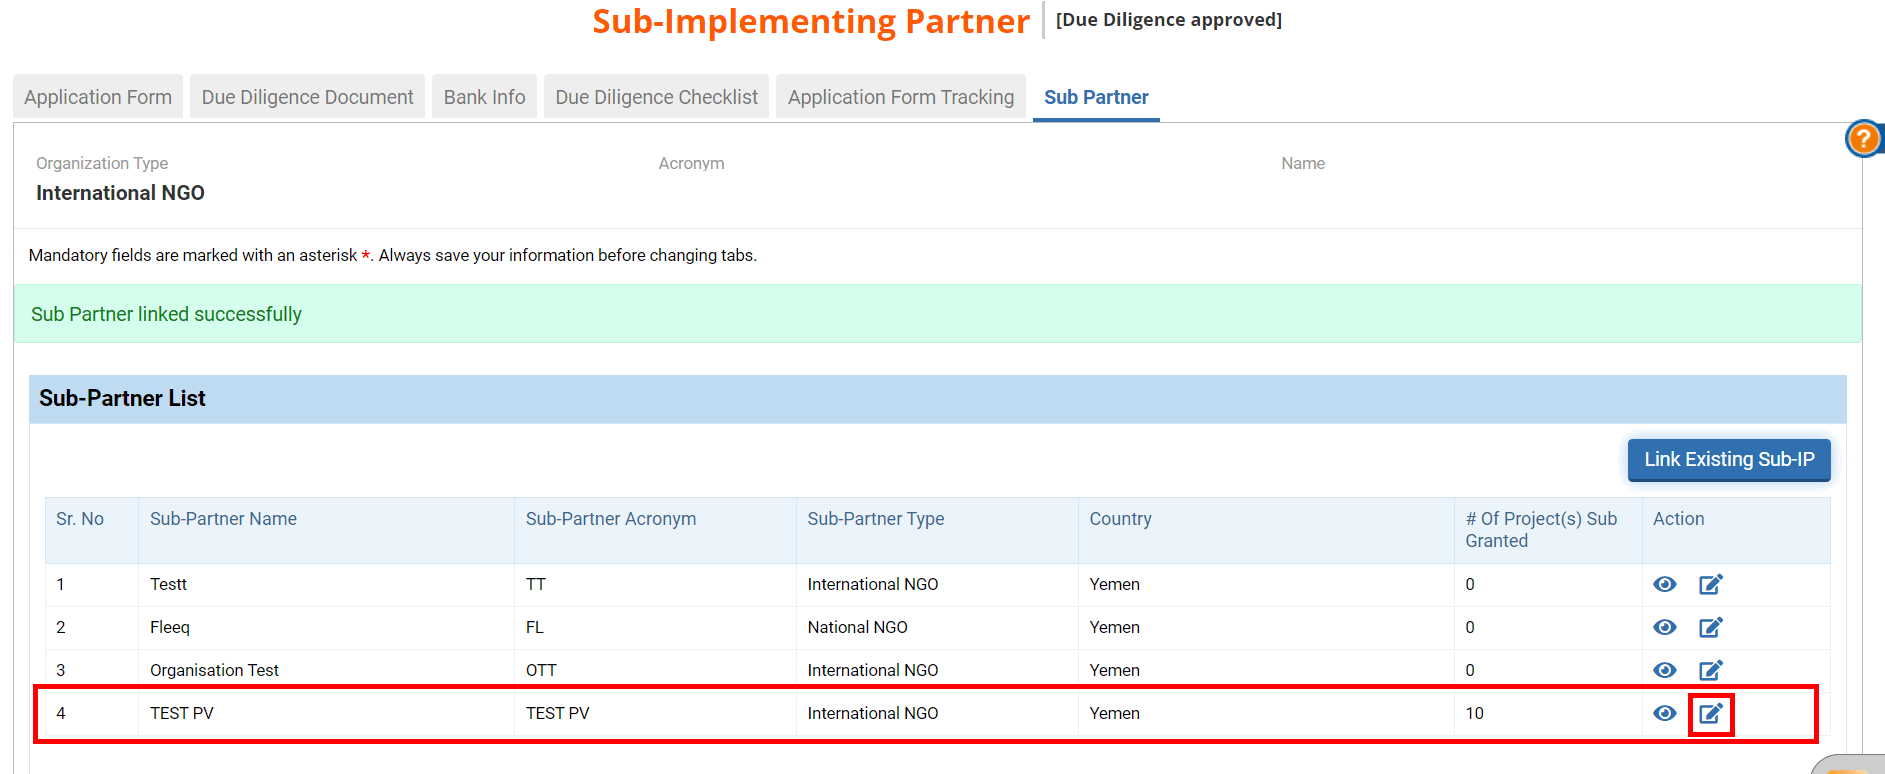
Your newly linked Sub-IP will be displayed in the Sub-Partner List table. As this Sub-IP was registered in the system by another organization, you will have to edit its ‘Contact Details’ section to add the Sub-IP focal point’s contact information for your organization. To do so, click on this icon ![]() .
.
On the registration page, go to the ‘Contact Details’ section, and click on [Add New contact].
Fill in all mandatory fields, ensure that the box ‘Is Active’ is ticked and click on [Save].
Once added, you can click on this icon ![]() to edit the contact, on this icon
to edit the contact, on this icon ![]() to delete the contact and this icon
to delete the contact and this icon ![]() to view the contact.
to view the contact.
Once you have added the new contact, do not forget to save the page, as the system will not automatically save your data.