I) What is disbursement
II) When is the disbursement triggered
III) Steps in disbursement
1) Create an obligation
2) Add a payement schedule
3) Create a voucher
OneGMS Tip: Upload and download documents related to disbursement
4) Submit to account
5) Disburse Tranche
6) How to trigger and process another tranche disbursement
OneGMS Focus: Disbursement from MPTF Funds to UN agencies
Disbursement is the transfer of the full/partial amount from the UN bank account to the implementing partner’s bank account, for a specific approved project. The number of disbursement tranches and the amount will be clearly stipulated in the grant agreement between OCHA and the implementing partner based on the risk level of the partner and the project duration.
II) When is the Disbursement triggered
The first tranche of funding is disbursed to the partner within 10 working days following the signature of the Grant Agreement by OCHA’s Executive Officer.
Disbursement tranches are set before the generation of the Grant Agreement, at Timelines development stage. To learn how to set the Disbursement tranches, please refer to this article of the Help Portal.
The implementing partner will receive a first instalment at the beginning of the project and will be entitled to request the next disbursement(s), by submitting a financial statement, as soon as the implementing partner has spent 70% of the funds previously received.

As shown in this workflow, disbursement follows specific steps. For the first disbursement, the Finance HQ team must create an obligation (step 1).
During this create obligation process, they must configure the disbursement details, by adding a payment plan (step2), creating a voucher from the payment plan instalment (step 3). After configuring the tranche disbursement, Finance HQ can submit the disbursement to the accounts (step 4), as shown in the workflow above.
Finally, Finance HQ can finalise the process by indicating the tranche has been disbursed (step 5).
If another disbursement is required, the process will repeat, where Finance HQ will begin the next disbursement process (step 6), configure this next disbursement, submit it to the accounts and disburse the tranche.
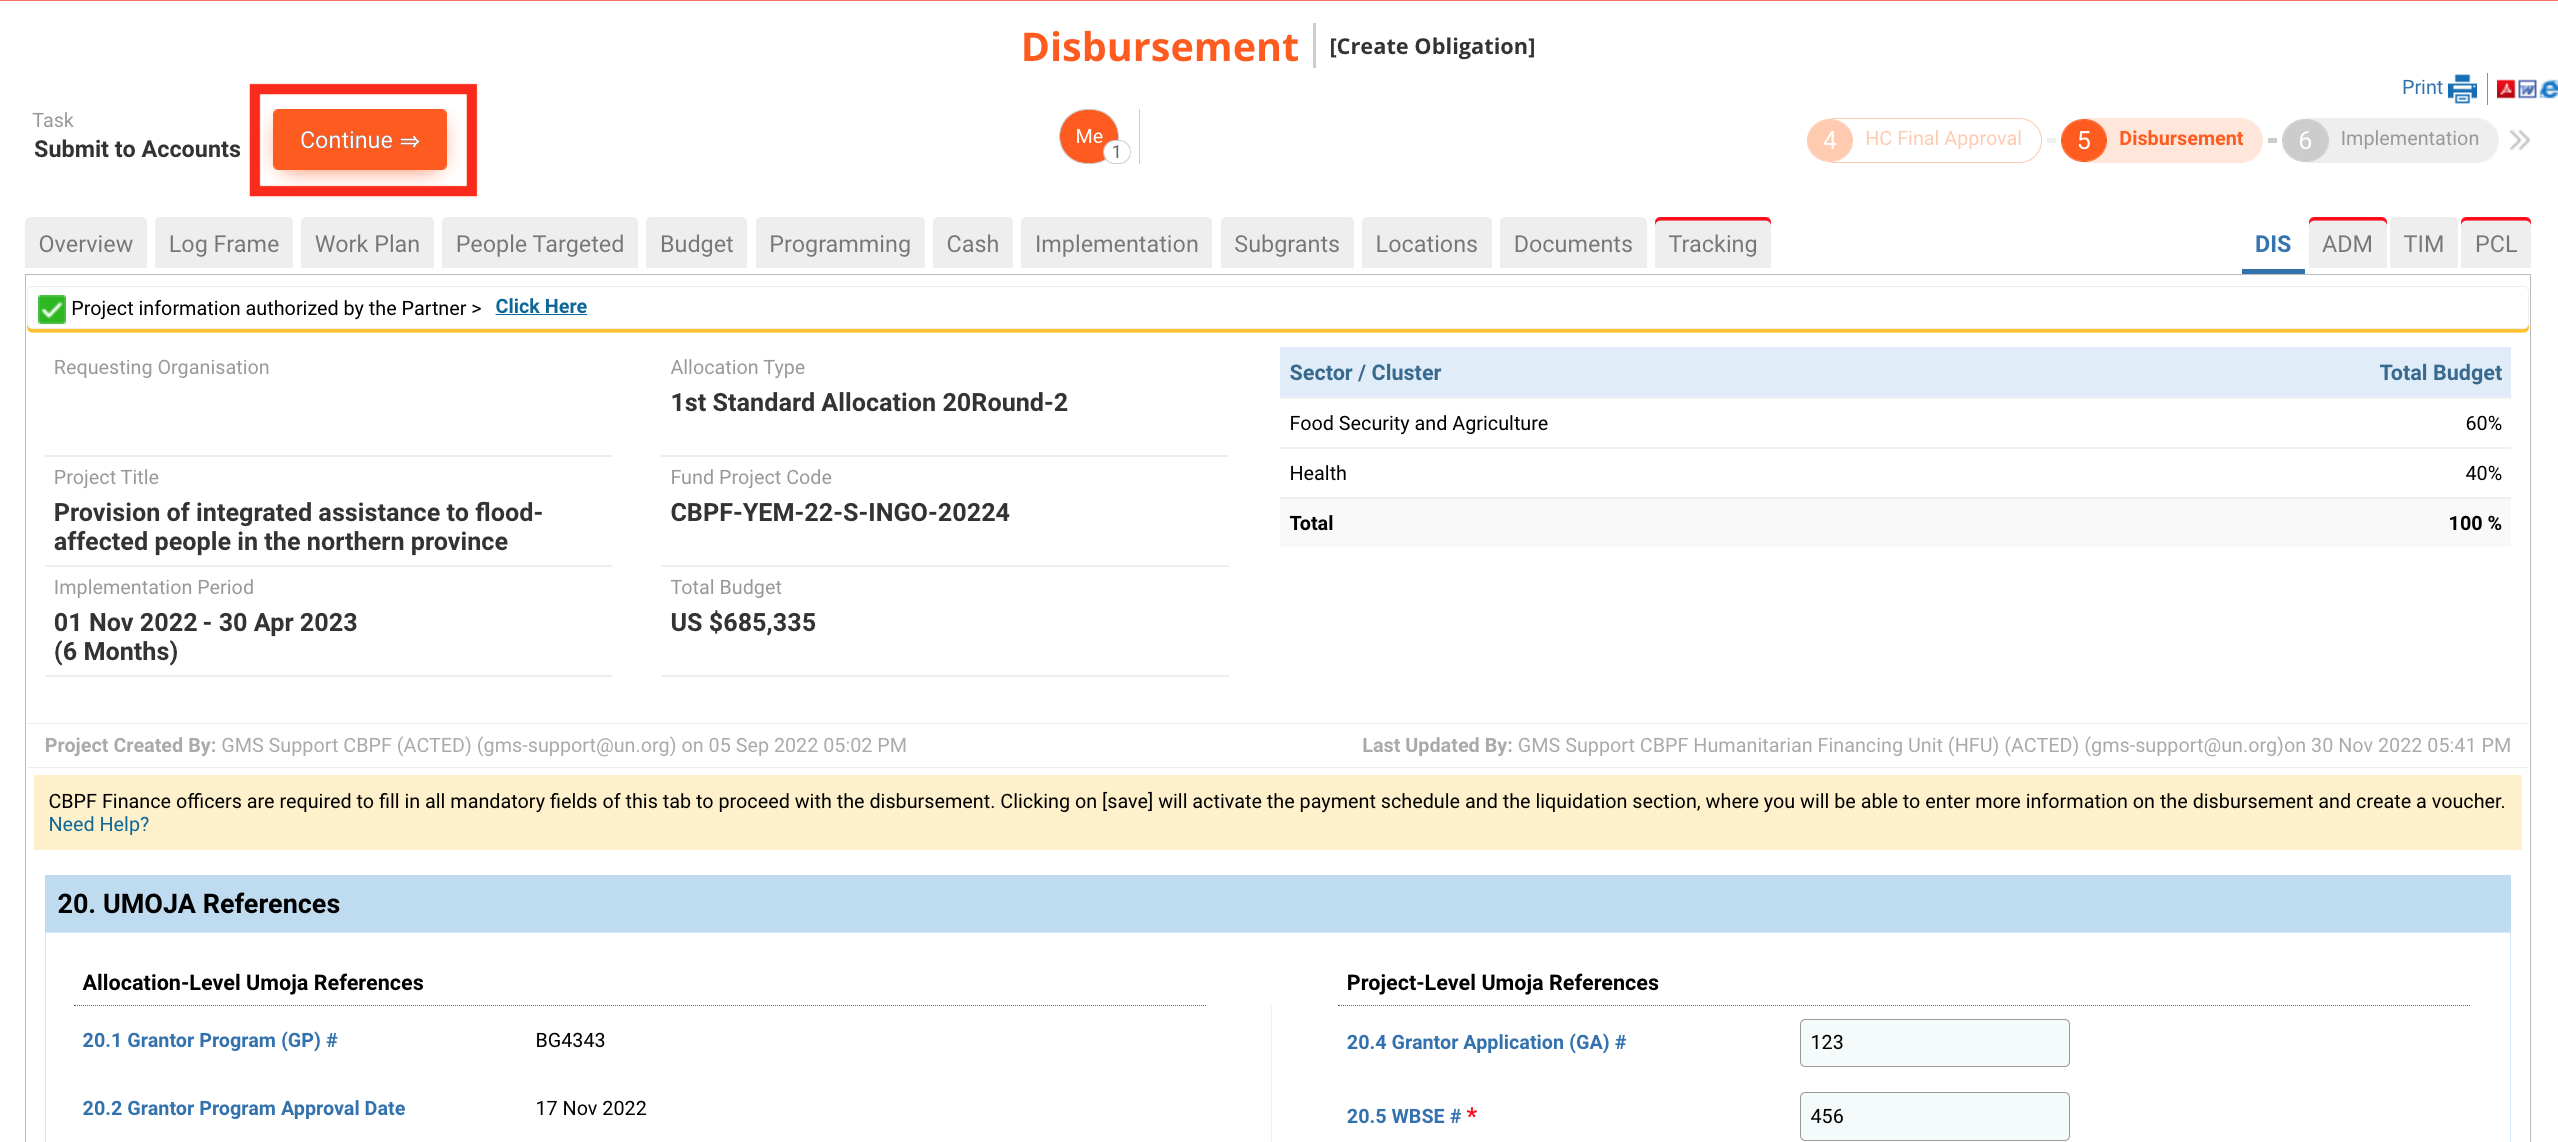
CBPF Finance can view the ‘Create Obligation’ request in the Task List after logging into the OneGMS.
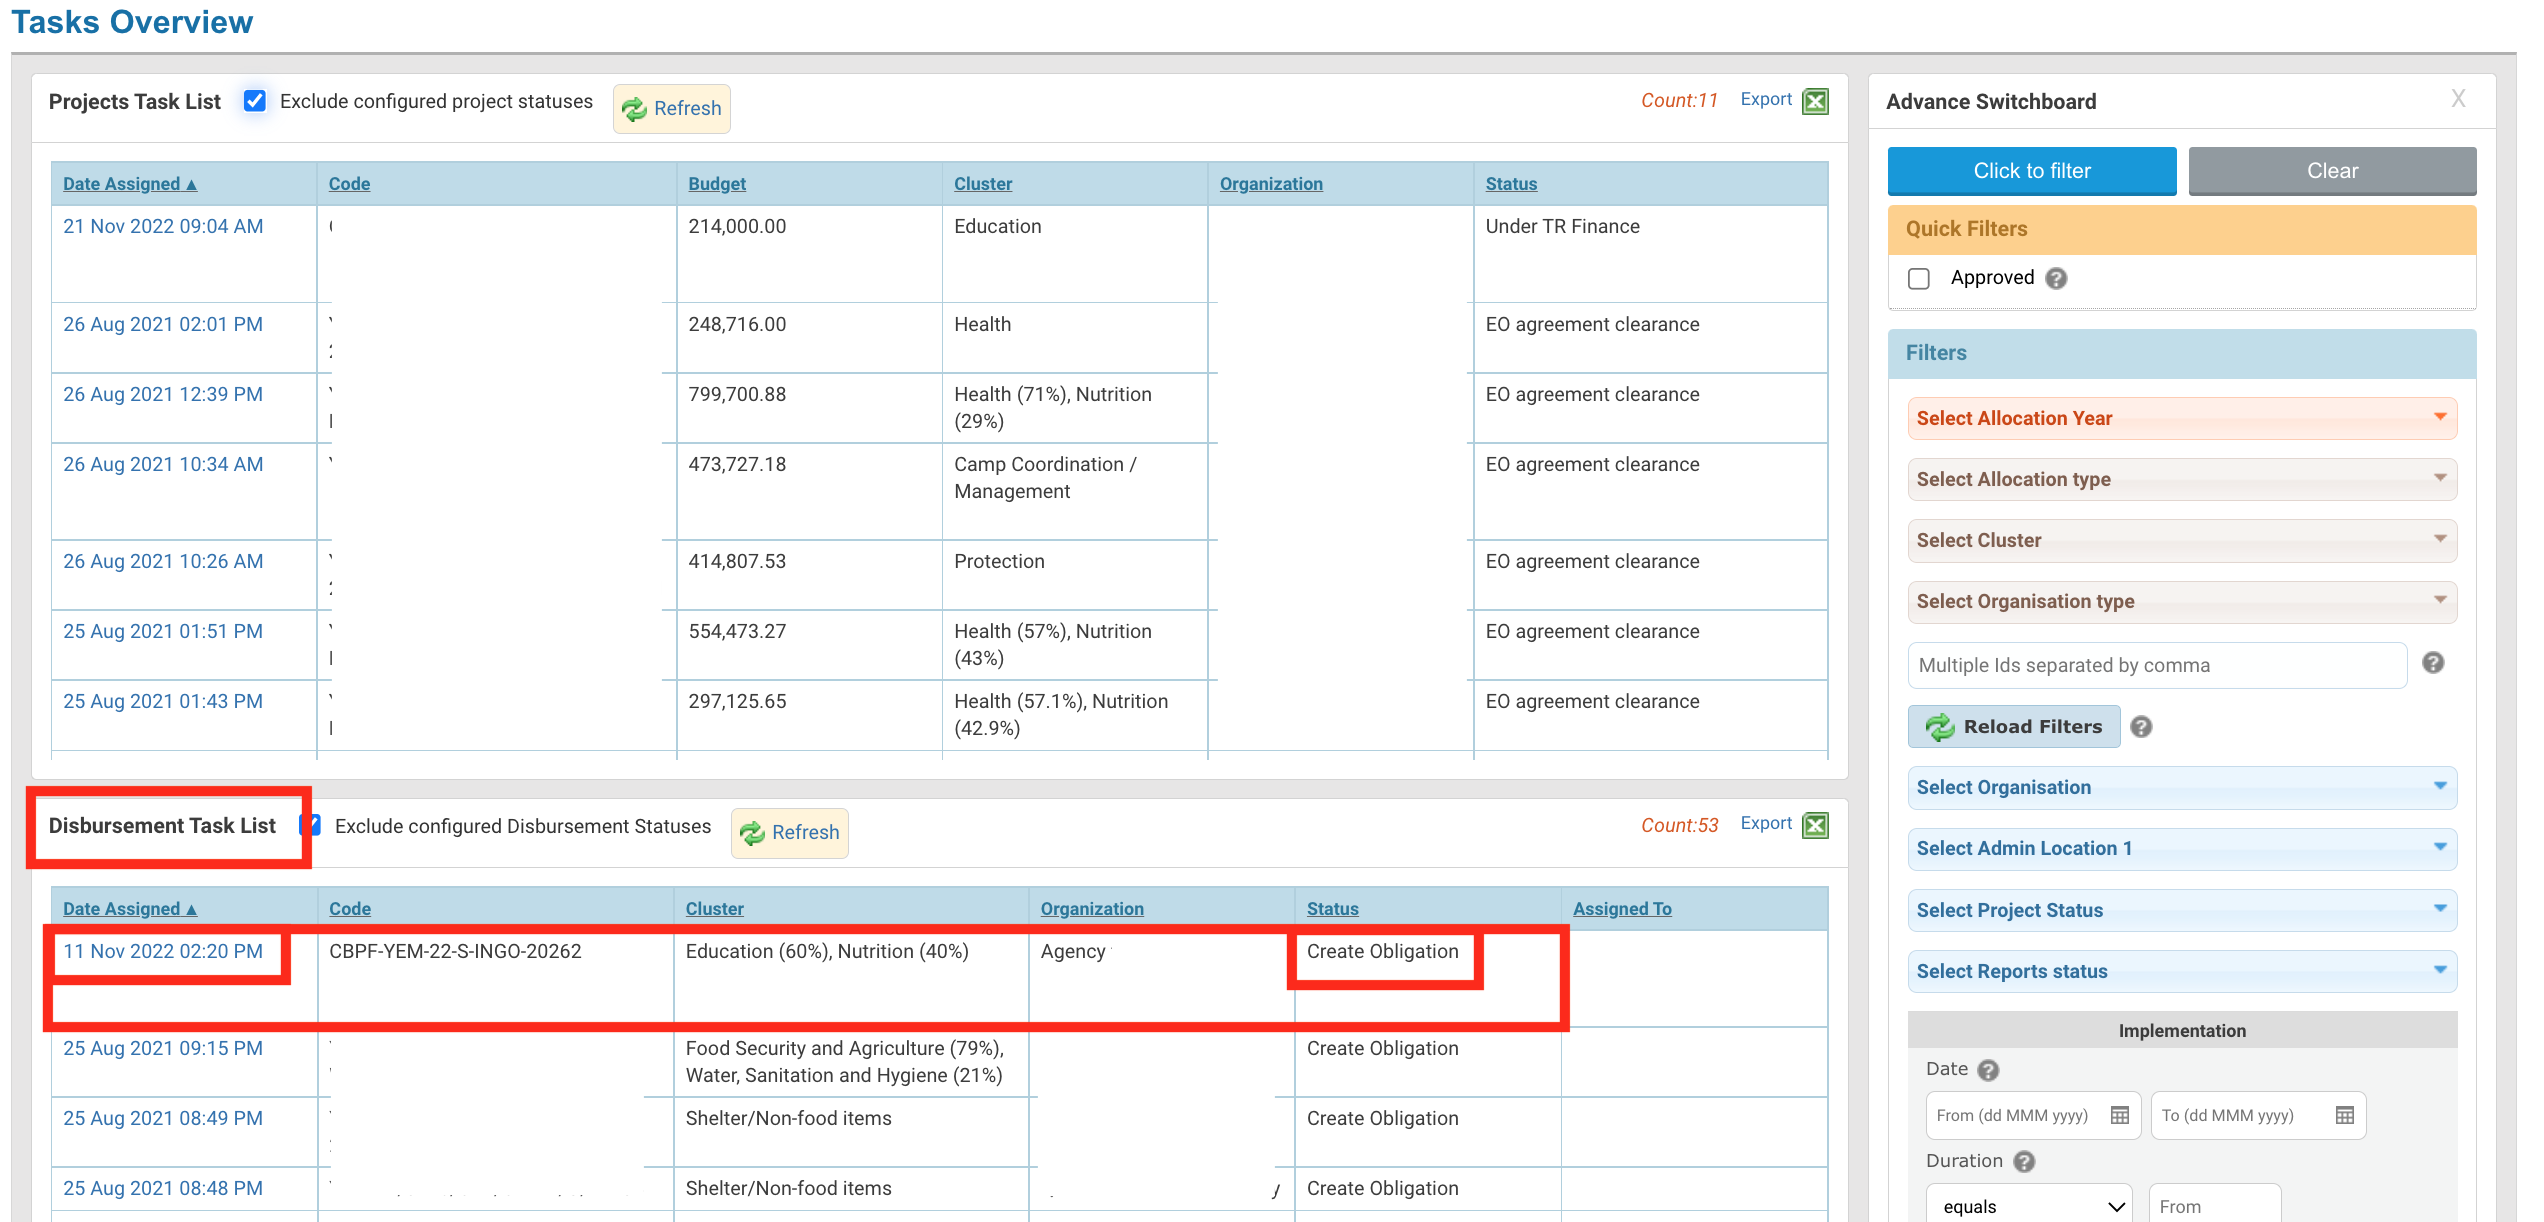
In the ‘Disbursement’ tab, the CBPF Finance officers are required to fill in all mandatory fields (*) of this tab to proceed with the disbursement. Clicking on [Save] will activate the payment schedule and the liquidation section, where you will be able to enter more information on the disbursement and create a voucher.
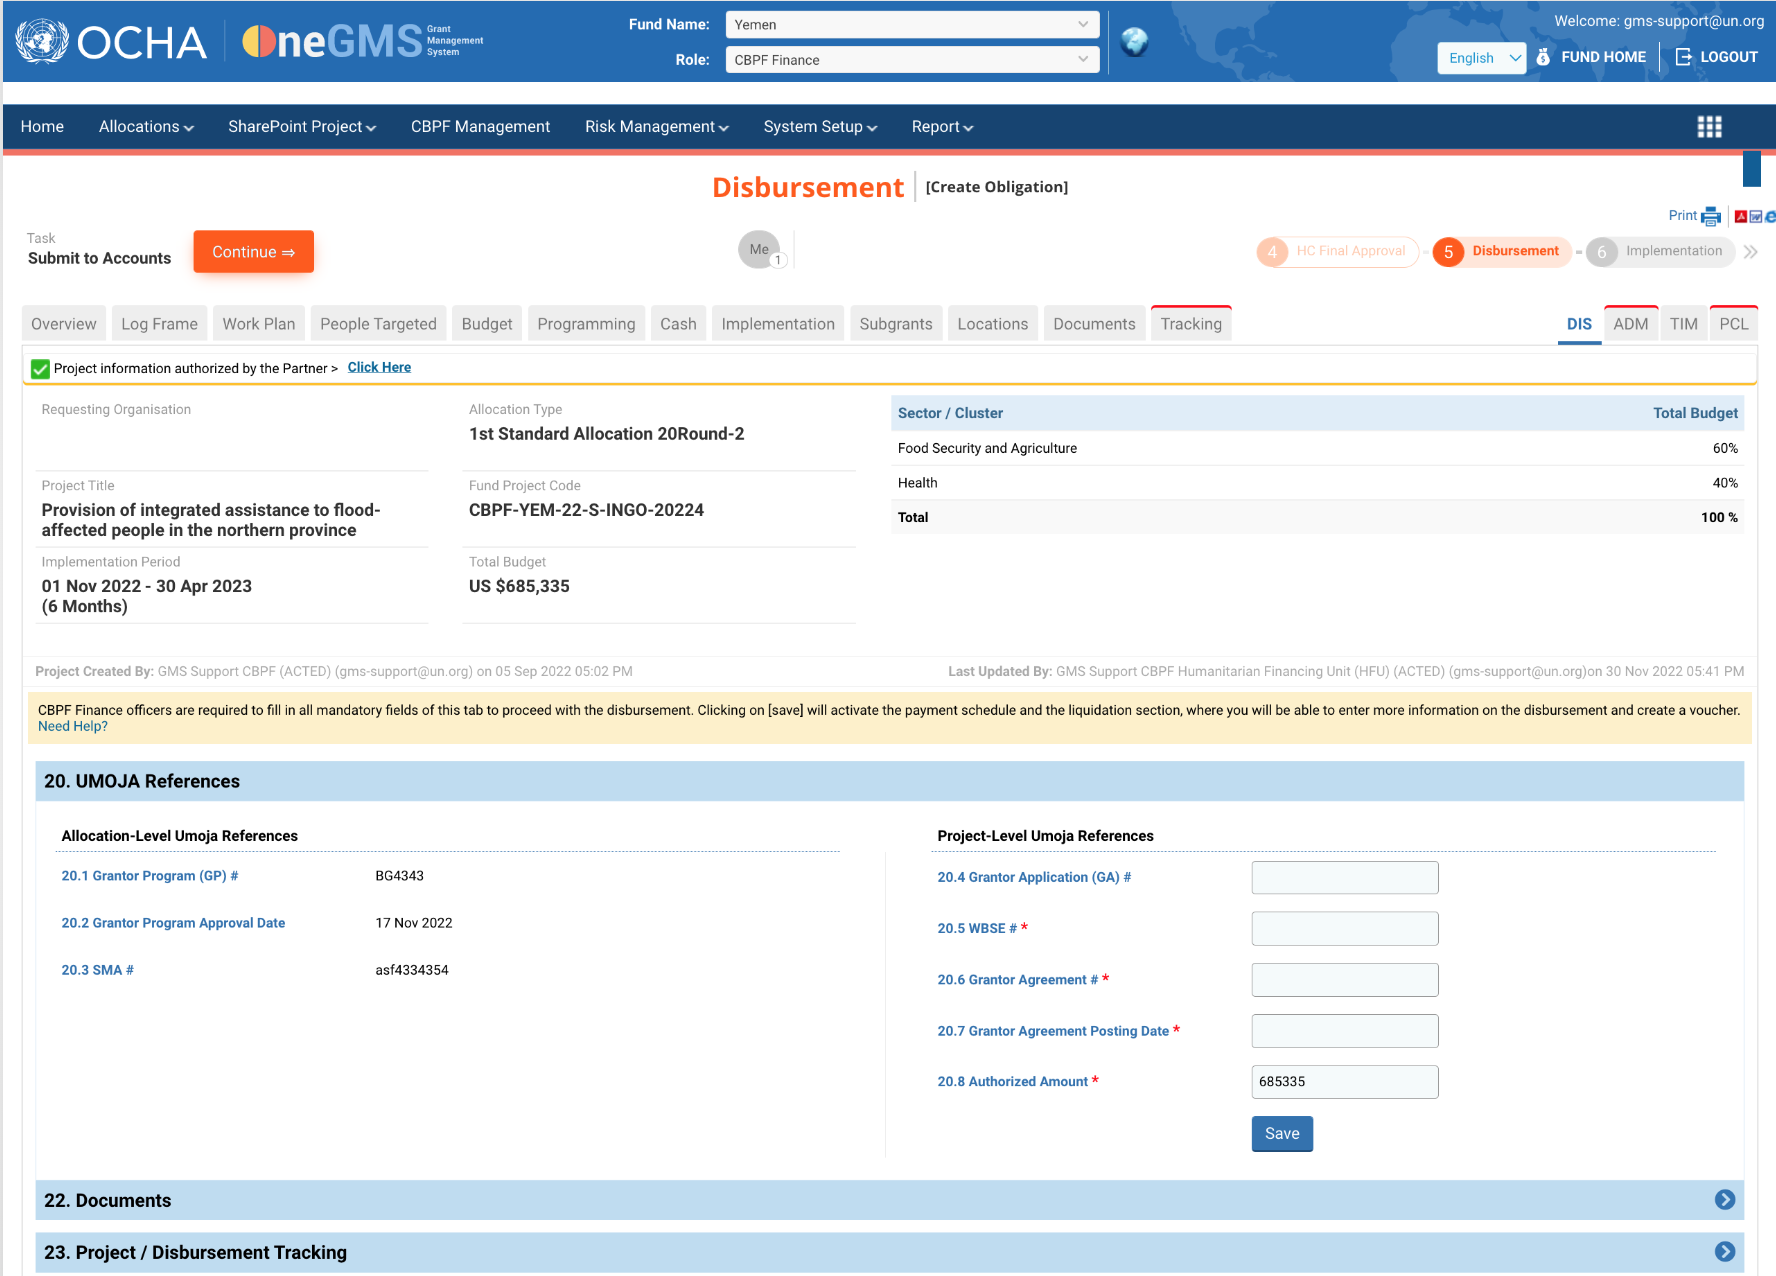
20. UMOJA References
Allocation-Level Umoja References:
UMOJA References are added at allocation level. If the allocation-level UMOJA Reference is missing, please click here. .
Field descriptions:
- 20.1 Grantor Program (GP) #: this code allows to link the allocation on the OneGMS to its equivalent Allocation Grantor Program Code from UMOJA.
- 20.2 Grantor Program Approval Date: the date the Grantor Program was approved.
- 20.3 SMA #: Strategic Management Application code.
Project-Level Umoja References:
- 20.4 Grantor Application (GA) #: you can enter the GA number.
- 20.5 WBSE # *: enter the work bench structure element number
- 20.6 Grantor Agreement # *: enter the unique Grantor Agreement number.
- 20.7 Grantor Agreement Posting Date *: select from the calendar the date the Grantor Agreement was posted.
- 20.8 Authorized Amount *: this field corresponds to the project total budget. It is automatically filled by the system.
Once you have filled in all mandatory fields click on [Save]
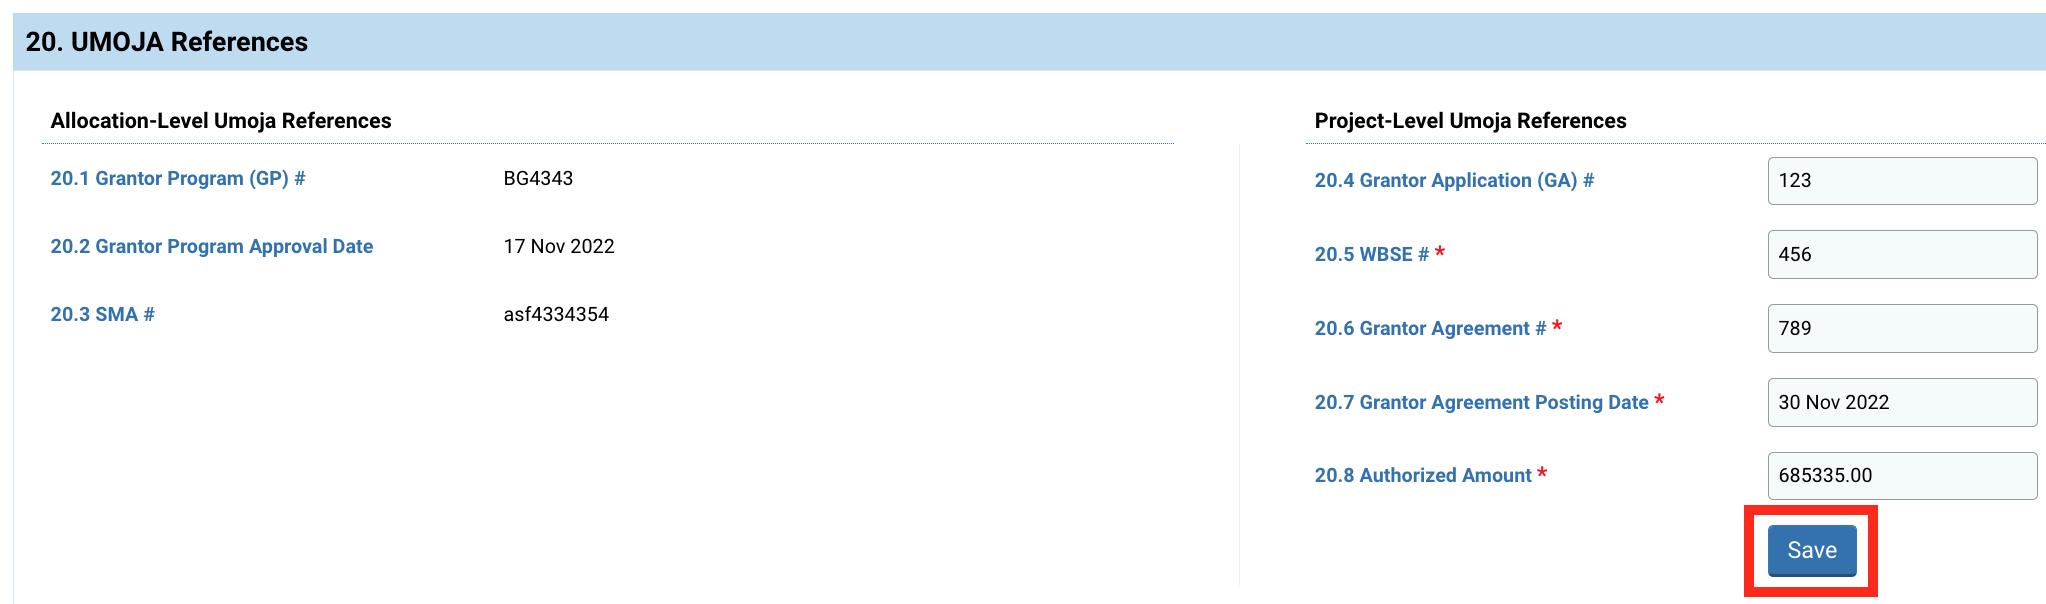
Upon clicking on [Save], a new section is added to the tab: 21. Payment Request(s) and Disbursement Details.
21. Payment Request(s) and Disbursement Details
This section allows you to add and activate the payment schedule. You will have to add a payment schedule and then attach a voucher to each payment schedule. To add a payment schedule, click on [Add Payment Schedule].

In the pop-up window fill in mandatory fields and click on [Save] to add a payment schedule.
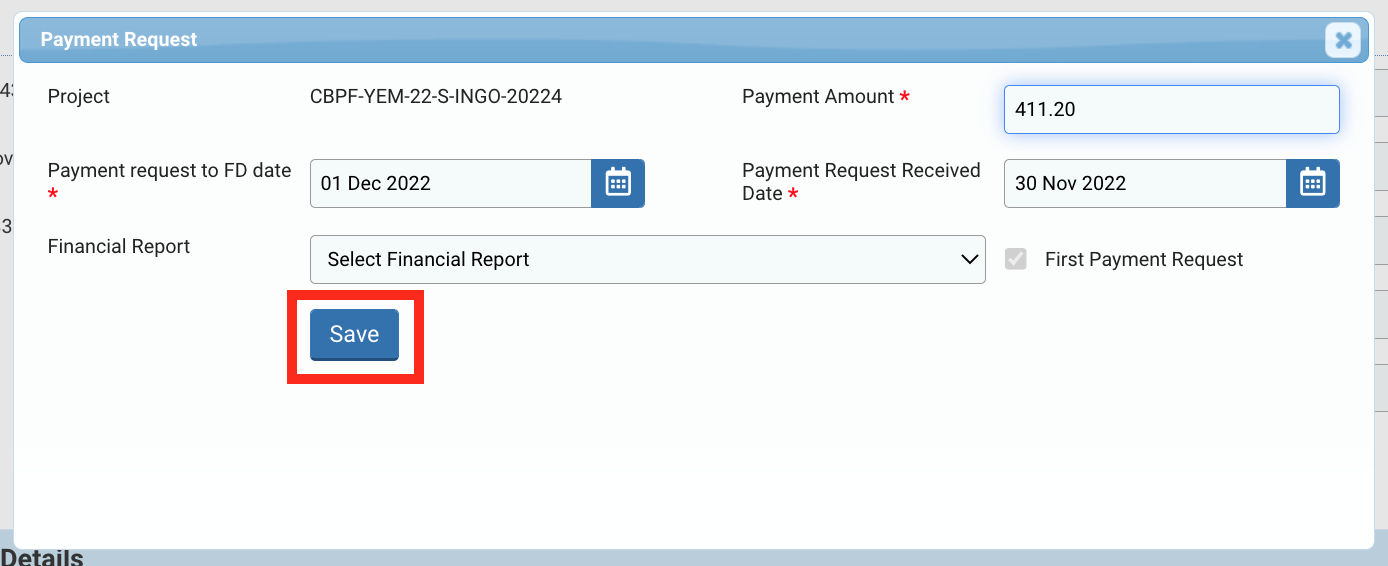
Fields description:
- Payment Amount *: enter the amount of disbursement.
- Payment request to FD date *: select from the calendar the date the payment request was submitted to the finance division.
- Payment Request Received Date *: select from the calendar the date the partner requested the payment.
- Financial Report: select from the dropdown list the financial report.
Please note: for the first tranche to be disbursed there is no requirement of linking the disbursement to a financial report. However, for subsequent tranche disbursements, the IP has to provide a financial report and Finance HQ must link the disbursement tranche to the according Financial Report.
You can click on this icon ![]() to edit or this icon
to edit or this icon ![]() to delete the payment schedule.
to delete the payment schedule.

For every payment schedule created there will be a voucher associated with the same. To create a voucher, click on this icon ![]()

On the pop-up window, fill in all mandatory fields and click on [Save] to attach the voucher.
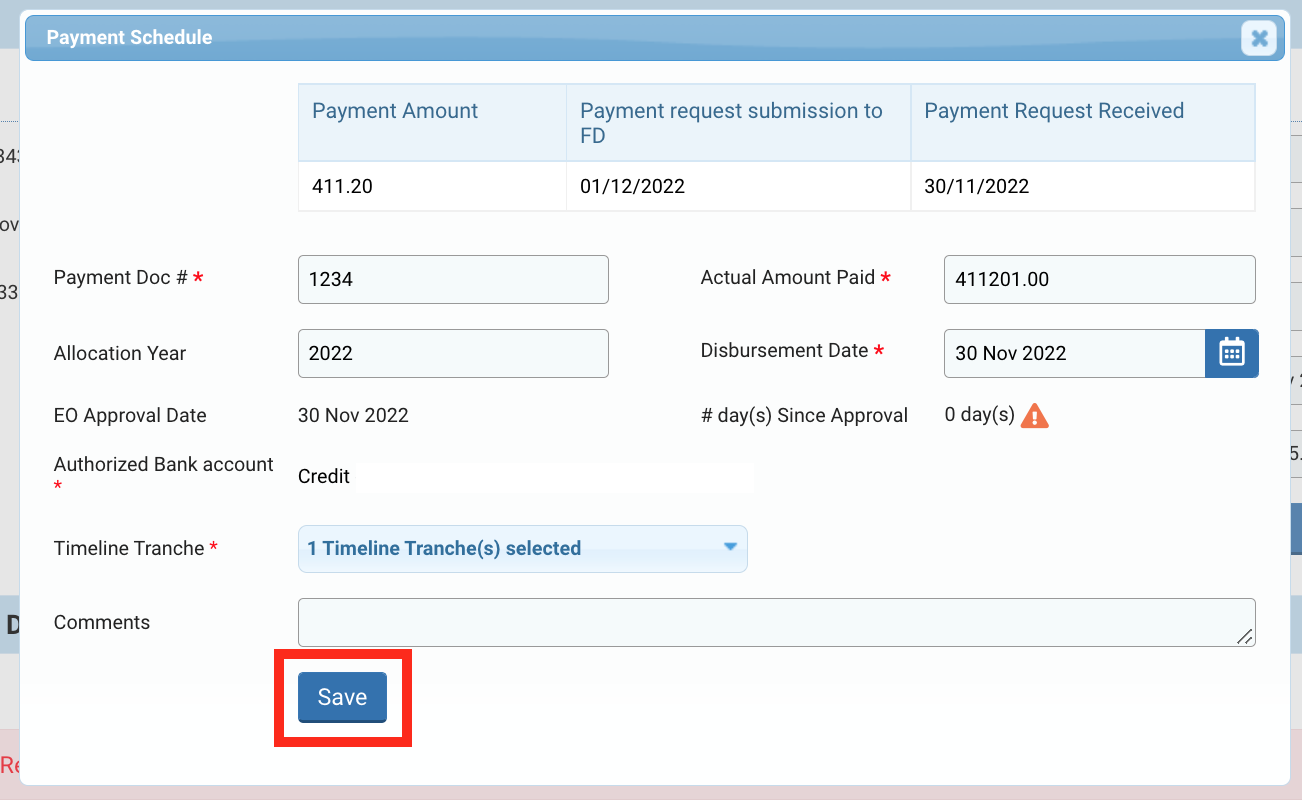
Fields description:
- Payment Doc # *: enter the unique number generated by UMOJA.
- Actual Amount Paid *: enter the actual amount disbursed.
- Allocation year: indicate the year the project’s allocation.
- Disbursement Date*: select from the calendar the date the actual amount will be disbursed.
- Authorized Bank account *: the bank account information displayed in this field is the information that has been authorized in the Project Authorization page. It is hence the bank account that was linked to the project and the Grant Agreement. For a change of bank account information, it is necessary to request a project revision. To learn more about bank account information change, please refer to this article on Project Revision and this article on the Due Diligence.
- Timeline Tranche *: select from the dropdown list the tranche timeline (e.g., Tranche 1, Tranche 2 etc.). Based on the selected tranche, the system will be able to populate the instalment number correctly in the financial report.
- Comments (*): this field is mandatory only if the amount paid is different from the tranche amount.
Your vouched is now attached to the payment schedule. To edit it, you can click on this icon ![]() .
.

You can also generate a memo by clicking on ![]()
On the pop-up window, fill in all mandatory fields and click on [Generate Memo] to download the memo on your computer.
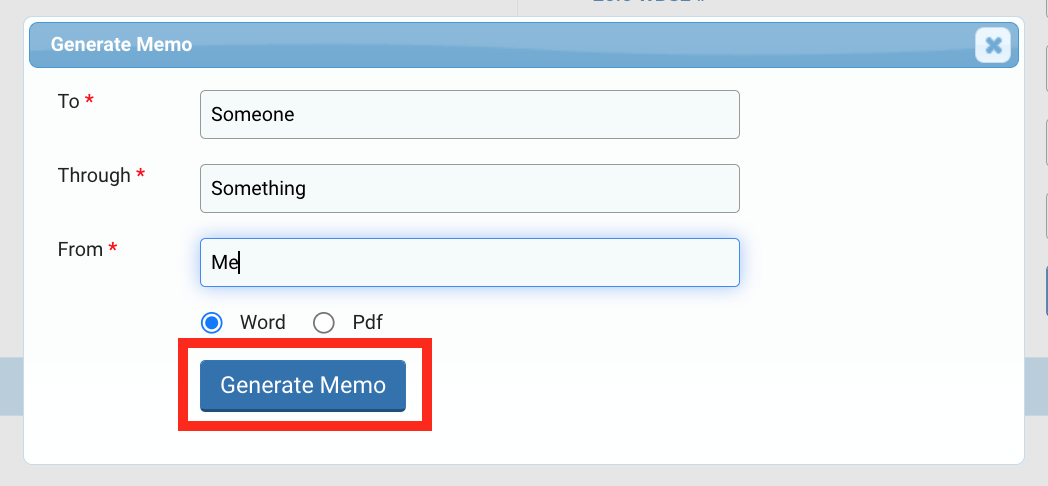
Field Description:
- To *: indicate to whom the memo will be addressed.
- Through *: indicate the platform on which the disbursement has been made.
- From *: indicate form whom the memo is coming.
- Select whether you want to generate the memo in a Word or PDF format.
|
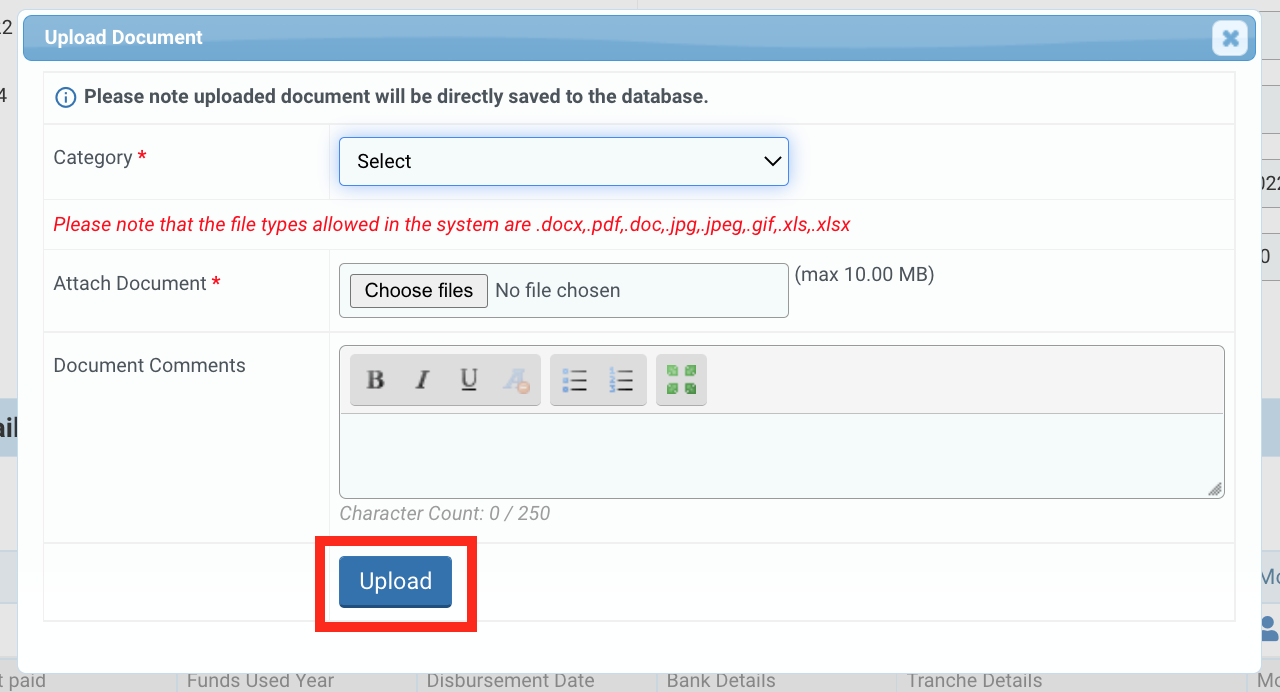
OneGMS Tip: Upload and download documents related to disbursement 22. Documents In this section, the CBPF Finance officer can upload or download documents related to disbursement. To download disbursement related documents that have been previously uploaded, click on [Download All].
To upload documents, click on [Add Document].
On the pop-up window, select the category of your document, click on ‘Choose File’ to select a file from your computer and leave a comment if necessary. Then click on [Upload] to upload the document.
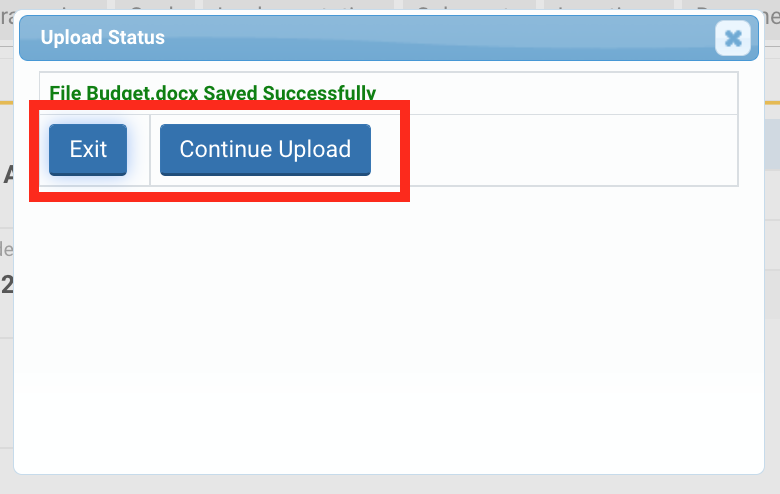
Upon clicking on [Upload] a pop-up window will ask you whether you want to continue to upload files or return to the ‘Disbursement’ tab. To continue uploading documents click on [Continue Upload], otherwise click on [Exit].
|


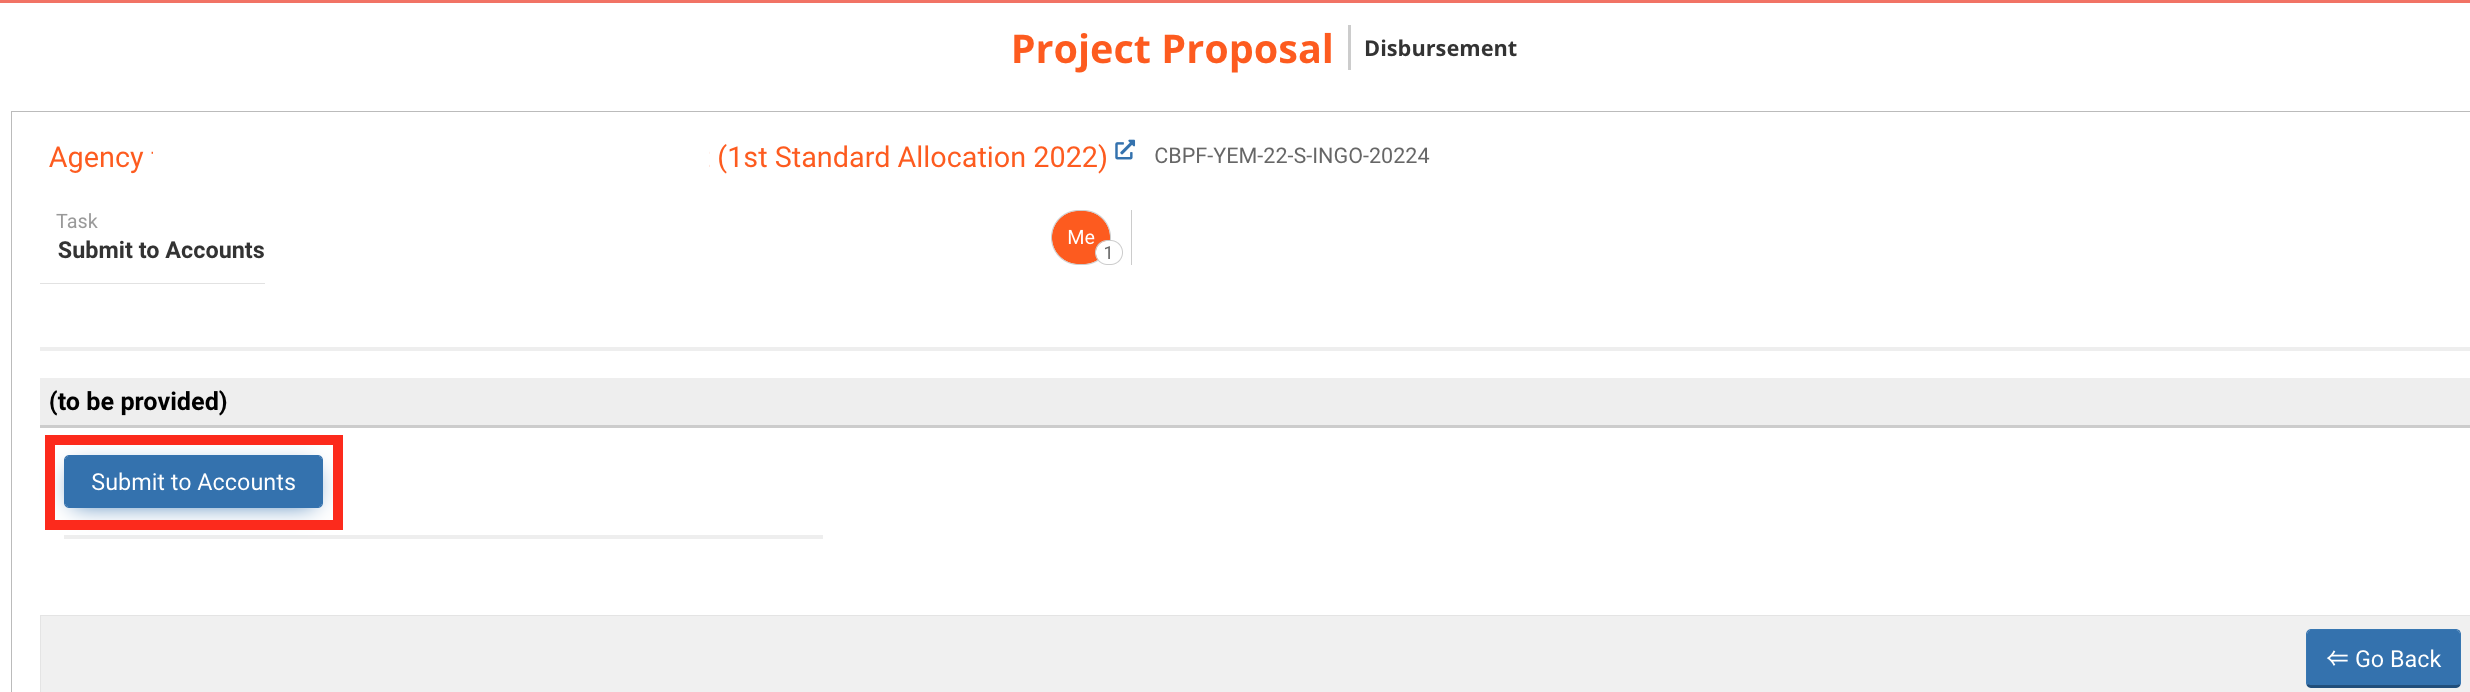
Once the voucher and payment schedule are saved, you can submit to the accounts to disburse the tranche.
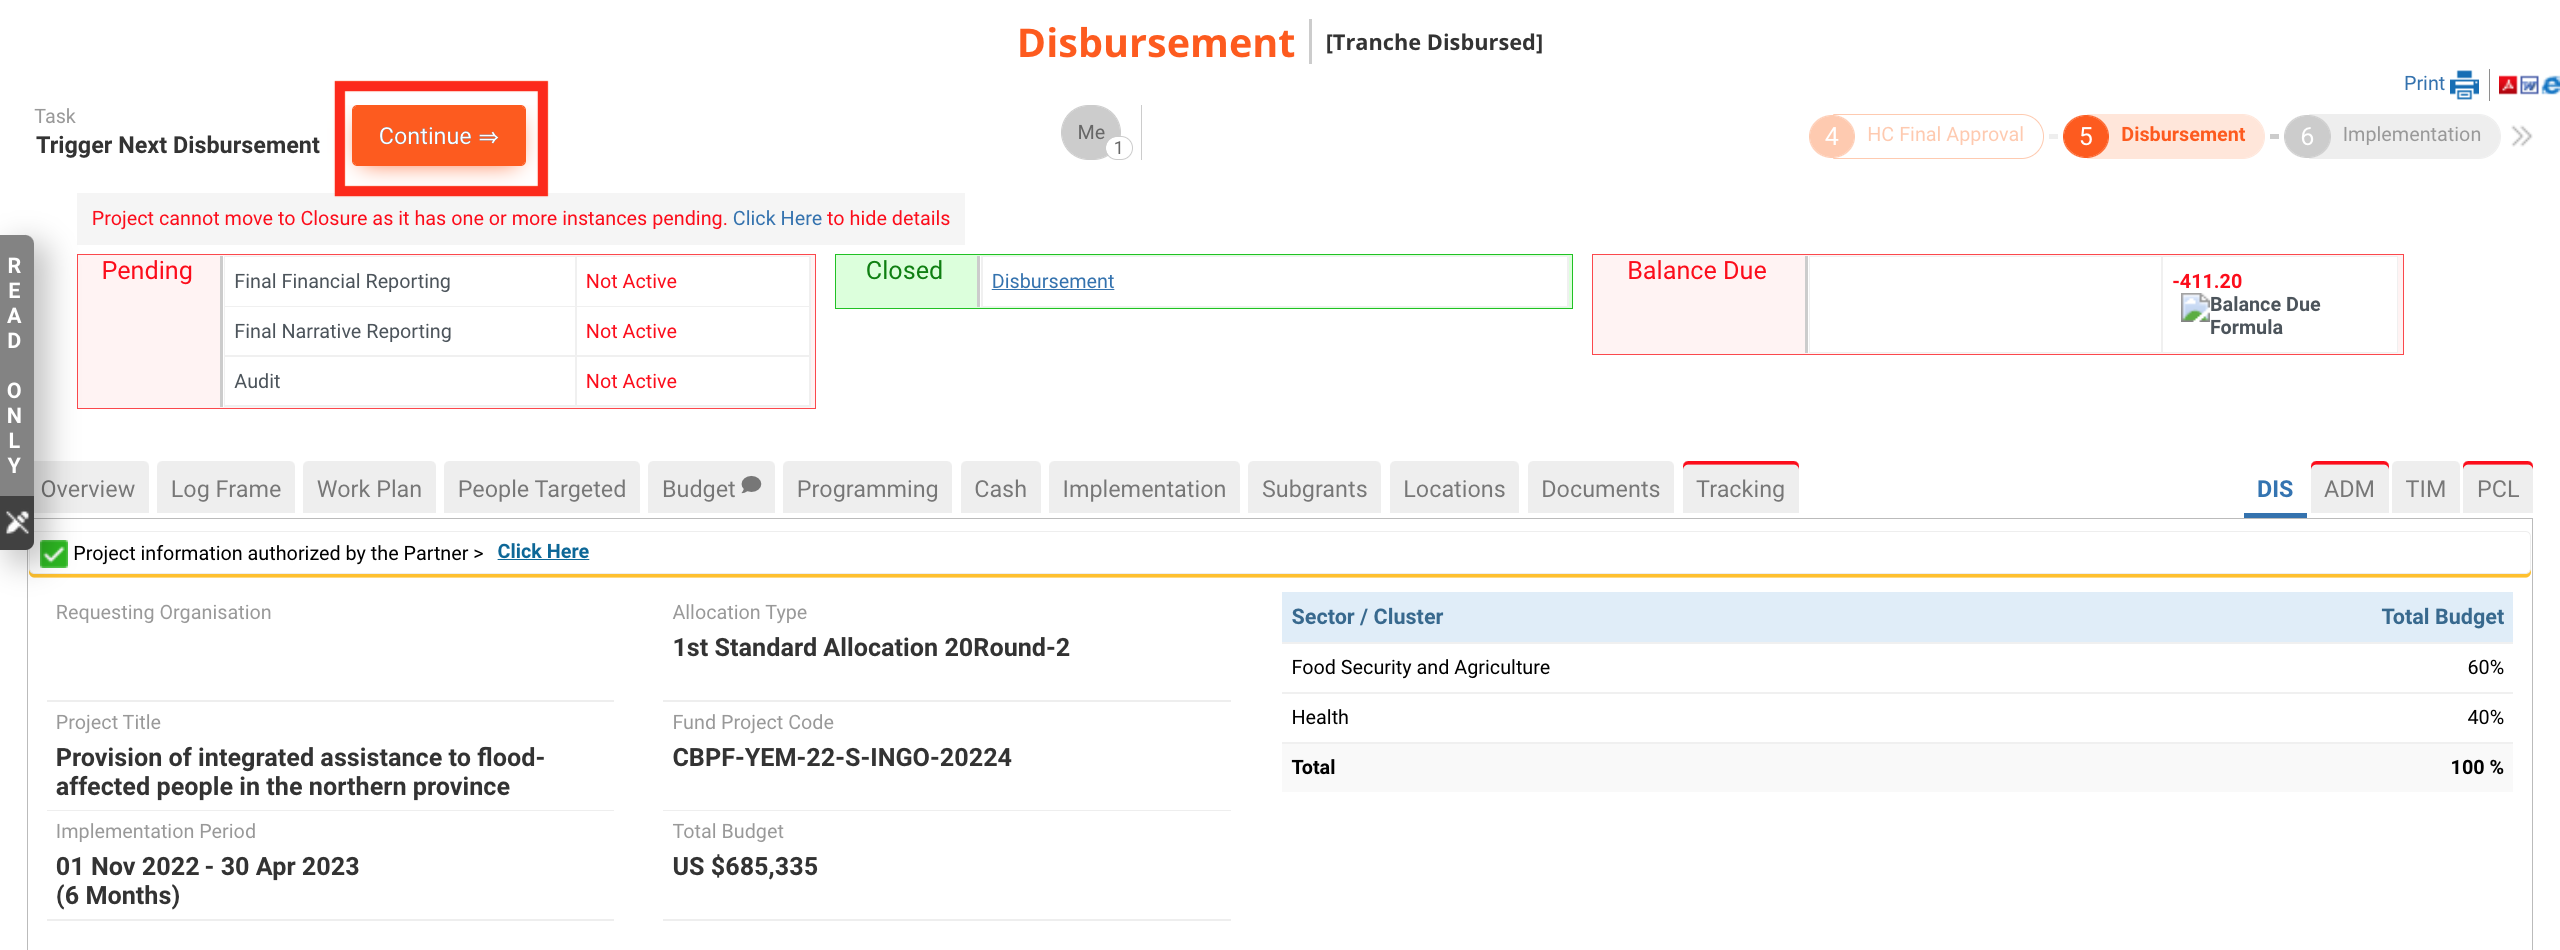
To do so, click on [Continue] to open the task page.
From your task page, click on [Submit to Accounts].
After reviewing the details, click on [Continue] to open the task page.
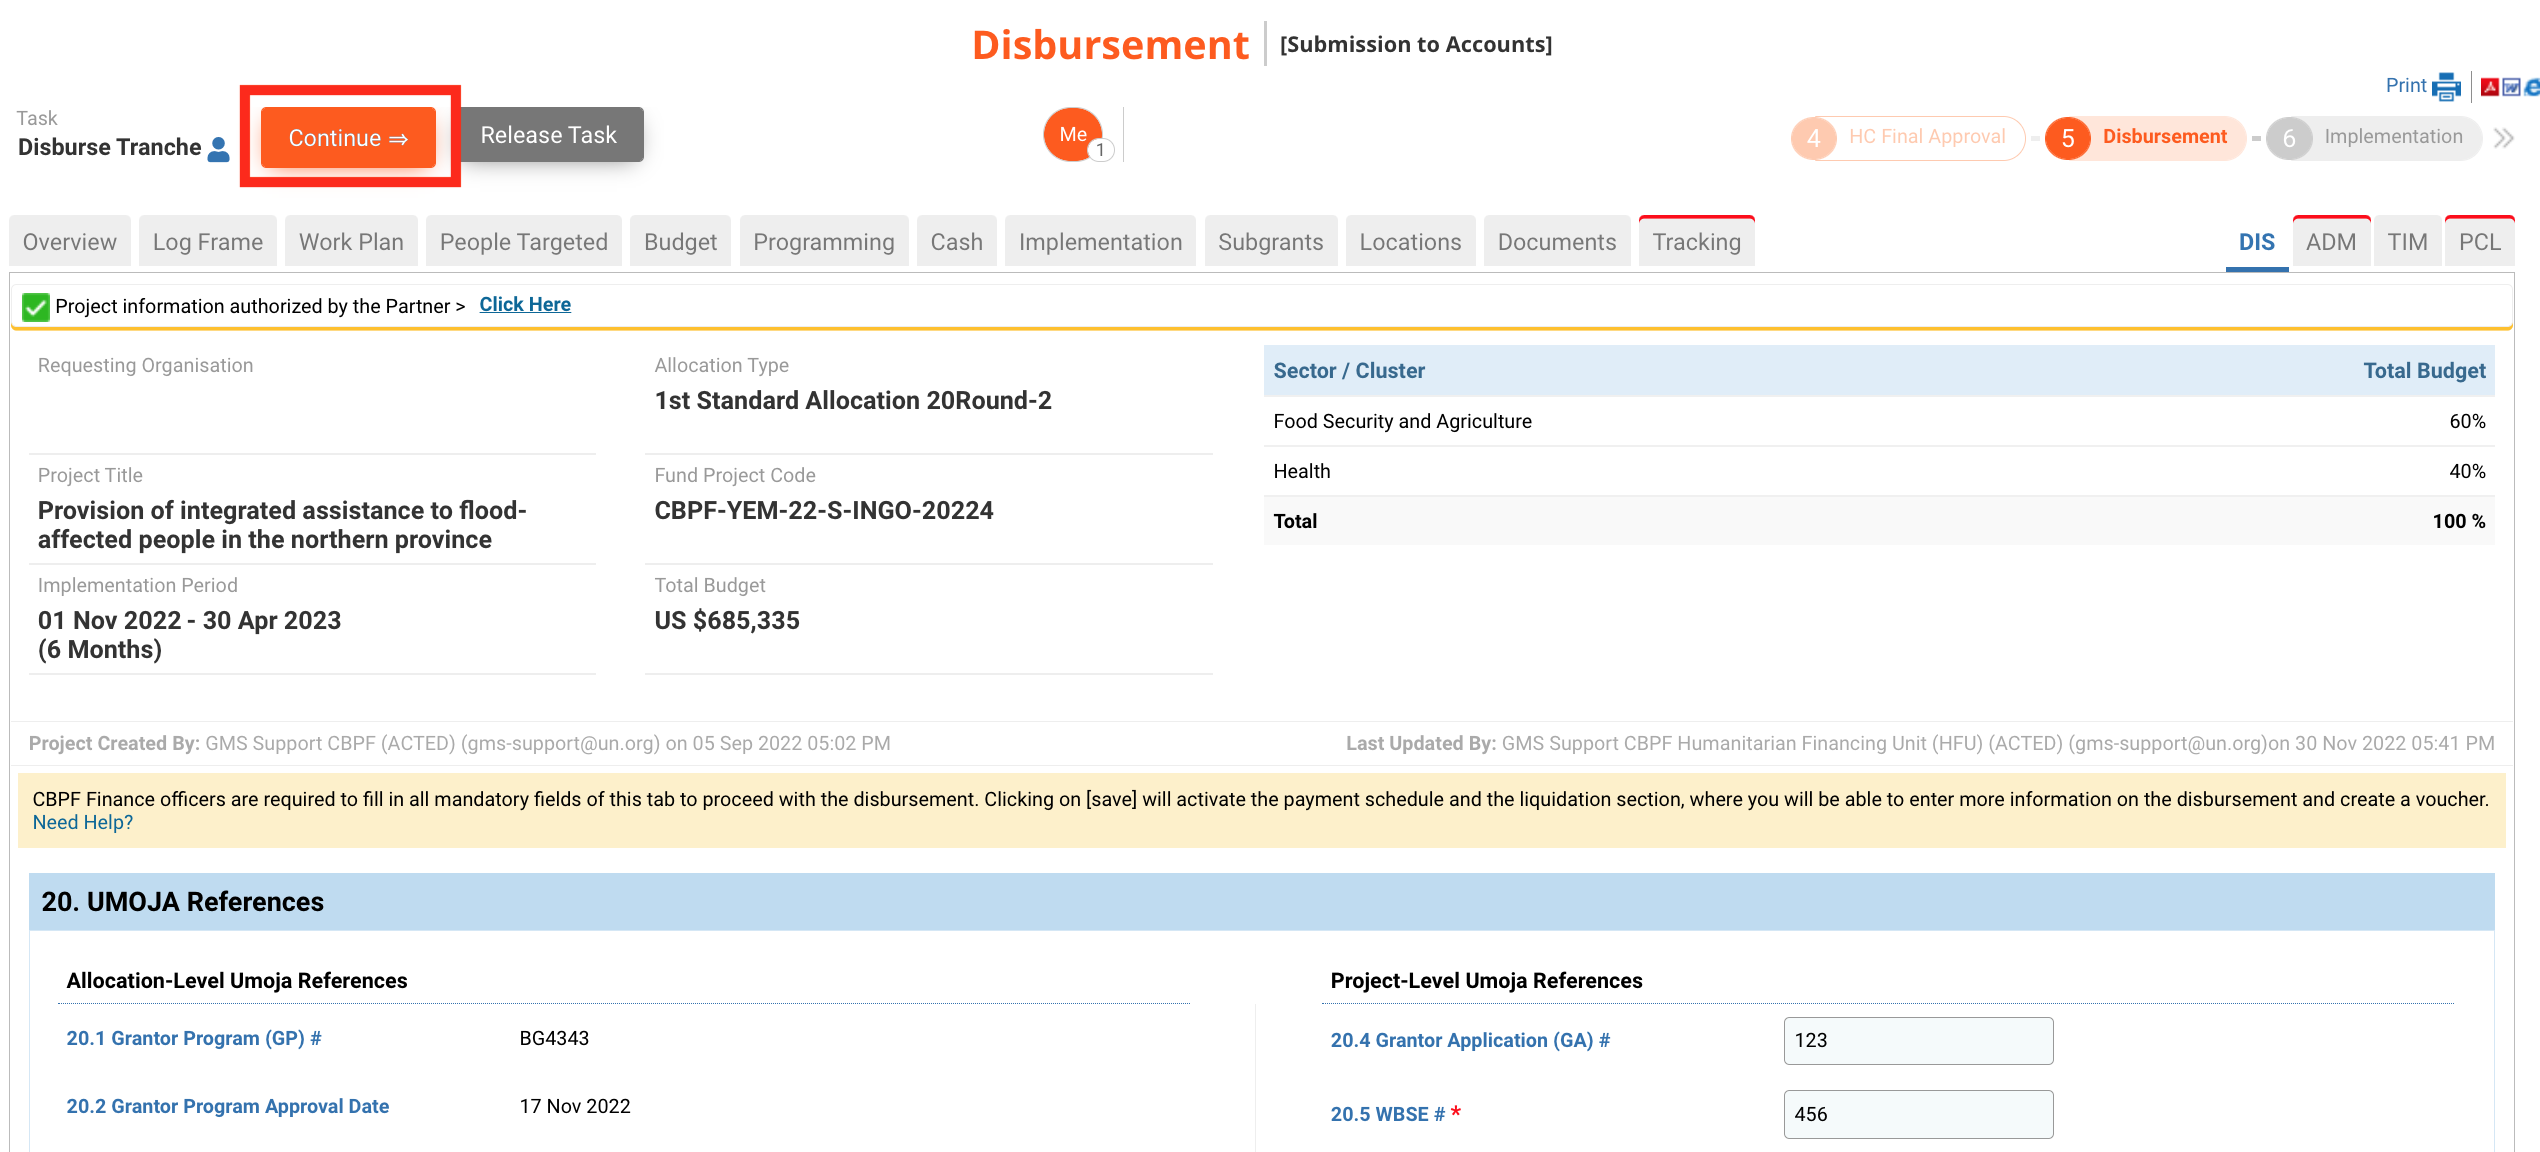
From there, click on [Disburse tranche]. You can leave a comment if necessary.
6) How to trigger and process another tranche disbursement
First option:
Upon approval of an Interim Financial Report from the Partner requesting a disbursement, the system will automatically set the disbursement tab as ‘Begin subsequent Disbursement’. Finance HQ can disburse the next tranche directly by repeating the above steps 2 to 6.
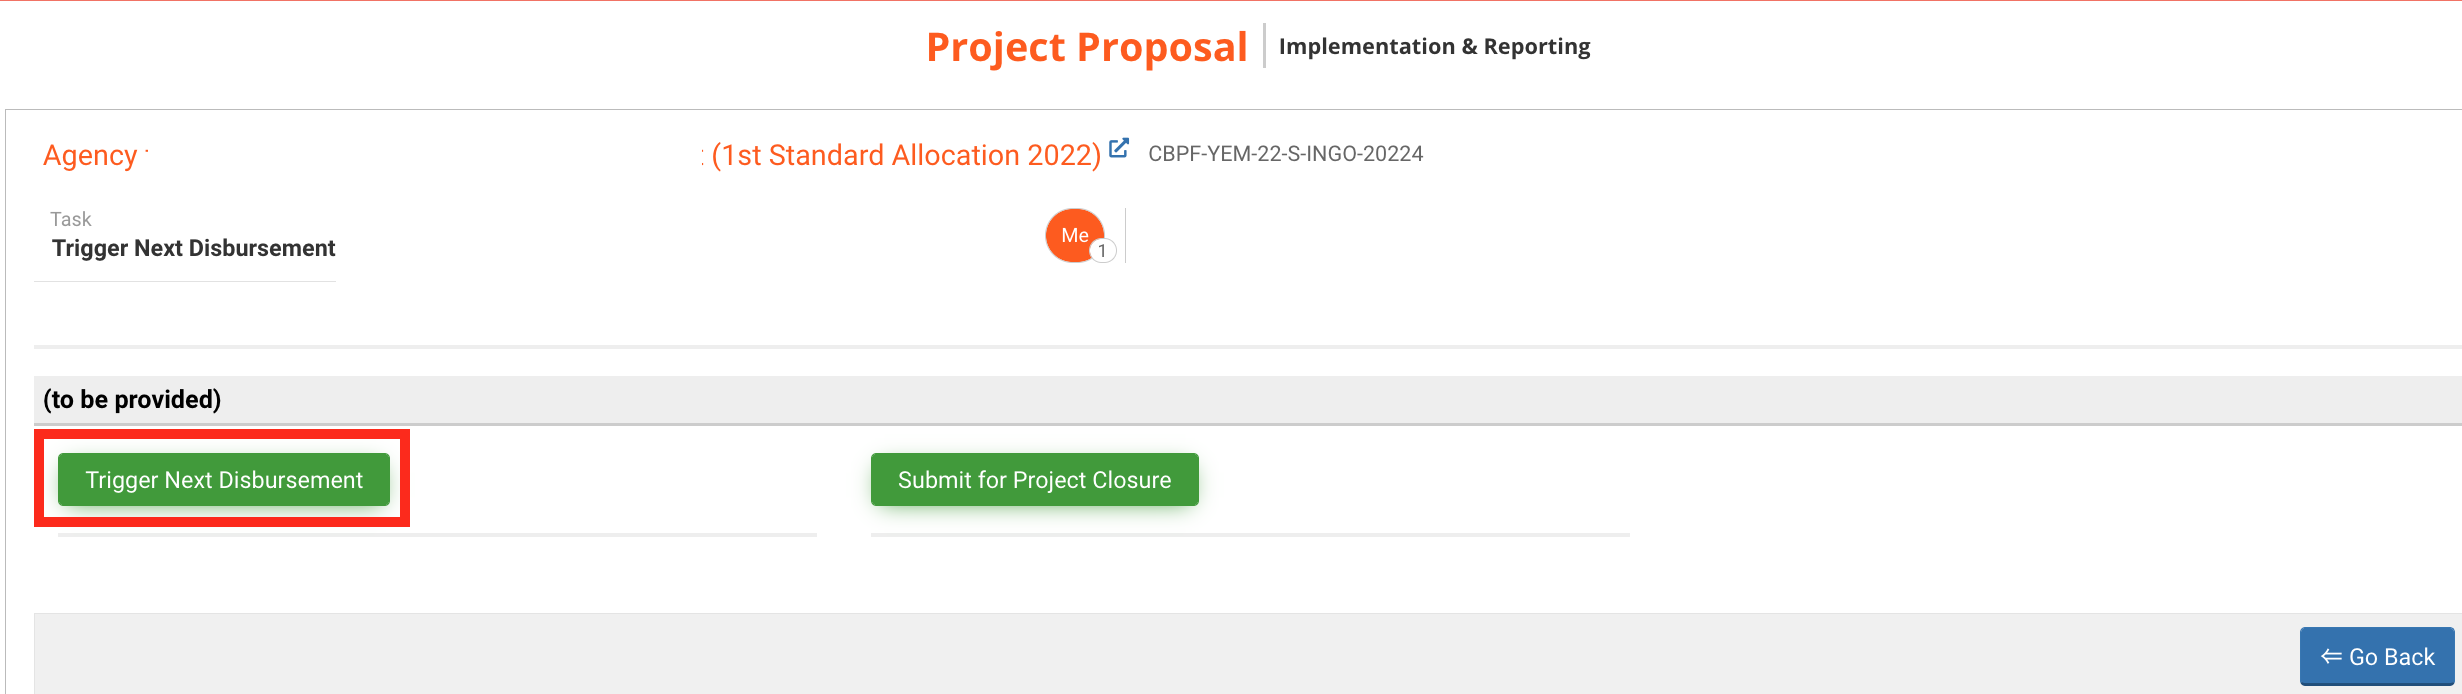
Second option:
CBPF Finance can manually trigger another disbursement by going to the 'Disbursement' tab. Then, access the task page by clicking on [Continue].
Finally, click on [Trigger Next Disbursement].
|
OneGMS Focus: Disbursement from MPTF Funds to UN agencies The Disbursement from MPTF Funds to UN Agencies is a different process than the one described in this article. The Disbursement data is automatically generated in the Disbursement tab upon processing of the Fund Transfer Request (FTR). To learn more on what it is and how to process FTRs, please refer to this article. |