I) Access the revision request
II) Leave comments to the revision request
III) Download revision request documents
IV) The task page
V) Set up the revision request
1) Reset revision
I) Access the revision request
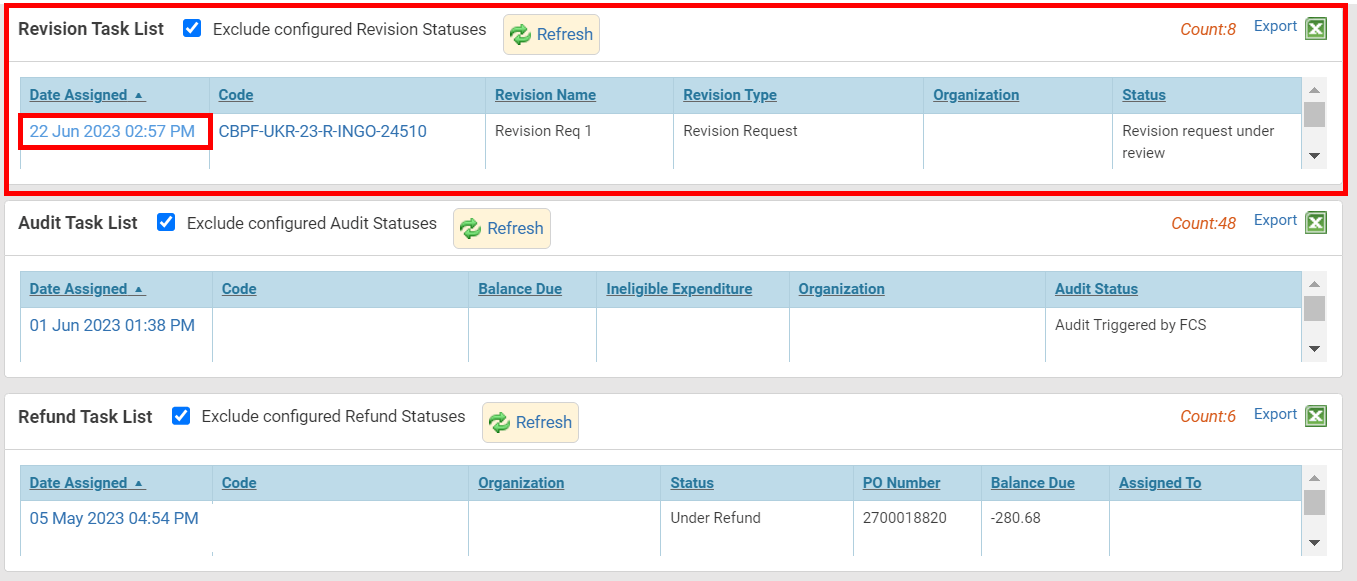
Once the revision request is activated and submitted by the Parter, you will be able to open it and review it from the ‘Revision Task List’ section of your home page. To open the revision request, click on the date under the ‘Date Assigned’ column.
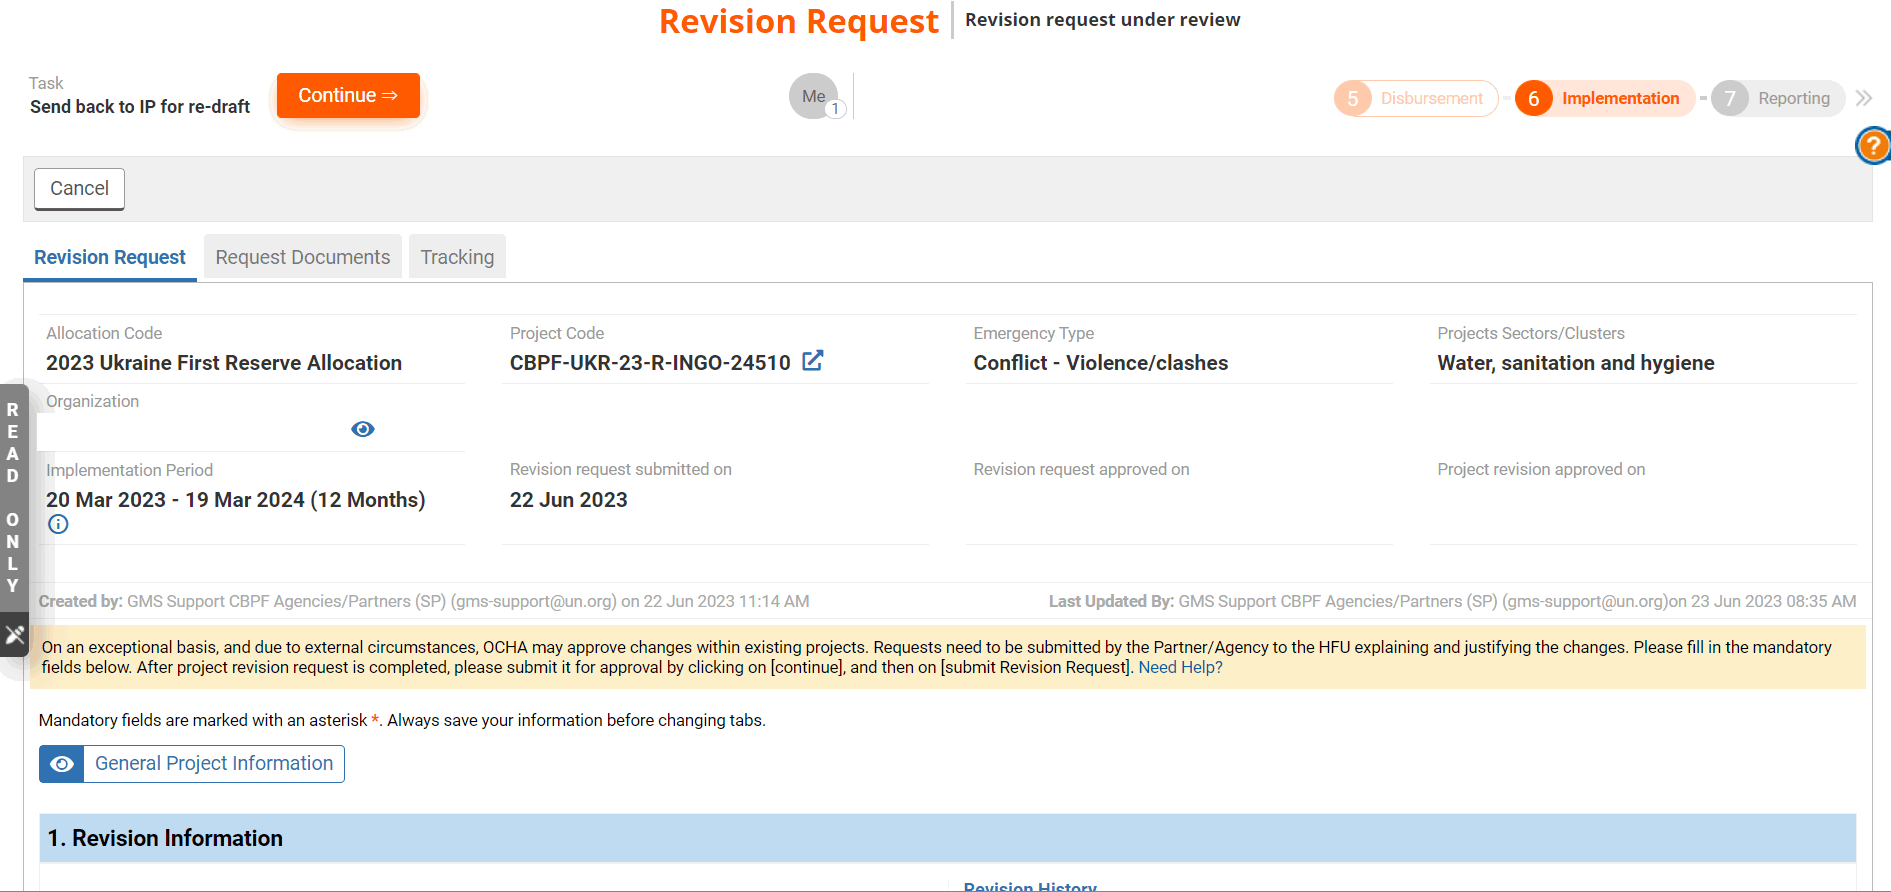
You will have ready-only access to the revision request. Review all the fields of the revision. If you want to read more on each field of the revision request, please click here.
II) Leave comments to the revision request
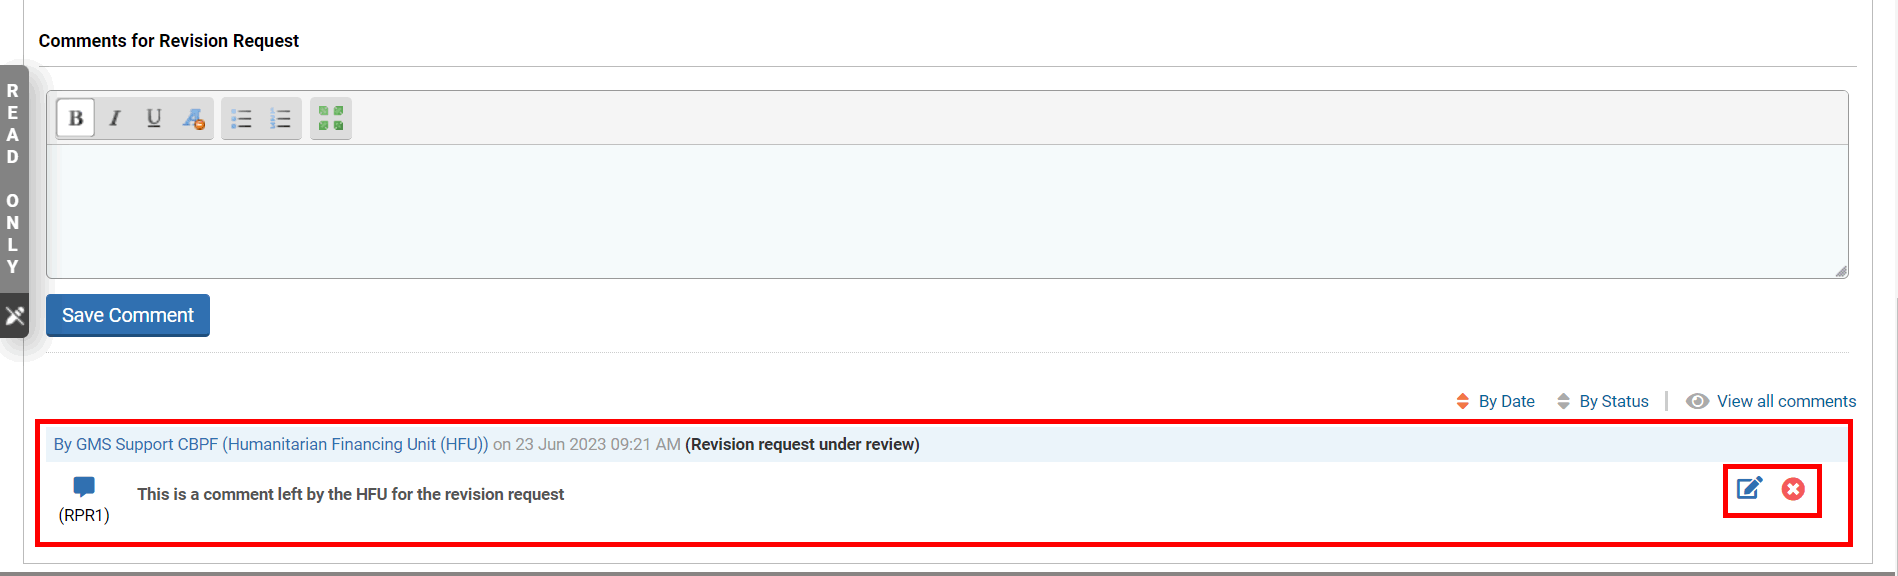
All parties involved in the revision request draft, review and approval have the possibility to leave comments. This is particularly important when corrections are required, and the revision request is sent back to re-draft.
Comments can only be inserted at the tab level and at specific workflow stages, depending on the user role. More specifically, you can only save comments when the revision request is active under your user role. For instance, the HFU will be able to save comments at the ‘Revision request under review’ stage, while the partner will be able to leave comments at ‘Revision Request: Redraft’ step of the workflow.
Leave a comment
To add a comment, go to the bottom of the tab, enter the comment within the comments section provided and click on [Save Comment].
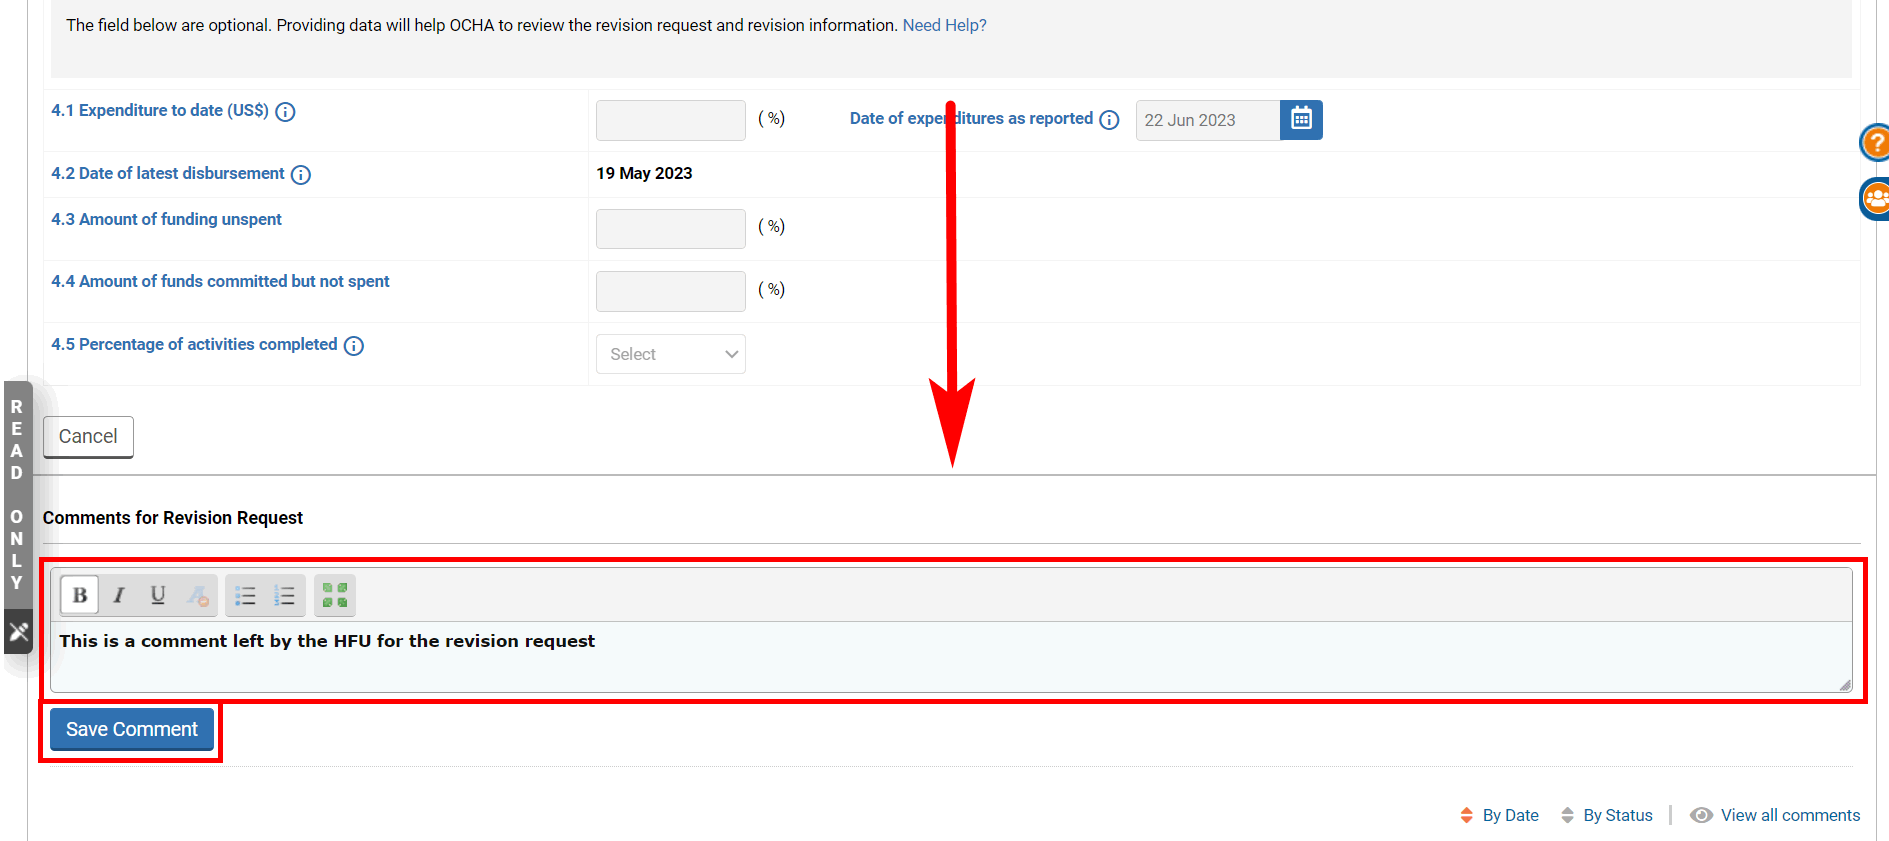
Once saved, the comment(s) will be displayed at the end of the page, below the comment section. The comments trail will provide information on the user who wrote the comment, the date and time stamp of the comment, the workflow status in which the comment was made, and the comment itself. You can use this icon ![]() to edit the comment or this one
to edit the comment or this one ![]() to delete it.
to delete it.
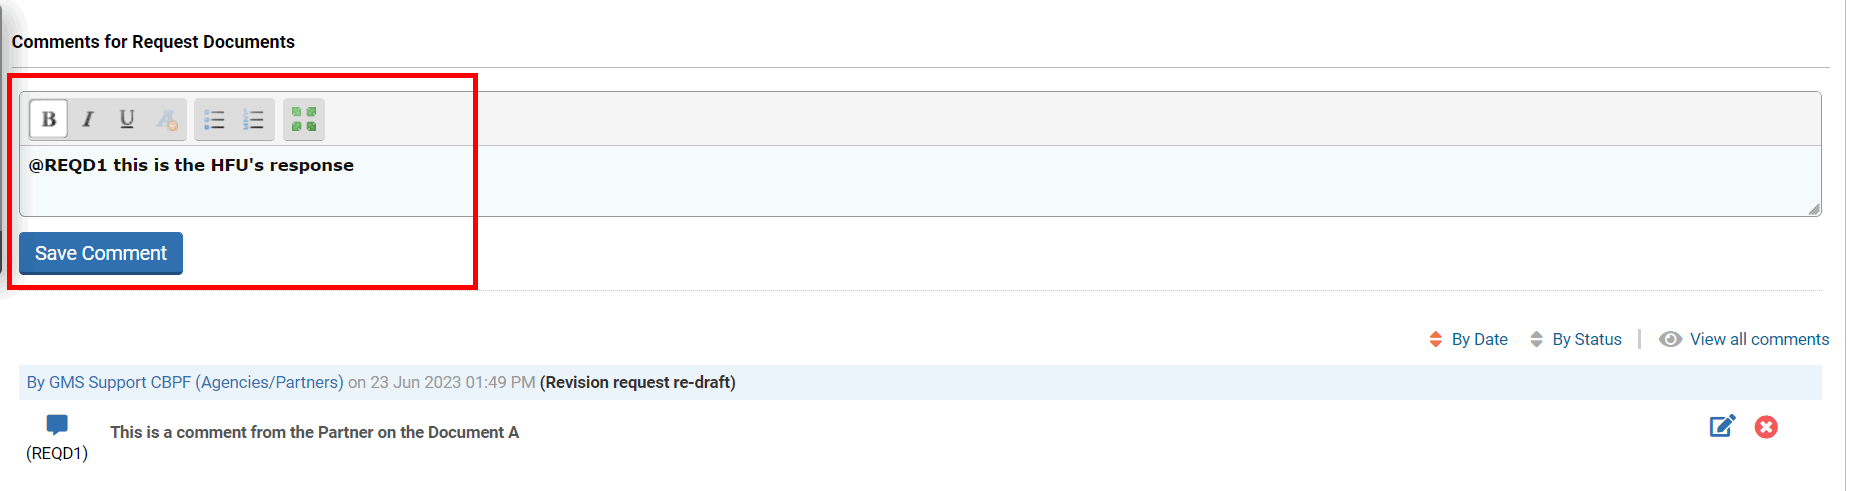
Reply to a comment
If you wish to reply to a specific comment, indicate at the beginning of your comment the comment reference you wish to reply to. The comment reference is displayed between brackets at the beginning of the comment below the comment icon.

For instance, here to reply to this specific comment previously left by the Partner, indicate ‘@REQD1’ at the beginning of your comment.
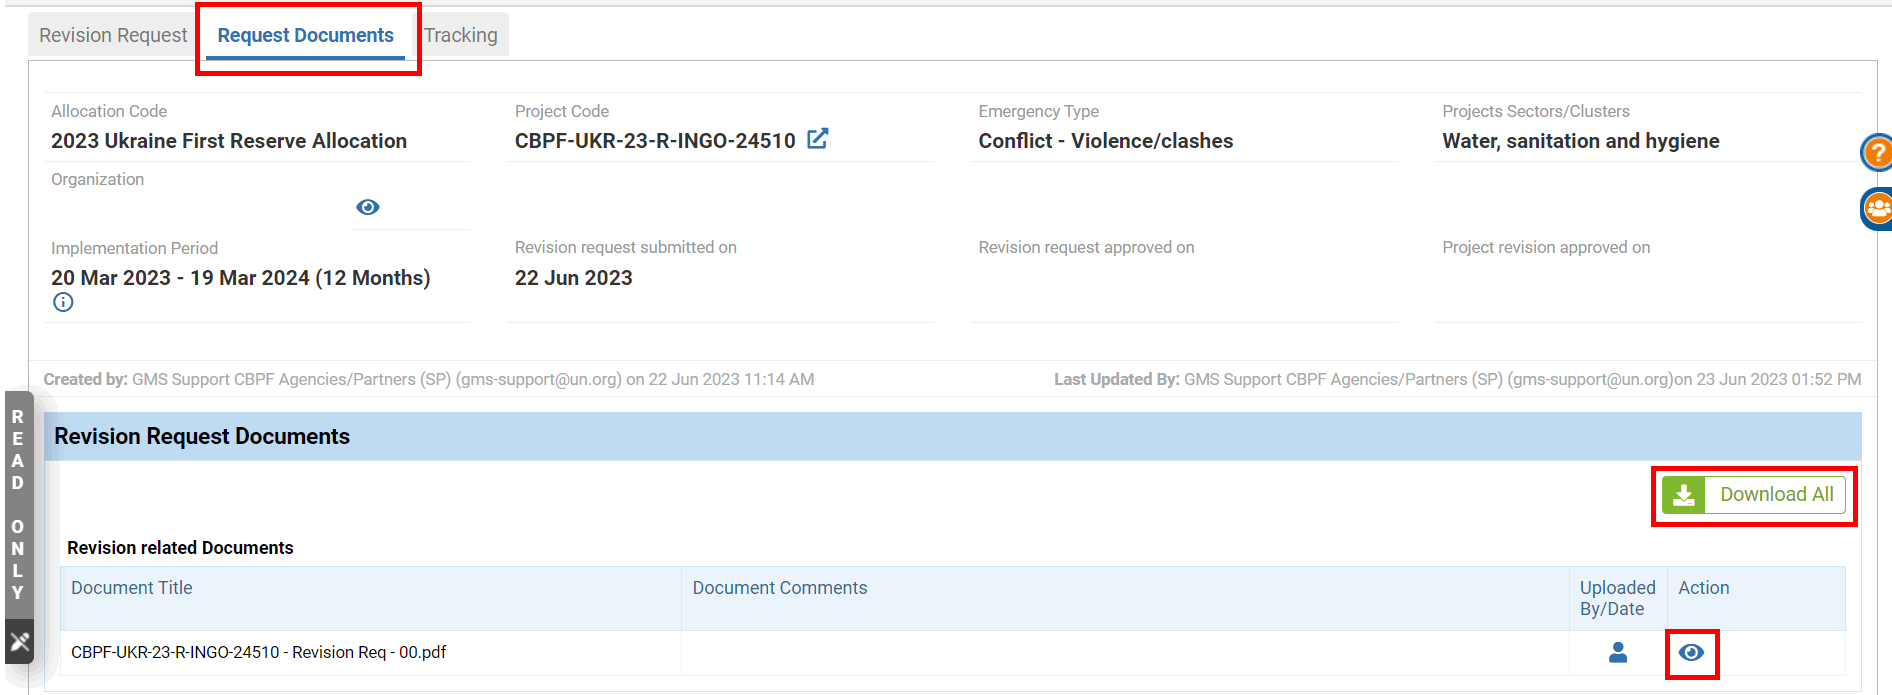
III) Download revision request documents
You can download the documents related to the revision request from the ‘Request Documents’ tab. To do so, click on [Download All] to download all the documents or on this icon ![]() to download a specific document.
to download a specific document.
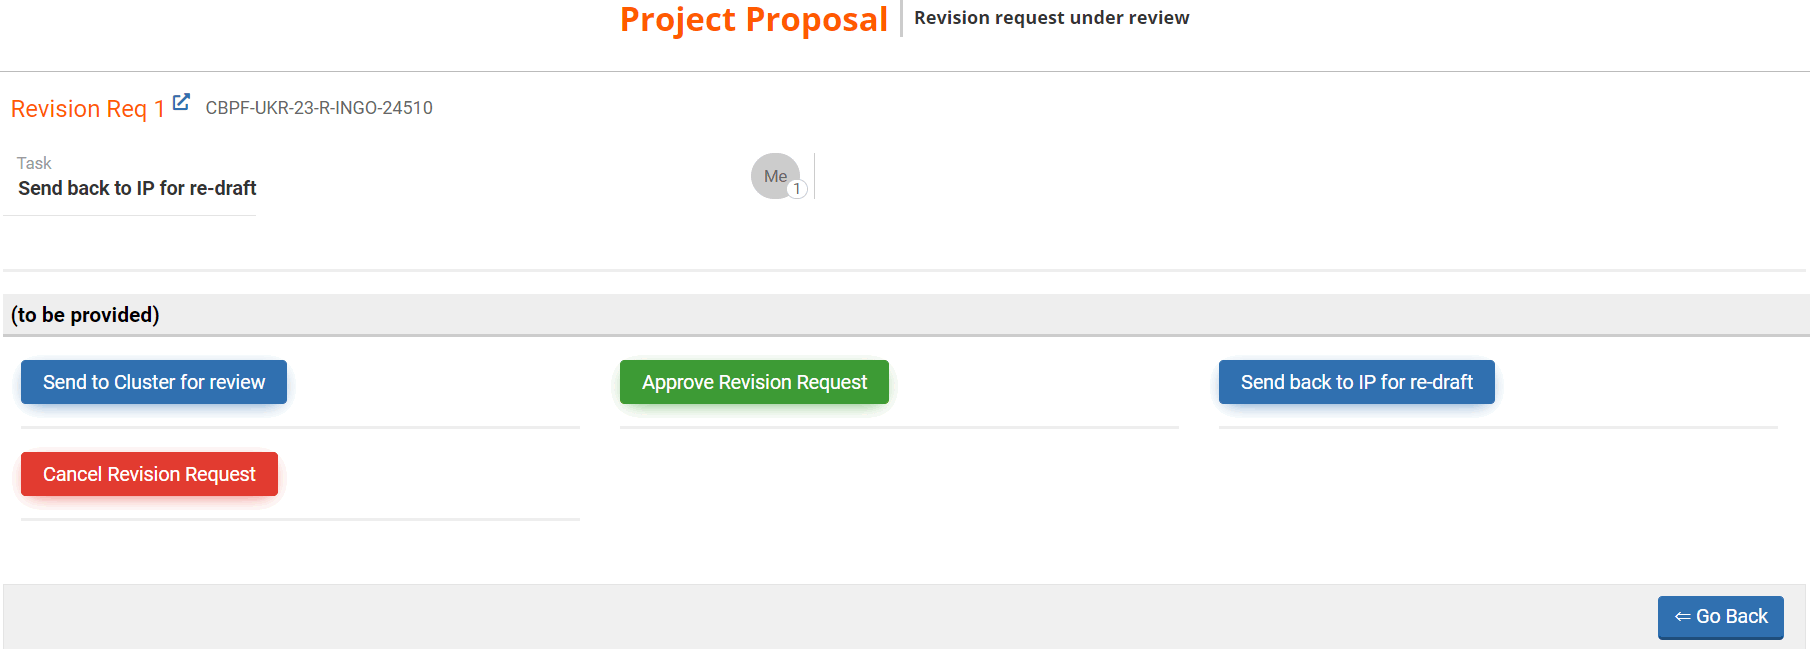
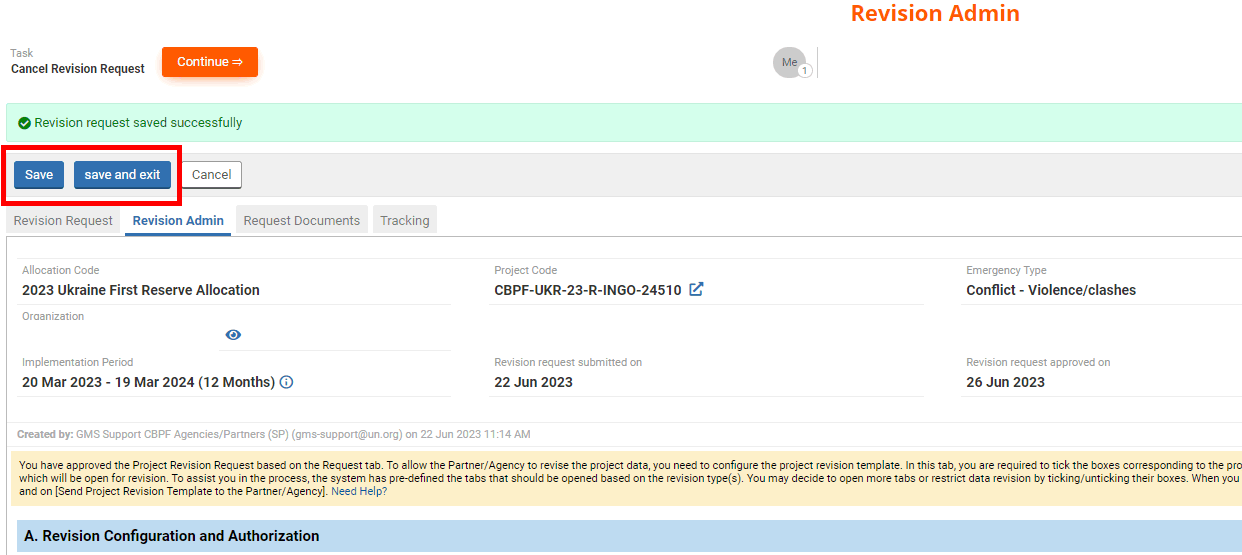
Once you have reviewed and commented on the revision request you can click on [Continue] to open your task page.
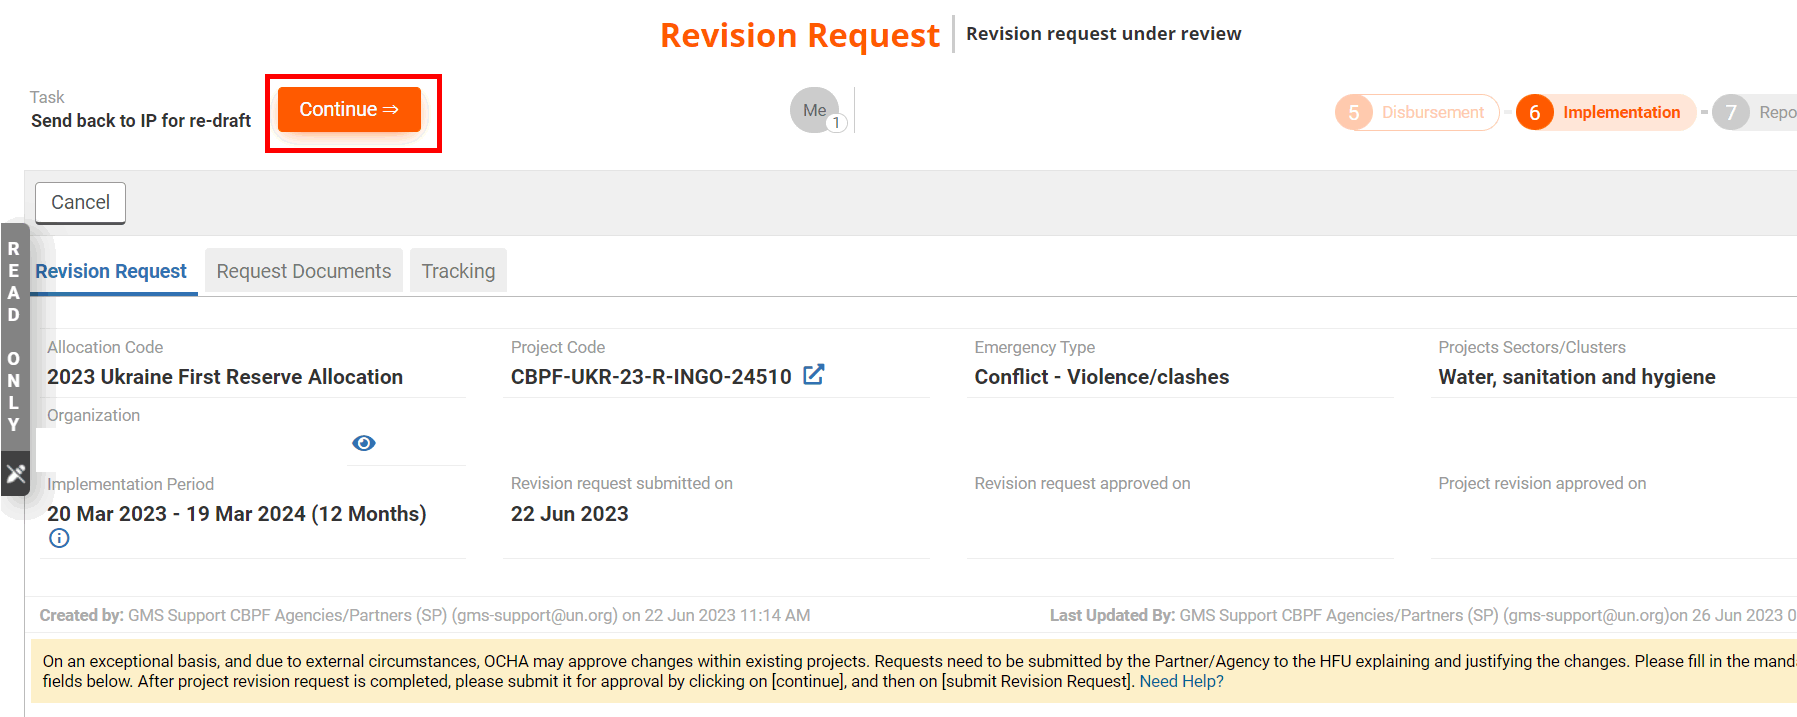
The task page displays all the actions you can perform at this stage:
- Send to Cluster for review: click here to send the revision request to Cluster for their review.
- Approve Revision Request: if no changes need to be made click here to approve the revision request. You will then be able to set up the project revision and the IP will be able to fill it in.
- Send back to IP for re-draft: if changes need to be made, click here to send the revision request back to the IP.
- Cancel revision request: click here if you wish to cancel the revision request.
V) Set up the revision request
Once the HFU has approved the revision request, new tabs will be displayed: the project proposal’s tabs that need to be updated according to the revision request, and the ‘Revision Admin’ tab. The ‘Revision Admin’ tab allows the HFU to configure the project revision template. Indeed, depending on the revision type(s), you may restrict or grant access to the project proposal tabs open for revision. As you can see in the snip below, the system automatically reflects the revision request.
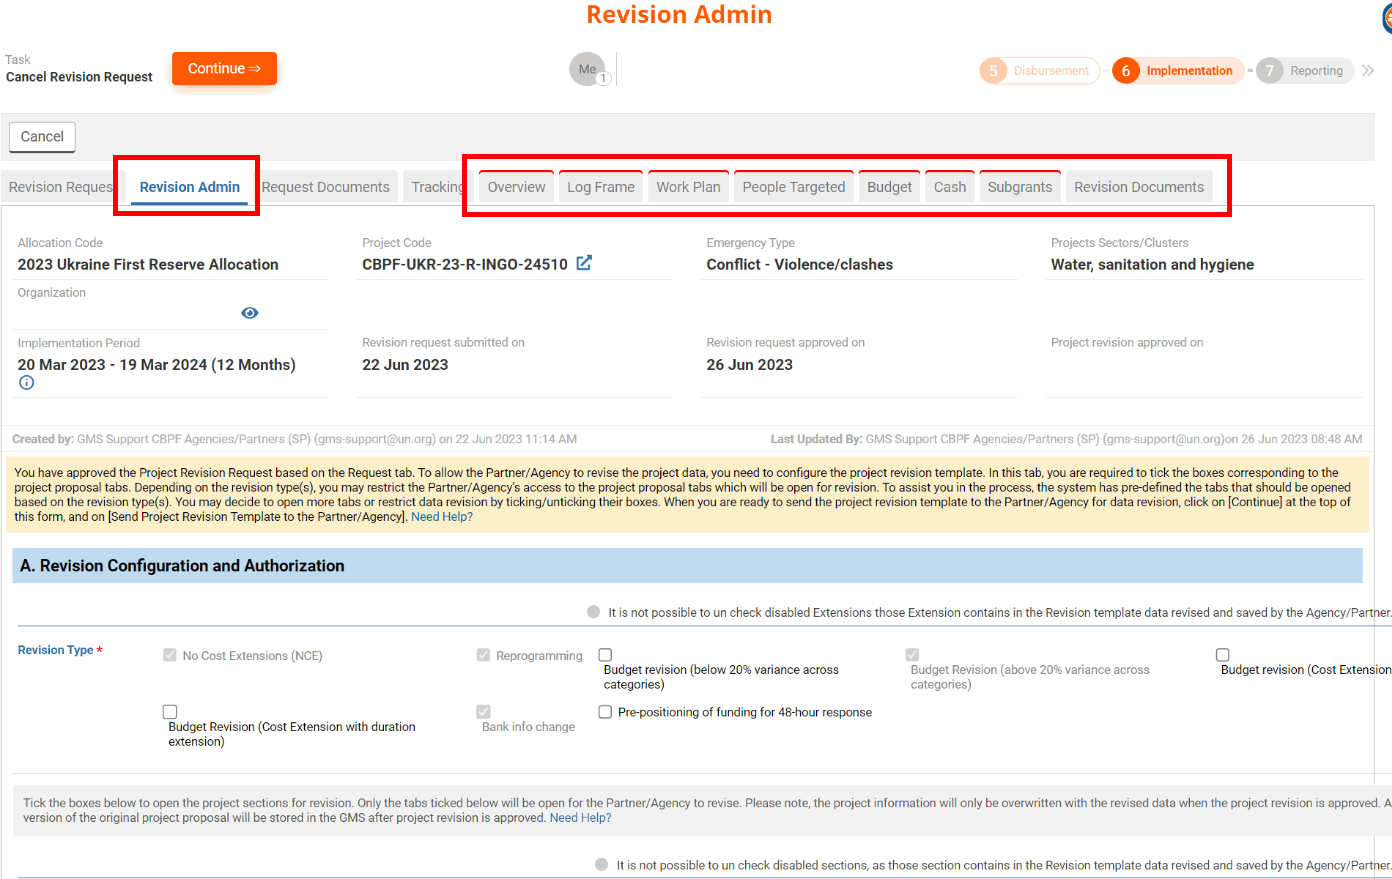
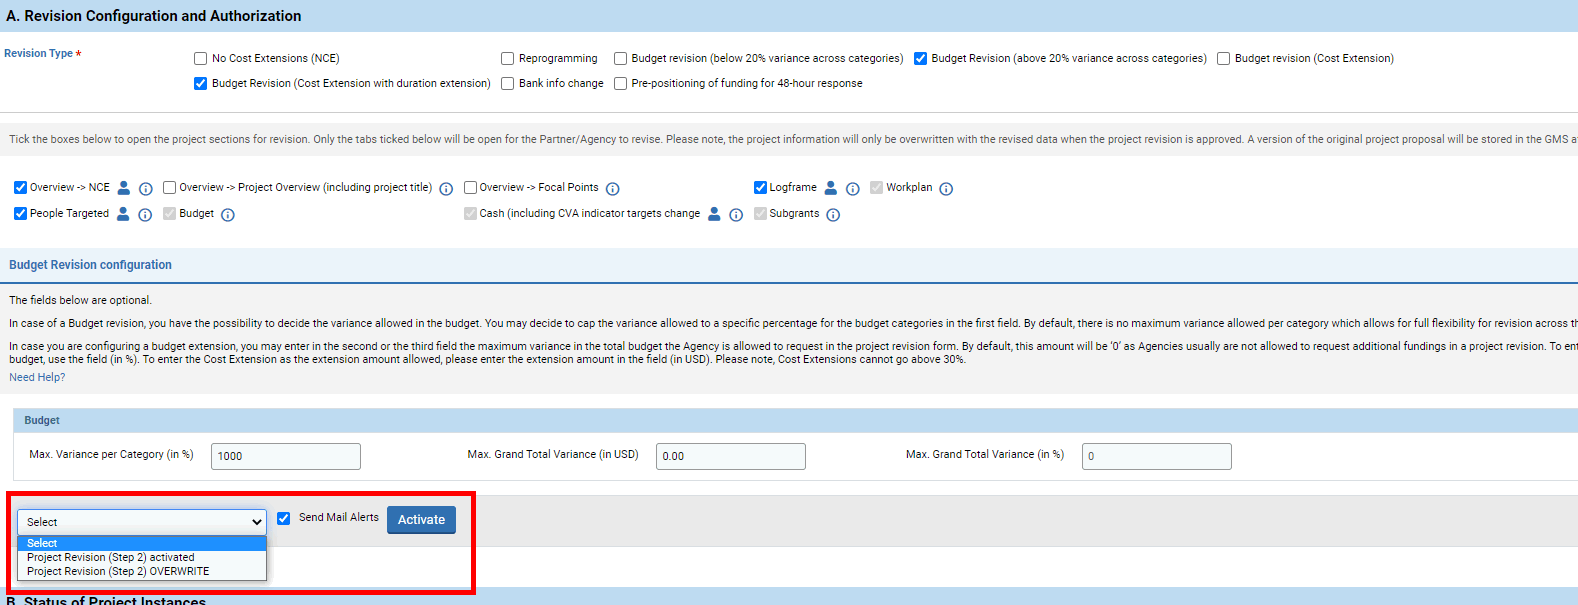
A. Revision Configuration and Authorization
From this section, you can configure the Revision Type and the Budget Revision. Project tabs that are ticked will be editable by the partner.
The system predefines the tabs to be opened according to the type(s) of revision approved (those already ticked by the system). You will not be able to untick them. However, you will be able to tick/untick revision types that were not already approved, as well as the tabs the partner will have to update linked to these types.
Please note: you will not be able to untick a tab that a partner has already started to revise.
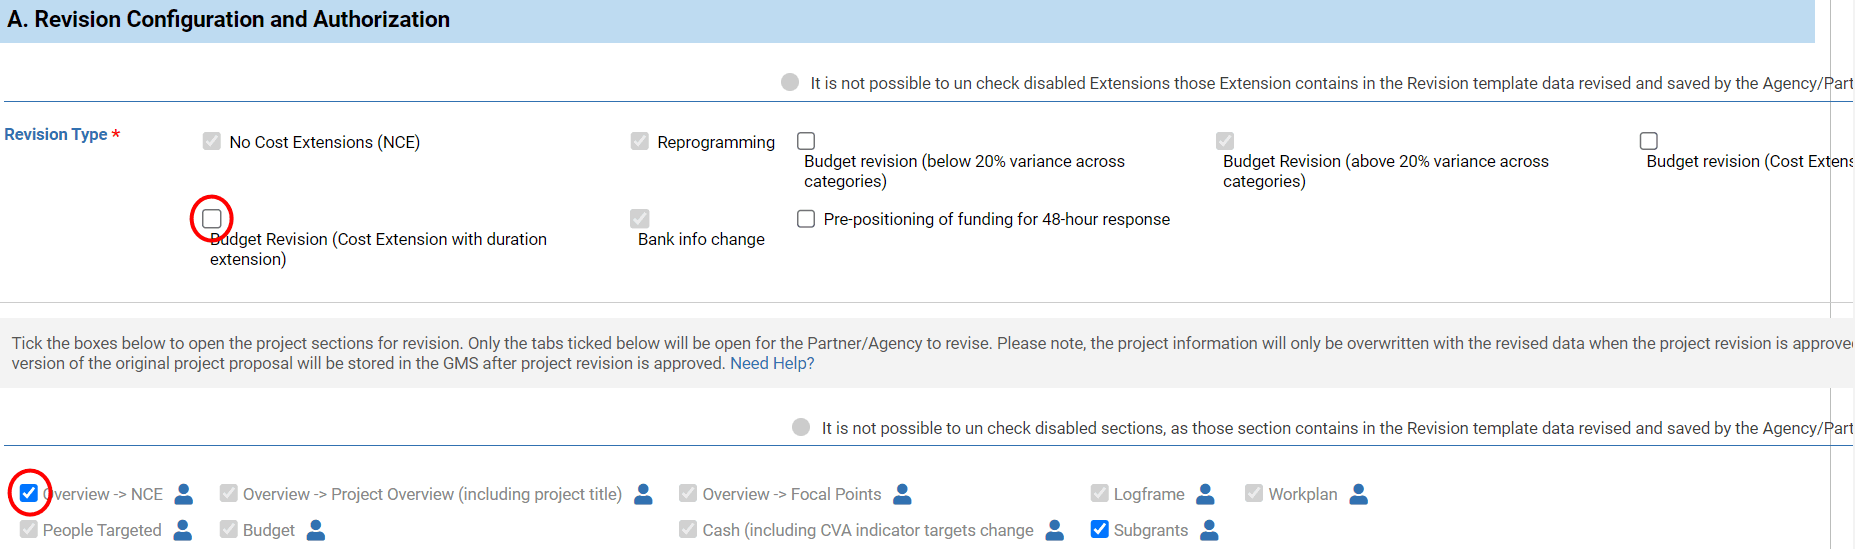
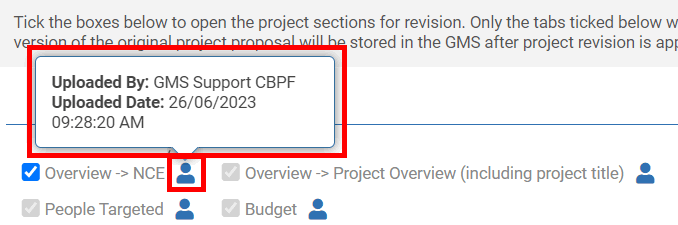
You can hover over this icon ![]() to display the date the tab was last added or removed and by whom.
to display the date the tab was last added or removed and by whom.
In the case of a budget revision, the HFU also has the possibility to cap the variance allowed in a budget category or the total budget. The first field allows you to cap the authorised variance for budget categories. By default, there is no maximum variance allowed per category, which allows total flexibility when revising budget categories.
If you are configuring a budget extension, you can enter in the second field the maximum variance from the total budget that the implementing partner is authorised to request in the project revision form. By default, this amount will be ‘0’ as Partners usually are not allowed to request additional fundings in a project revision.
Please note: cost extensions cannot go above 30%.
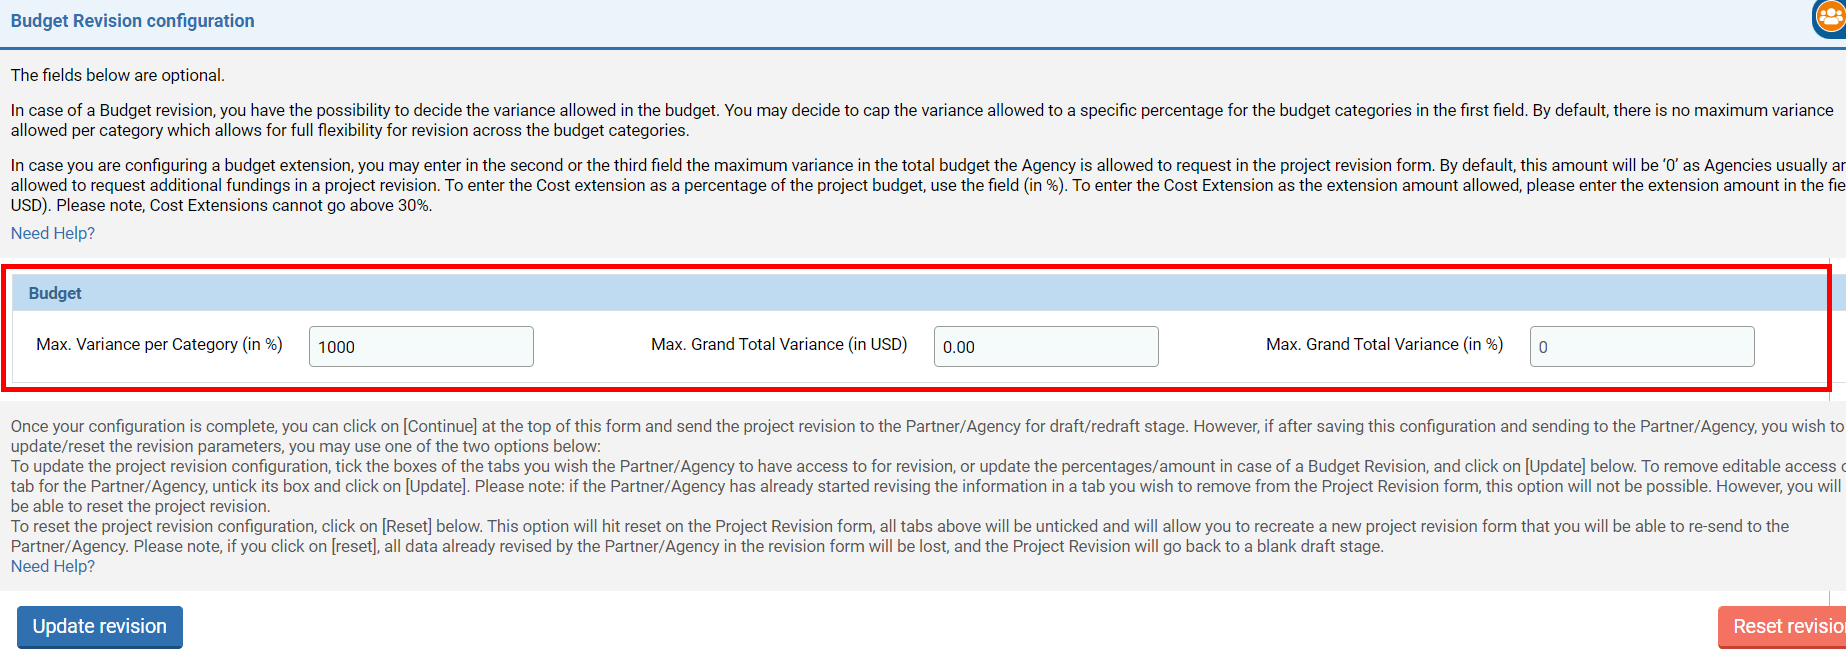
To save the project revision configuration, click on [Update].
Please note: you will not be able to remove a tab that has already been revised by the partner.
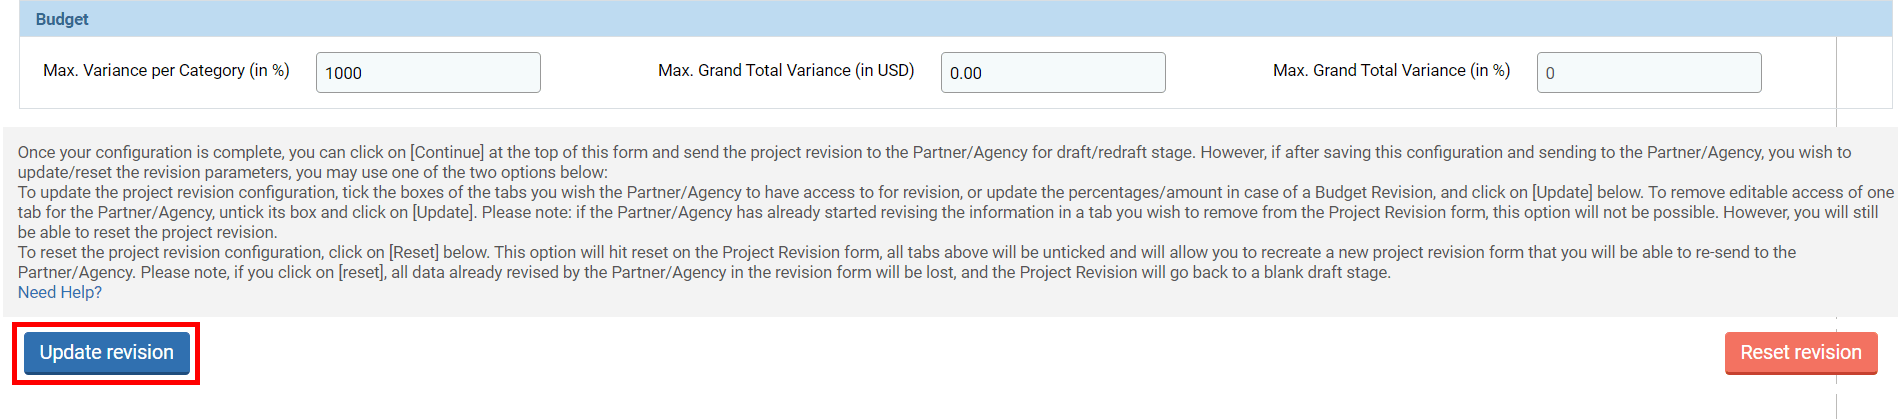
You also have the possibility to reset the Project Revision form by clicking on [Reset].
Please note: if you reset the project revision form, all data already revised by the Partner will be lost and the project revision will go back to a blank draft stage.
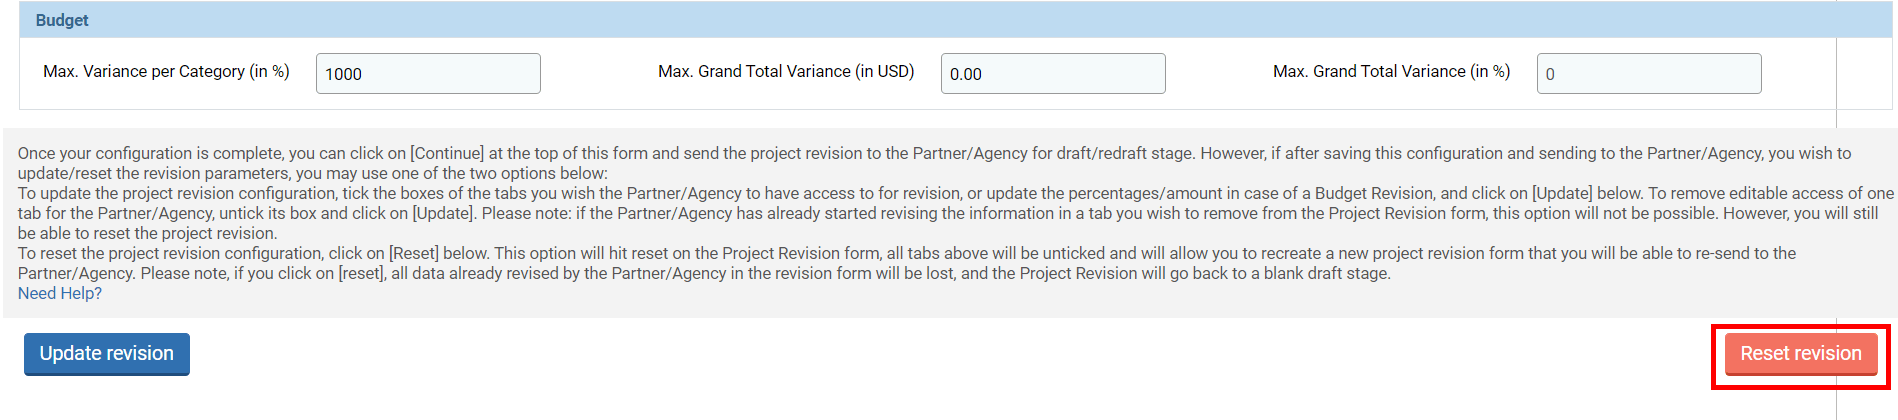
As a result, all tabs above will be unticked and will allow you to recreate a new project revision form that you will be able to send to the partner.
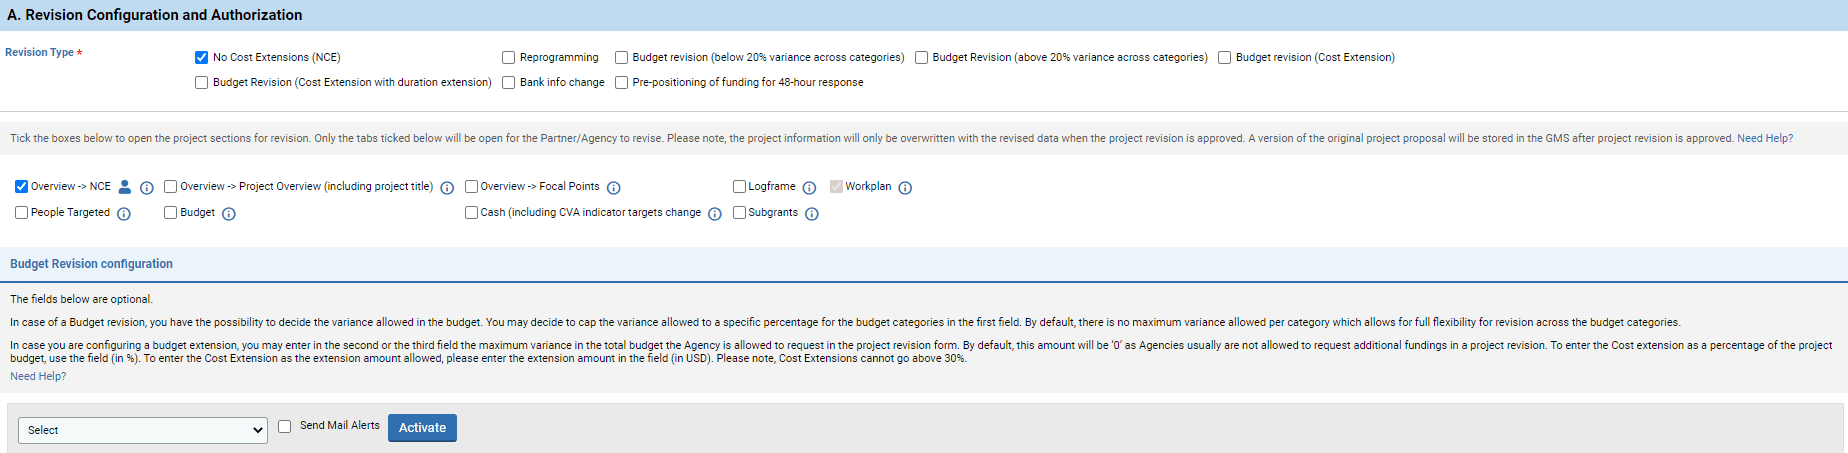
When selecting the revision type, you will notice a dependency between the revision types and the sections/tabs activated by the system. For instance, in case of a No Cost Extension revision type, it will be mandatory for the Partner to revise the Overview – NCE and the Workplan sections of the proposal to update the project end date and activities. However, the Workplan section is not mandatory and can be closed for revision by resetting the revision. This table below shows the sections/tabs that get activated for each revision type (mandatory and non-mandatory).
| Revision Type | Mandatory Activated Revision Sections | Non-mandatory Activated Revision Section |
| No Cost Extension (NCE) | Overview -> NCE | Workplan |
| Reprogramming | Programming -> Protection Subgrants Workplan Programming -> Gender Equality Locations Overview -> Funding Summary Programming -> Persons with disabilities Budget Cash (including CVA indicator targets change) Programming -> Localization |
Overview -> Project Overview (including project title) People Targeted Log frame Overview -> Country Context Overview -> Focal Points Implementation |
| Budget revision (below 20% variance across categories) | Overview -> Funding Summary Budget |
Subgrants |
| Budget Revision (above 20% variance across categories) | Overview -> Funding Summary Budget |
Subgrants |
| Budget revision (Cost Extension) | Overview -> Funding Summary Budget |
Subgrants |
| Budget Revision (Cost Extension with duration extension) | Overview -> NCE Overview -> Funding Summary Budget |
Subgrants Workplan |
| Bank info change | Bank Info tab | |
| Pre-positioning of funding for 48-hour response | Programming -> Protection Subgrants Workplan Programming -> Gender Equality Locations Overview -> Funding Summary Programming -> Persons with disabilities Budget Cash (including CVA indicator targets change) Programming -> Localization |
Overview -> Project Overview (including project title) People Targeted Log frame Bank Info tab Overview -> Country Context Overview -> Focal Points Implementation |
There is also a dependency between some sections/tabs. Indeed, modifying one tab can impact another one. For instance, allowing the modification of the ‘Overview’ tab in case of a NCE will impact the implementation period of the project proposal. Thus, it will be mandatory for the partner to also revise the ‘Workplan’ tab to re-distribute the activities. The table below shows the dependency between the different tabs.
|
Tab source |
Dependent tab |
|
Overview - NCE |
Workplan |
|
Log Frame |
Workplan – Budget – Cash – Subgrants – Locations* |
|
People targeted |
Cash – Locations* - Programming |
|
Subgrants |
Budget |
Once you have configured the revision, do not forget to save your data, as the system will not save it.
Once saved, you can send the project revision form to the Partner. To do so, below the ‘Budget Revision section’, select one of the two options from the drop-down list:
- Project Revision (step 2) activated: select this option if this is the first project revision template that you configured and would like to send to the Partner.
- Project Revision (step 2) overwrite: select this option if the partner already started to revise the project and you would like to overwrite the previous project revision. Consequently, the precedent project revision will be deleted and replaced with this new configuration.
Then tick the box ‘Send Email Active’ if you wish to notify the Partner by email and click on [Activate]
Upon the activation of the project revision form, the project tabs that need to be revised will be displayed.
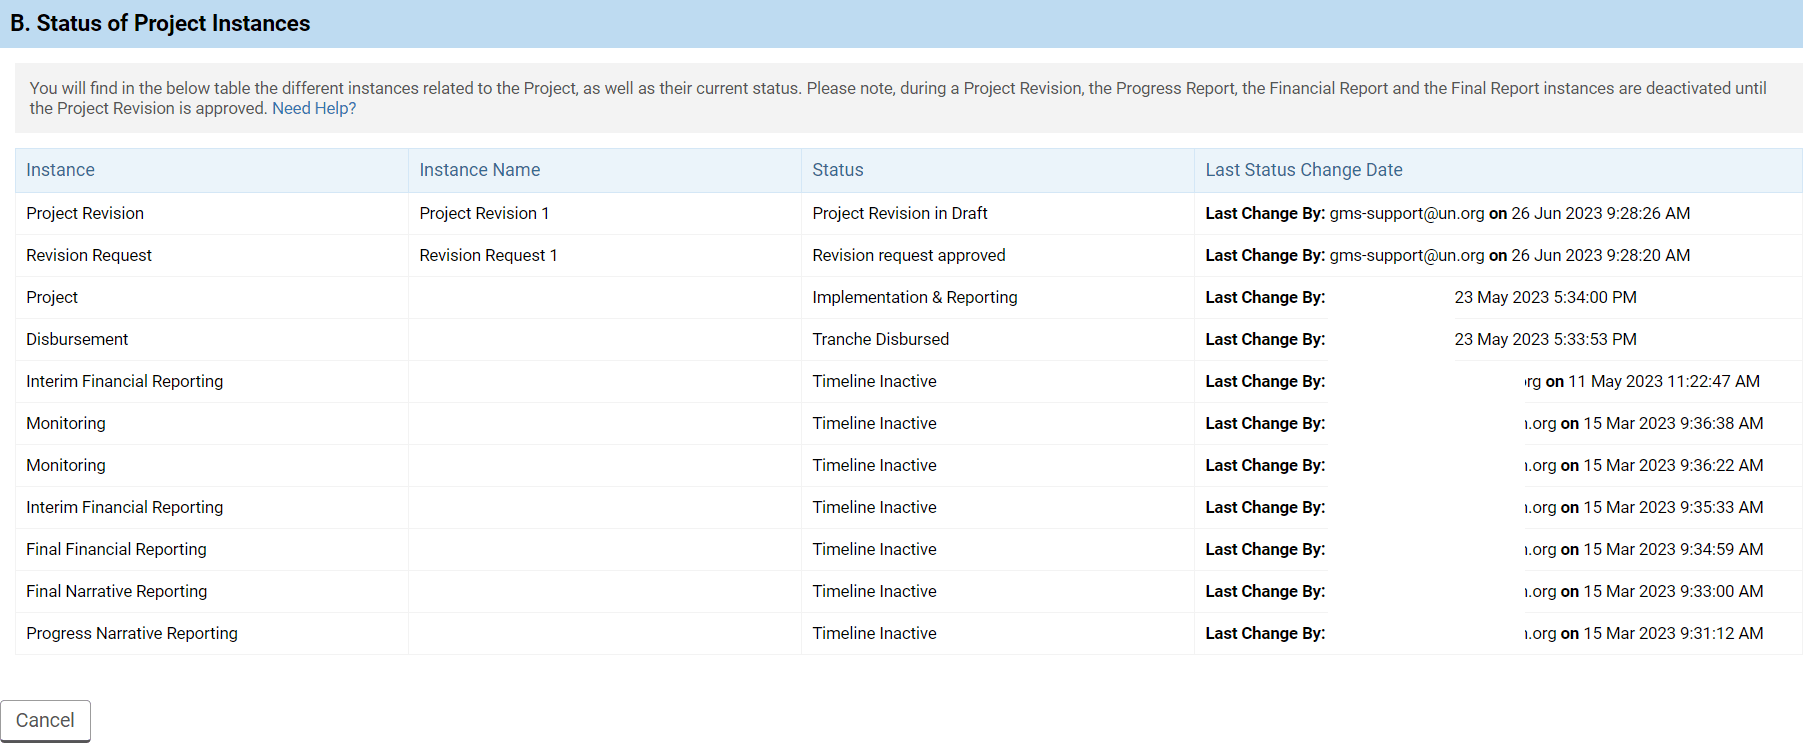
B. Status of Project Instances
This section provides you with the status of the different instances related to the project and its current status.
Please note: during the project revision, the progress, financial, and final reports instances are deactivated until the revision is approved.