II) Fill in the Monitoring tab (HFU)
1) Add participants in the Monitoring tab
2) Insert Actions/Recommendations in the Monitoring tab
III) Send the Actions/Recommendations to CC/IP for action (optional - HFU)
I) Access a monitoring instance in the OneGMS (HFU/CC)
After a monitoring type has been activated in the OneGMS system, the HFU can directly access the instance by clicking on its name in the 'Timelines’ tab.

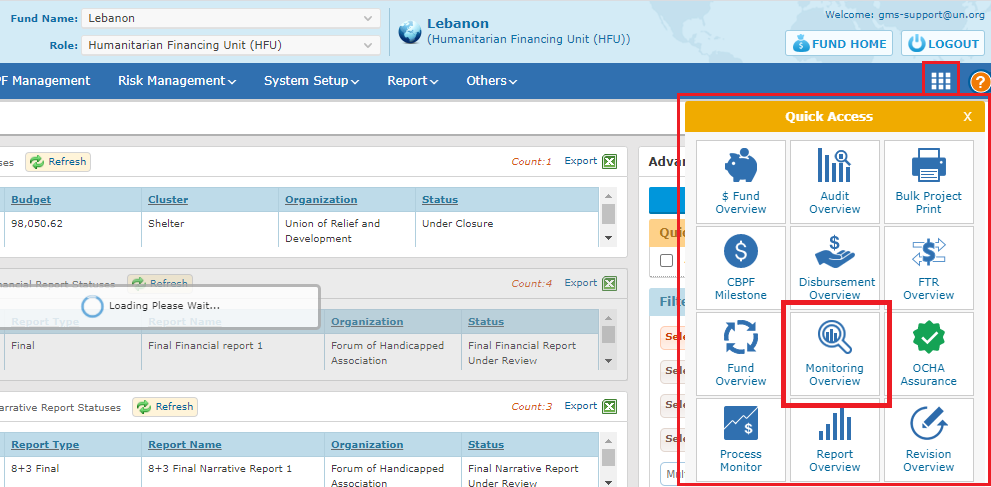
Alternatively, the HFU/CC can go to their homepage and click on [Monitoring Overview] on the Quick Access dashboard to open the Monitoring overview screen.
To generate a Monitoring Overview, select one or more filters from the filters section.
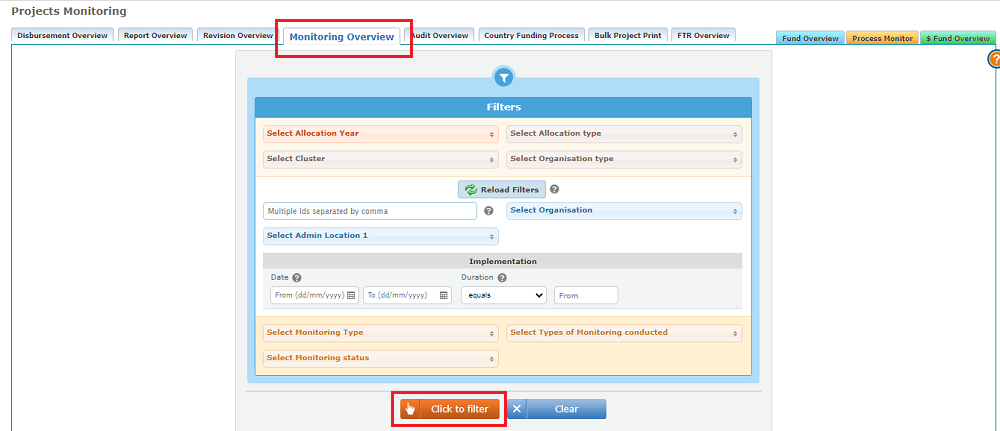
Then click the [Click to filter] button to generate the Tasks Overview.
Click the [Clear] button to reset the entire set of filters.
The OneGMS will display all projects which are active/open for monitoring.

Click on the monitoring instance which are showing Project Monitor status as Active.
Please Note: the monitoring instances are not blocked by active project revisions and can be updated even after the project is closed.
II) Fill in the Monitoring tab (HFU)
Once on the monitoring page, you can fill in the monitoring results and details of the visit or remote call in the monitoring tab.
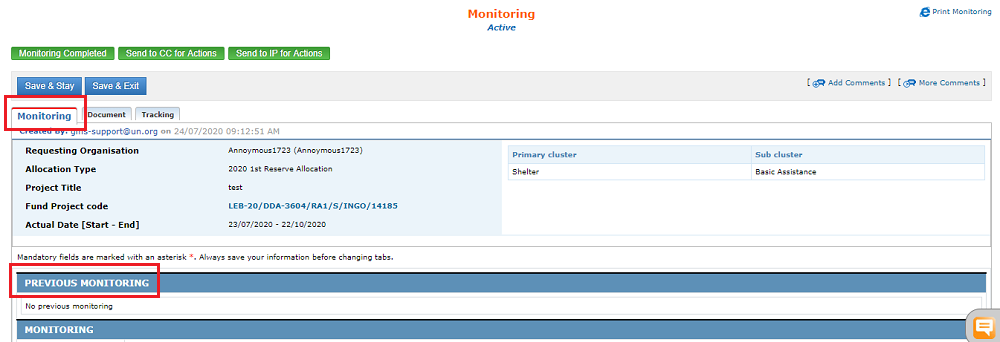
Please note: you will find at the top of the monitoring tab a history log of previous monitoring rounds.
The 'Monitoring' tab is composed of 6 mandatory fields you need to to fill out before clicking on [Save and Stay] / [Save and Exit].

Fields Description:
• Start Date (date dropdown): Select the date on which the monitoring activity has to be/was started.
• End Date (date dropdown): Select the date on which the monitoring activity has to end/has ended. There are intricate links between the date inputted in this field and the OCHA Assurance dashboard. Please make sure you read the article on monitoring and OCHA Assurance dashboard.
• Monitoring Round (dropdown box): Select the applicable monitoring round
• Monitoring Participants: Follow the below mentioned steps to add the monitoring participants.
• Monitoring Type (Check box): Select the type of monitoring.
• Implementation Progress Result (dropdown box): Select the appropriate implementation progress result. Important Note: Please make sure to accurately reflect the Implementation Progress Result in the monitoring report and to choose the same result in the Performance Index pop-up window upon approval of the monitoring report on GMS.
• List Recommendations/Actions for follow-up: The Recommendations/Actions shown here will also appear at the Progress and Final Narrative reporting phases, thus allowing the IP to update this field and put a remark if they have taken the necessary action. Refer to the guidance below on how to add action/recommendations.
1) Add participants in the Monitoring tab
Click on the [Add Participant] button to add participants.
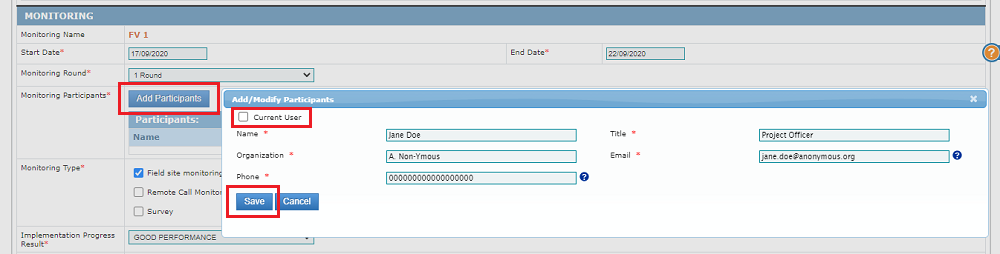
Participants' pop-up window field description:
• Name (Textbox): Enter the participant's name.
• Title (Textbox): Enter the participant's title.
• Organization (Textbox): Enter the organization's name to which the participant belongs to.
• Email (Textbox): Enter the email address of the participant.
• Phone (Textbox): Enter the contact details of the participant.
Click on the [Save] button to add the participant details.
After saving a participant you can click on the [Edit] link to modify the participant details or click on the [Delete] link to remove the participant from the monitoring list.

2) Insert Actions/Recommendations in the Monitoring tab
Click on the [Add Recommendations/Actions] button to add recommendations/Actions.
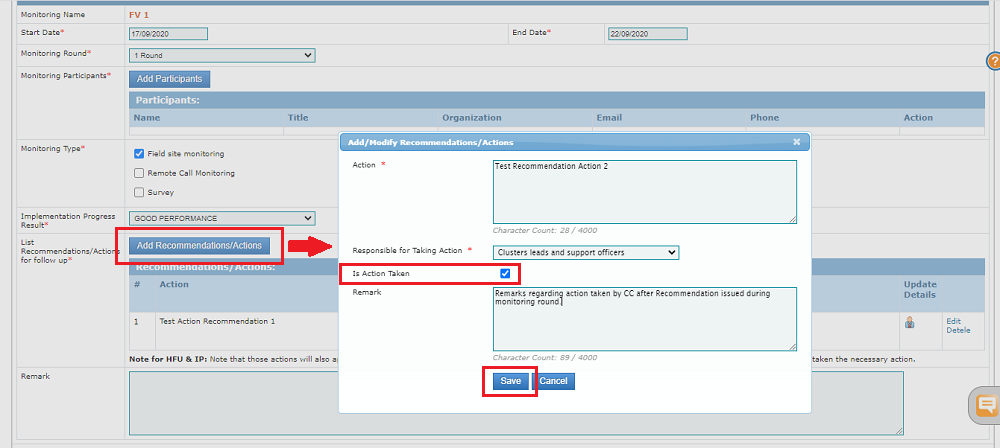
Pop-up window Field Description:
• Action (Textbox): Enter the action name.
• Responsible for taking action (dropdown box): Select the person responsible for taking appropriate action.
• Is Action Taken (Checkbox): Select the checkbox if, and only if, the action has been taken by the responsible person.
Click on the [Save] button to add the details.
After saving a recommendation you can click on the [Edit] link to modify the recommendation’s details, or to update whenever action has been taken.

You can also click on the [Delete] link to remove the recommendation from the monitoring list
Please note: all action points from the monitoring tool will be automatically shown in the Progress and Final Narrative report of the IP, as shown in the screenshot below.
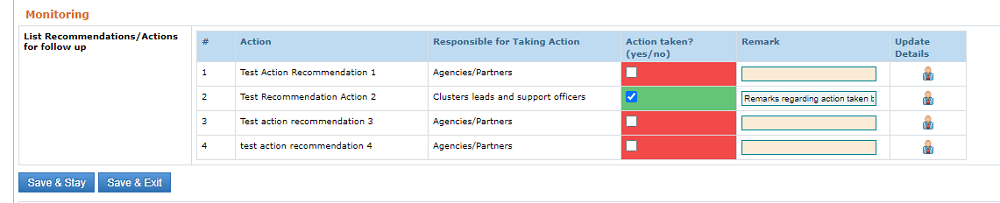
(The screenshot above is taken from the narrative report module on the GMS. You can see that the recommendations inserted in the monitoring module are automatically saved in the progress/final narrative report module).
The IP will be able, in the narrative report, to tick the box of a recommendation and mark it as ‘Action Taken’. In this case, the box turns green in BOTH the reporting and monitoring modules.
Ex. 1: Reporting module:
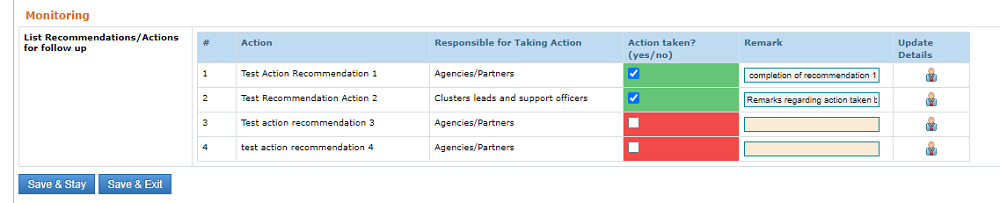
Ex. 2: Monitoring Module

If there were no actions/recommendations from monitoring, the IP’s view in narrative reports will be:
To learn more about narrative reporting and monitoring recommendations, please refer to this article in the Help Portal.
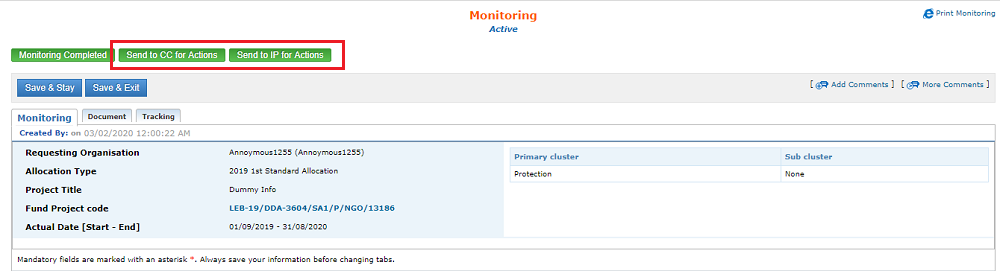
III) Send the Actions/Recommendations to CC/IP for action (optional - HFU)
After the HFU has activated the monitoring instance, filled in the necessary information, and updated the recommended actions, they can send the monitoring report to the Implementing Partner or Cluster Coordinator if necessary.
In this case, an email alert will be sent to the party who receives the task.
• Click on the [Send to IP for Actions] button to send the monitoring recommendations to Implementing Partner for actions.
• Click on the [Send to CC for Actions] button to send the monitoring recommendations to the Cluster Coordinator for actions.