Once the disbursement has been processed by the accounts team, you will have to go back to the ‘Disbursement’ tab to enter the disbursement details. To do so, go to your home page where a new task called ‘Confirm Tranche Disbursement’ will be displayed in your ‘Disbursement Task List’. To open the ‘Disbursement’ tab, click on this icon  .
.

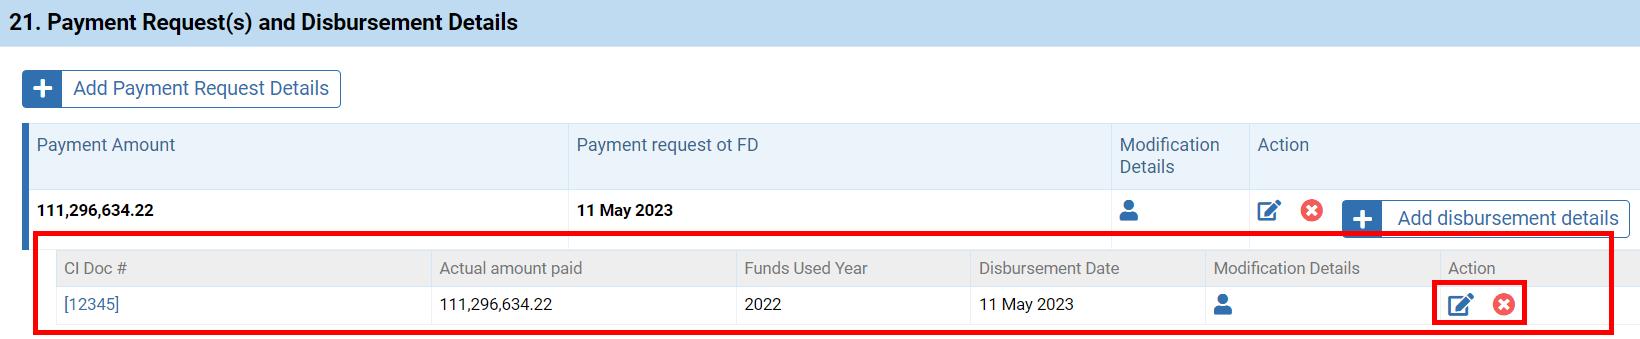
On the ‘Disbursement’ tab, go to the ‘Payment Request(s) and Disbursement Details’ section and click on [Add disbursement details].

On the pop-up window, fill in all mandatory fields and click on [Save] to attach the voucher.

Fields description:
Payment Doc # : enter the unique number generated by UMOJA.
Actual Amount Paid *: the total amount for disbursement is displayed by default. However, you can edit it if a different amount was disbursed.
Allocation year: the year the project’s allocation is automatically displayed.
Disbursement Date*: select from the calendar the date the amount was disbursed.
ERC Approval Date: the date on which ERC approved the project is automatically displayed.
# day(s) Since Approval: the system automatically calculates and displays the number of days that have elapsed between ERC approval date and the disbursement date.
Comments (*): this field is mandatory only if the amount paid is different from the amount in the payment request.
Your voucher is now attached to the payment schedule. Click on this icon ![]() to edit it or this icon
to edit it or this icon ![]() to delete it.
to delete it.
You can now click on [Continue] to confirm the disbursement and save the disbursement date and amount.
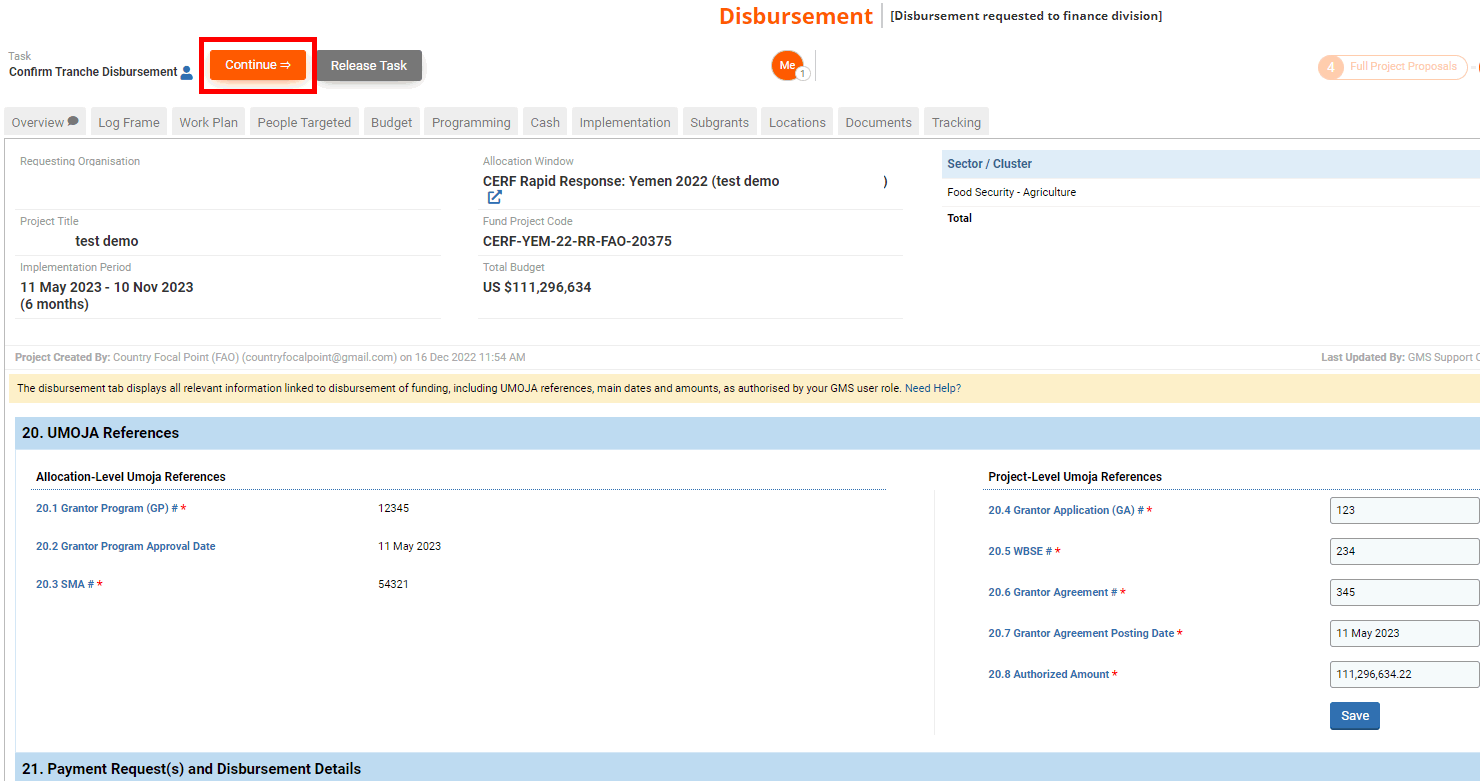
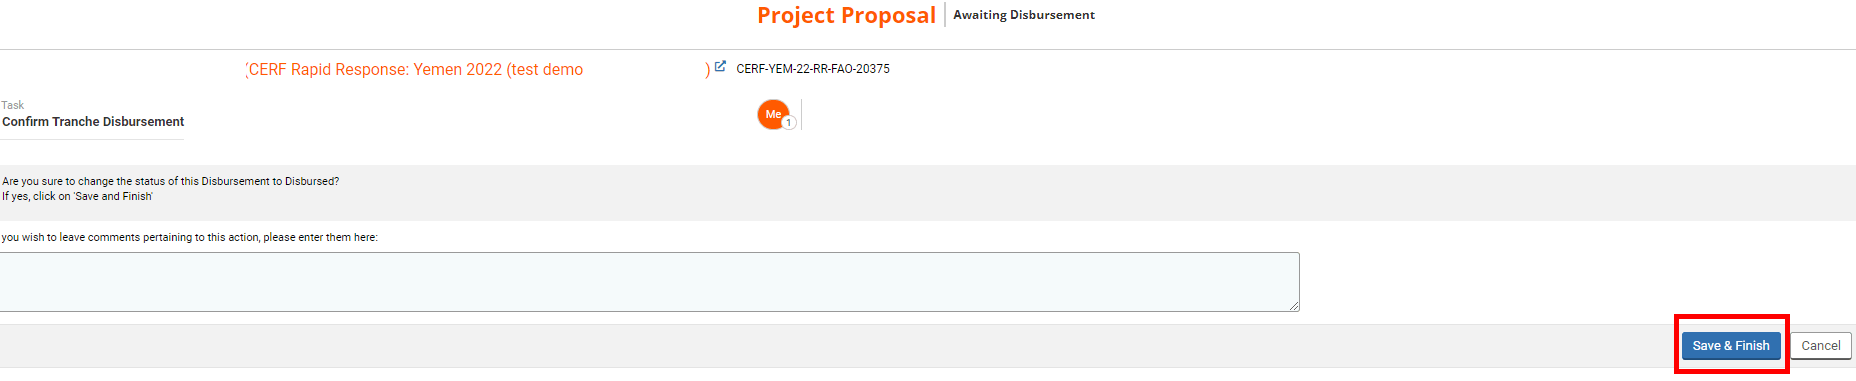
And click on [Tranche Disbursed].

You can leave a comment pertaining to this action if necessary and click on [Save & Finish] to confirm the disbursement.