The Overview tab includes general project information and is the first one to be filled out by the organization. All fields marked with an asterisk * are mandatory.
Please note that all the data provided in the screenshots of this article is purely indicative.

In this first section, the user will provide general information about the project.
1.1 Allocation Type Category
If relevant, OCHA staff will select the allocation corresponding to the project.
![]()
1.2 Fund Project Code
The Fund Project Code is automatically generated by the system as a reference for the project. It includes the name of the fund and the category of your organization. The four or five last numbers are unique to each project and will allow to refer it.

1.3 External/Organization’s Project Code
If relevant, enter your organization’s reference or code for this project.

1.4 Organization Sequence
This automatically generated figure indicates the number of projects financed by the CBPF fund the organisation is applying to.

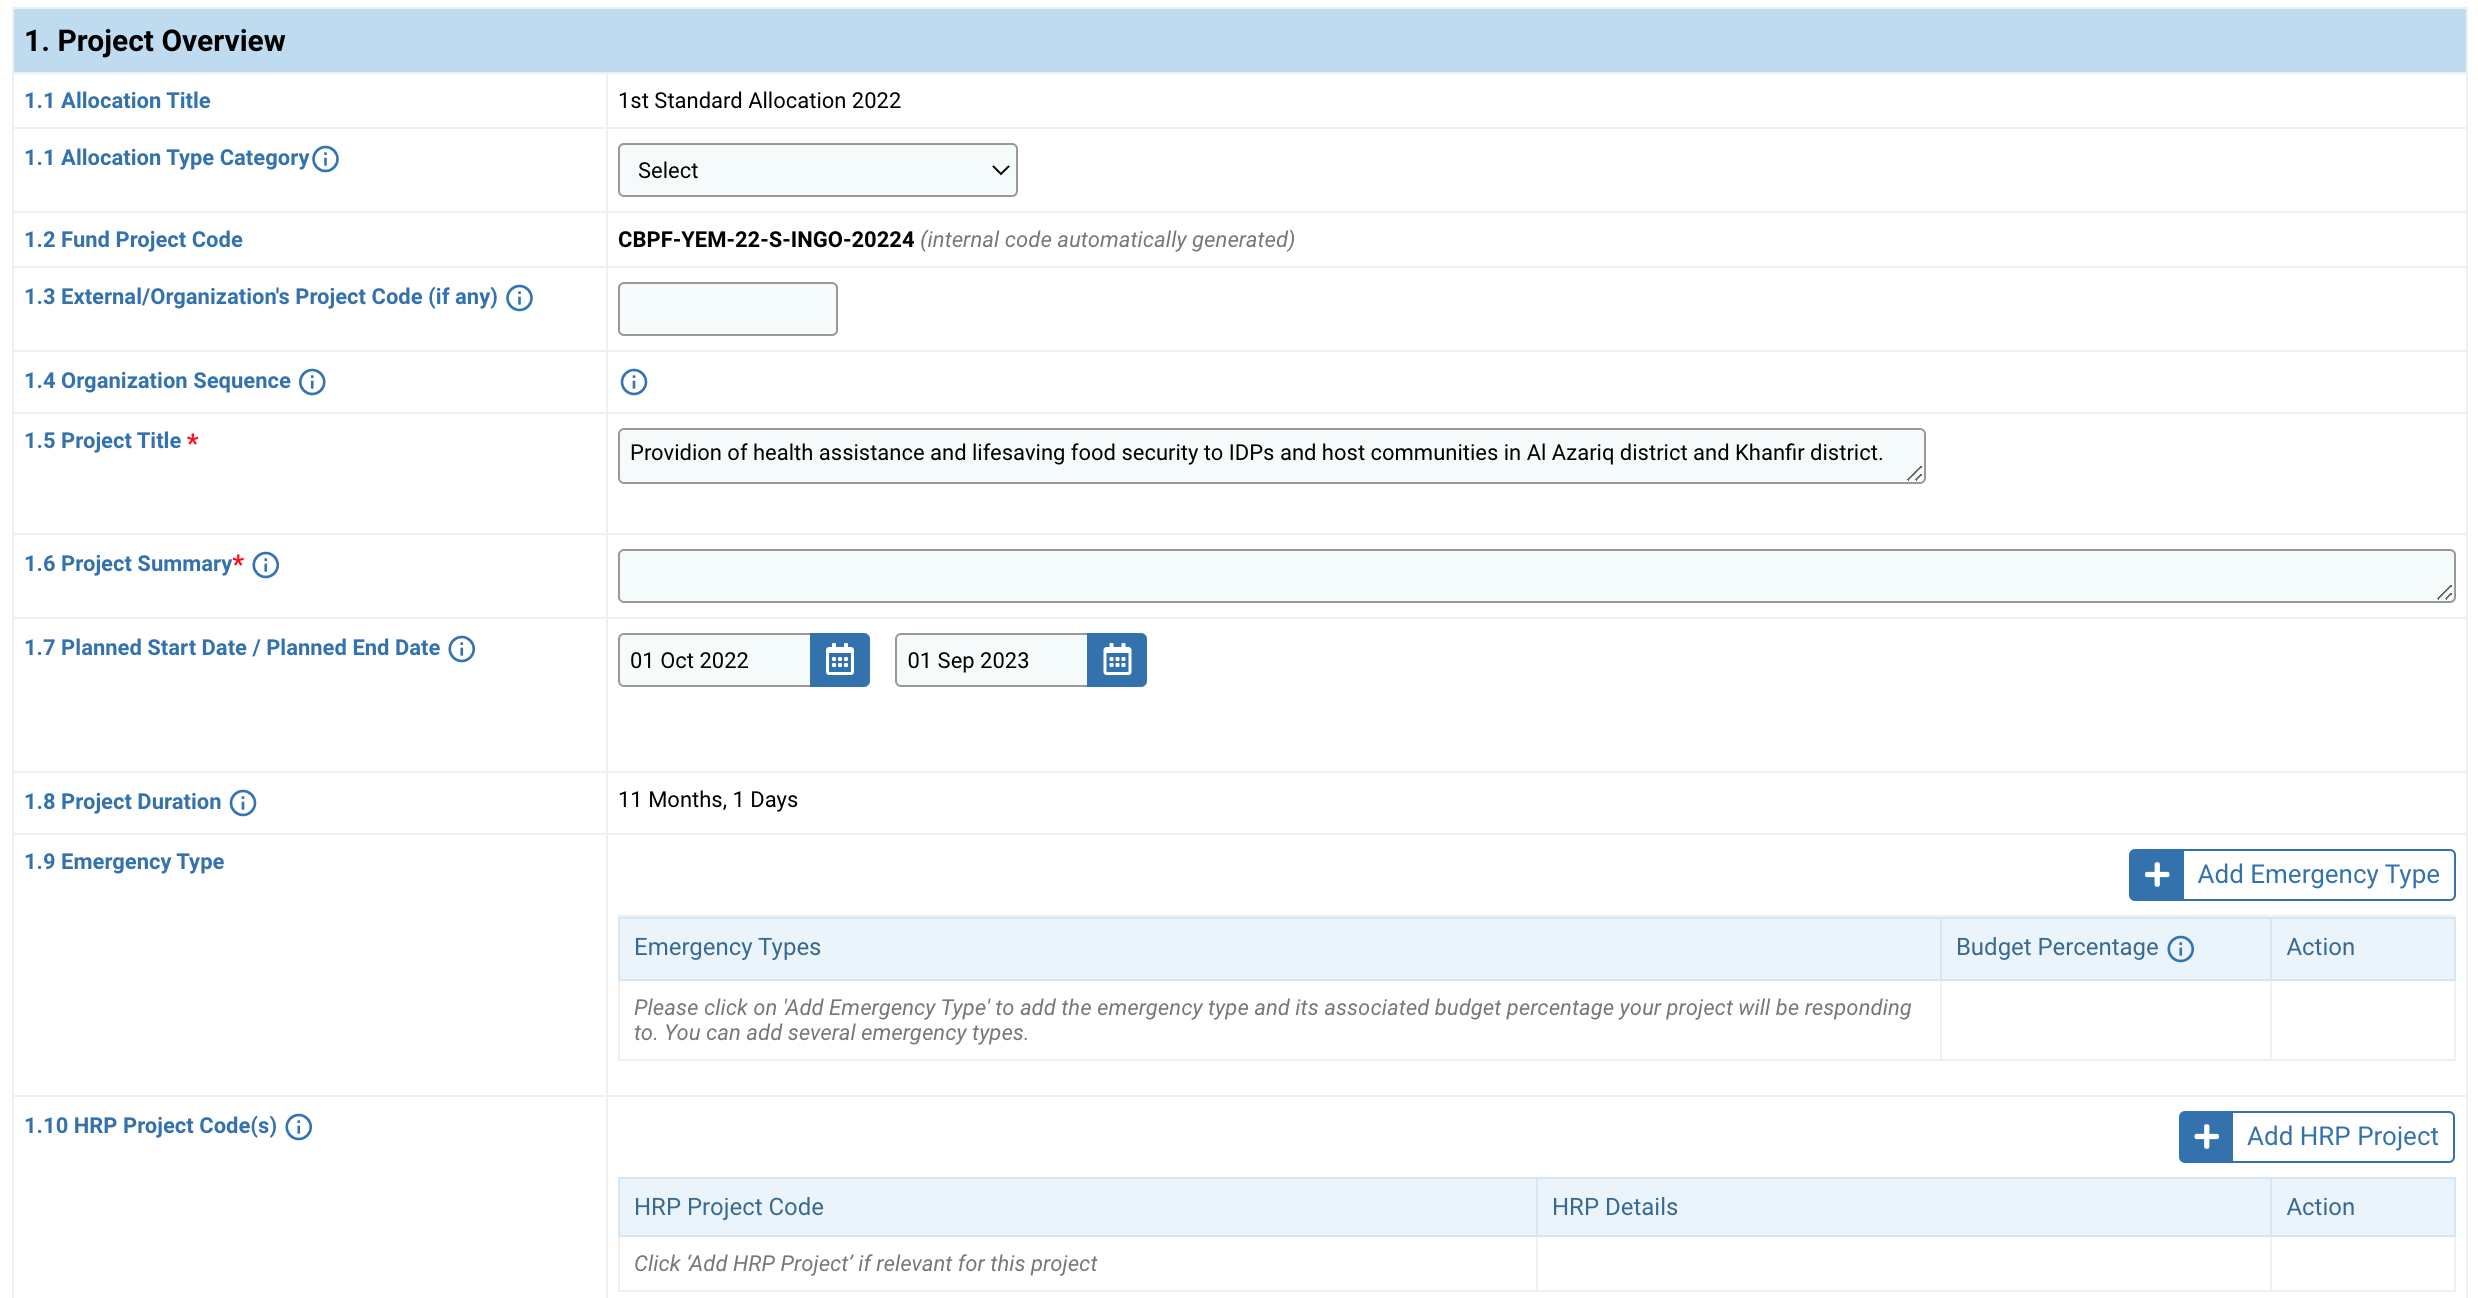
1.5 Project Title *
The project title previously entered in the ‘Create Project’ page will be displayed. However, you can modify it and briefly state the main objective(s) and the targeted location(s) and persons.

1.6 Project Summary *
Provide an exhaustive description of the project, including reference to how the differential needs, concerns, and priorities of the affected persons of different gender, age, and categories would be assessed.

1.7 Planned Start Date / Planned End Date
Select from the calendar the Planned Start and End dates for your project.

1.8 Project Duration
The duration of the project will be calculated automatically based on the Start/End Date selected and will appear in months and days.
![]()
1.9 Emergency Type
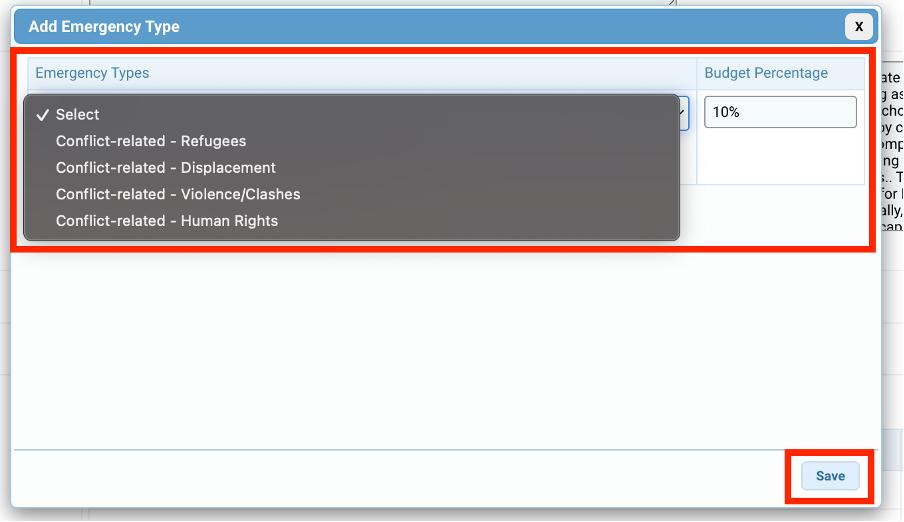
At allocation level, the HFU will define one or more emergency type(s) targeted by the allocation. You can select form here the emergency type that your project targets and its associated budget percentage. To do so, click on [Add Emergency Type].

On the pop-up window, select the Emergency Type from the drop-down list, enter the budget percentage and click on [Save]. Emergency types displayed in the drop-down list are those pre-selected by the HFU at allocation level.
Once added, the emergency type will be displayed in the Emergency Type table. You can edit the emergency type by clicking on ![]() , or delete it by clicking on
, or delete it by clicking on ![]() .
.

1.10 HRP Project Code(s)
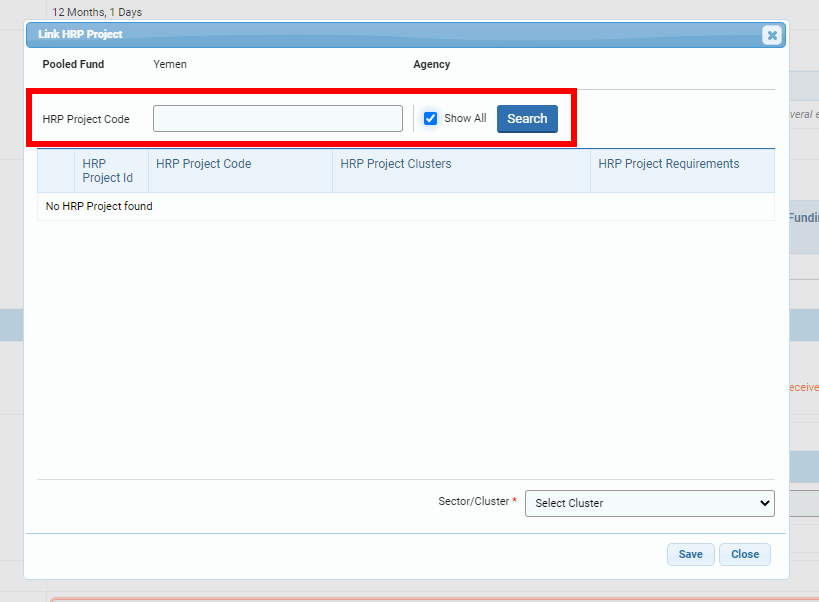
You have the possibility to link the project to the related Humanitarian Response Plan (HRP). To do so, click on [Add HRP Project].

On the pop-up window, enter either the HRP Project code or tick the box ‘Show All’ to display all the HRPs. Then click on [Search].
The search result will be displayed below. Tick the box(es) or the HRP(s) project you wish to add and select from the drop-down list the sector linked to the HRP(s). The sectors displayed in this drop-down menu are those selected for your project. Then click on [Save].
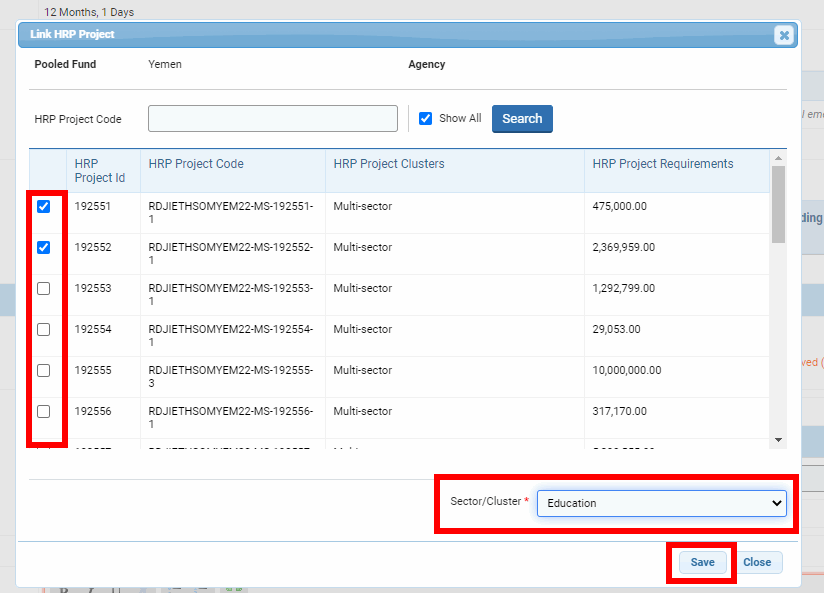
The HRP project selected will be displayed as a table. You can delete an HRP project by clicking on this icon ![]() .
.

Columns Description:
- HRP Project Code: the HRP project code.
- HRP Project Requirements: budget requirements in USD for this HRP project.
- HRP Project Funding: it is the HRP project’s total funding in USD from outside the project proposal.
- Percentage: the share of the HRP project budgetary requirements your project will contribute to. Please note that the share of all HRPs Project Code cannot be higher than the total budget for the cluster. For instance, our two HRP Project Codes are linked to the Education sector that has a total budget of 5 350 USD. Consequently, the share of our two HRP projects cannot be more important than 5 350 USD.
- Targeted Funding: the equivalent in USD of the percentage of the HRP project budgetary requirements. It will be filled in automatically, once you indicate the percentage.
- Targeted CBPF Sector/Cluster: the cluster you have linked to this HRP code. Below is displayed the total budget for the cluster.
- Funds not linked: this is the amount of funds requested in the Project proposal that are not linked to this specific HRP Project.
In this section, the user will provide information on the funding requirements of the project proposal and the project’s strategy.
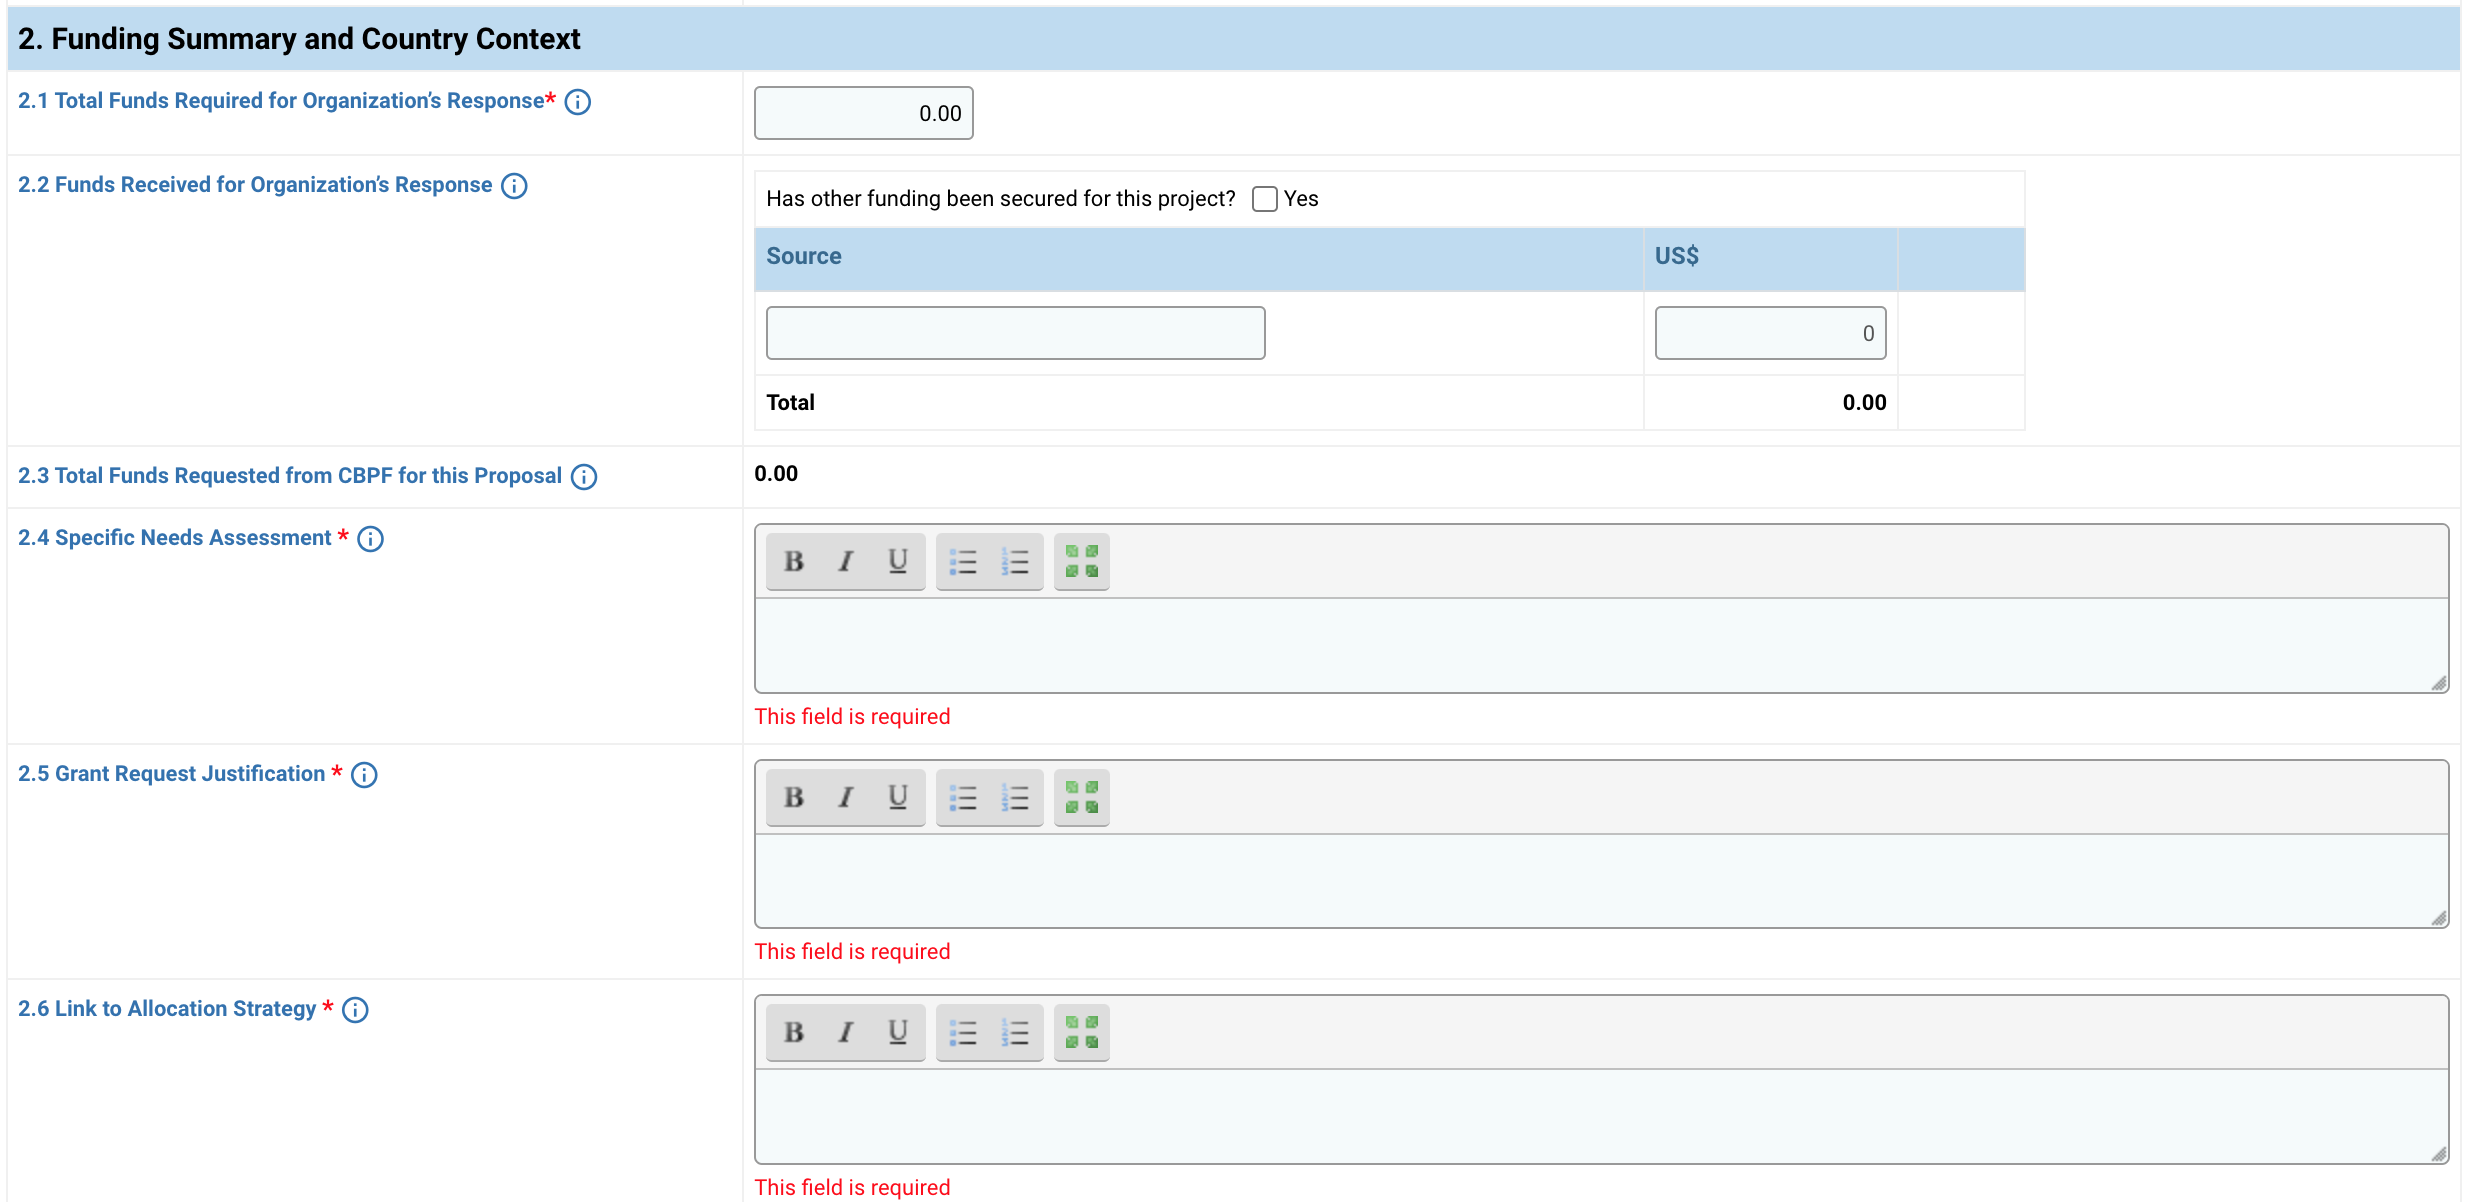
2.1 Total Funds Required for Organization’s Response *
Enter the total amount in USD required for this project, which includes internal and external funding. This field will be automatically updated once the ‘Budget’ tab is completed.

2.2 Funds Received for Organization’s Response
If applicable, add all external sources of funding (other than OCHA) that will fund the project, excluding this project proposal’s budget. Against each funding source, enter the amount received to date.
If you have received an external source of funding for this project, tick the box ‘Yes’ and inform the source of funding and the amount in USD in the narrative boxes.

To add an external source of funding, click on [Add Source] and to delete a source of funding click on this icon ![]() .
.
2.3 Total Funds Requested for this Proposal
The USD amount will be displayed automatically once you have filled in and saved the ‘Budget’ tab.
![]()
2.4 Specific Needs Assessments *
Explain the specific needs of the target group(s), the existing capacity, gaps, underlying factors and barriers to adequate participation broken down by sex and age. State how the needs assessment was conducted and list the baseline data as well as how the number of beneficiaries was developed. In addition, indicate references to assessments, such as Multi-cluster/sector Initial Rapid Assessments (MIRA).

2.5 Grant Request Justification *
Describe the proposed intervention, how the activities of the project will contribute to addressing the needs identified, with reference to the relevant cluster(s)’s Strategic Response Plan(s). Justify why your organization is best placed to deliver this project and explain the added value of your organization, e.g., access, geographical presence, specific expertise etc.

2.6 Link to Allocation Strategy *
For Standard Allocations/call for proposal: describe how the project fits with the Fund’s Strategic Objectives and Cluster/Sector Specific Objectives.
For Reserve Allocation/ rolling basis: explain why the project should be considered for funding.

This last section is for the user to enter at least one organization focal point’s contact detail. The focal point is the person from your organization who will play an active part in drafting the project proposal and following up on the project. This person will receive notifications from the OneGMS regarding the status change of this project.

3.1 Organization Focal Point Contact Details *
Add the contact detail of the person(s) in charge of the project. Adding several organisation focal points for one project is not mandatory but encouraged.
Please note: focal points are linked to projects but are not necessarily users of the system. If they do not have access the system but wish to do so, they will need to request system access from the HFU.
To know how to add a focal point, you can watch our tutorial video below or continue reading this article.
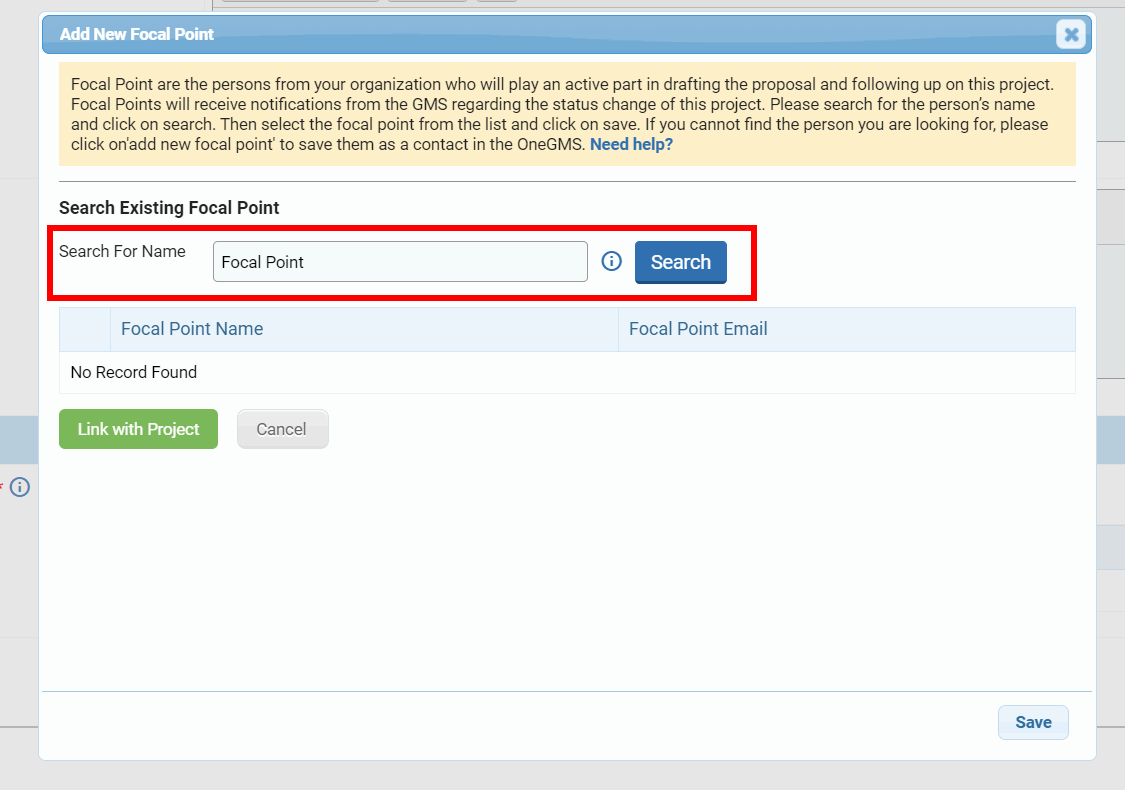
To add a focal point, click on [Add New Focal Point].

On the pop-up window, type the name of the focal point and click on [Search].
Please note: the search results will only display registered and active focal points.
There are two possible scenarios. Either you find you focal point, in that case please continue reading this article, or you cannot find your focal point. In that case click here.
You can find your focal point
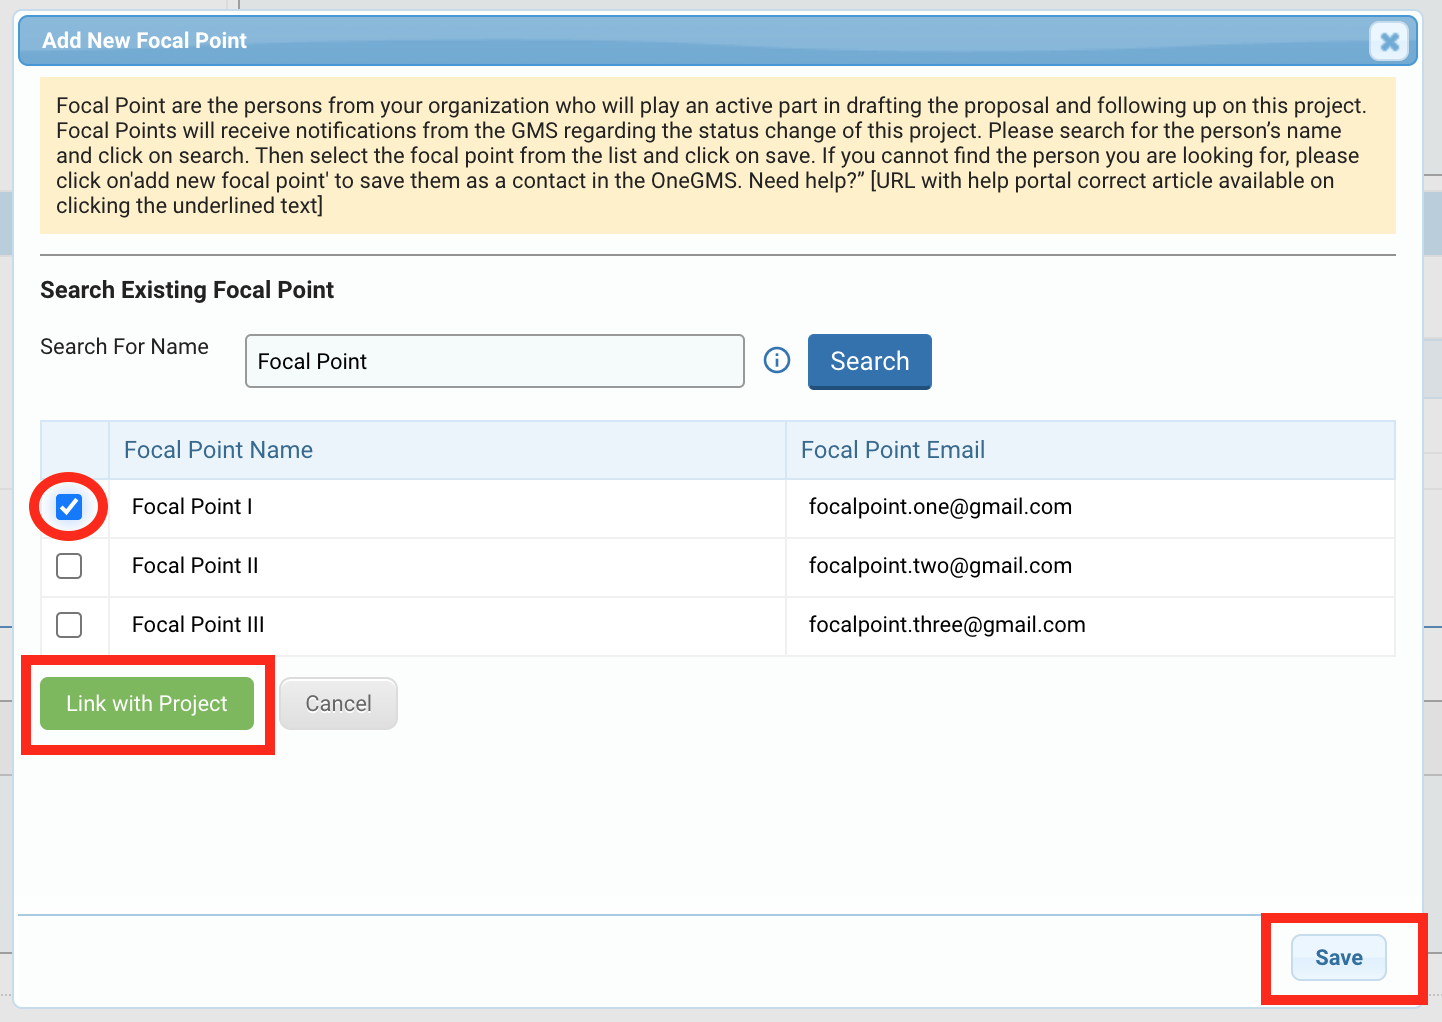
If the contact is already registered and approved, their name and email will be displayed. To select a person, tick the box next to the name and click on [Link with Project]. Then, click on [Save].
You cannot find your focal point
If you cannot find your focal point it is either because they have never been registered in the system as a contact, or because they have been registered but are inactive. In any case, click on the hyperlink ‘Add a new contact here’.

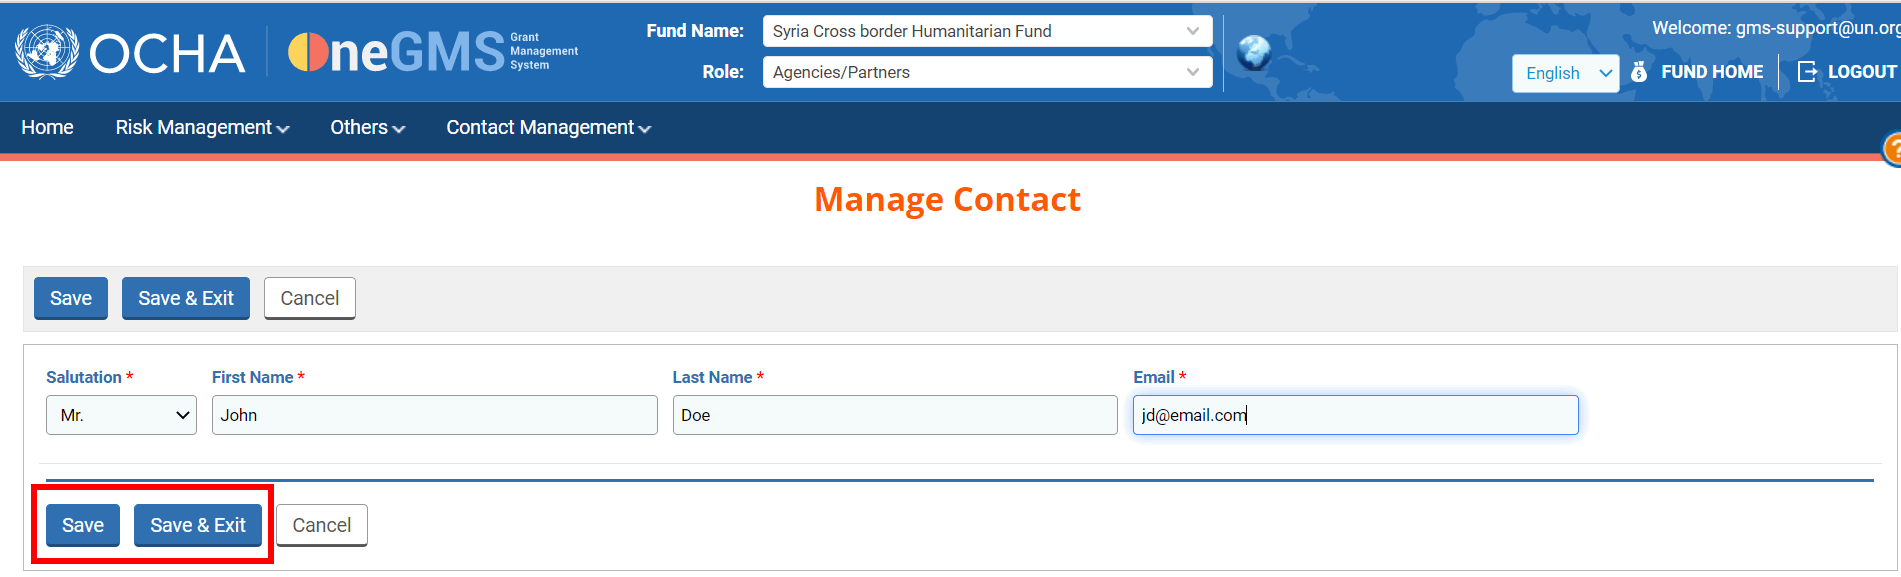
You will be redirected to the Manage Contact page where you will be able to register a new contact. Once you have filled in all mandatory fields click on [Save].
Depending on the status of the focal point, two scenarios can happen:
-
You are redirected to the Manage Contact page
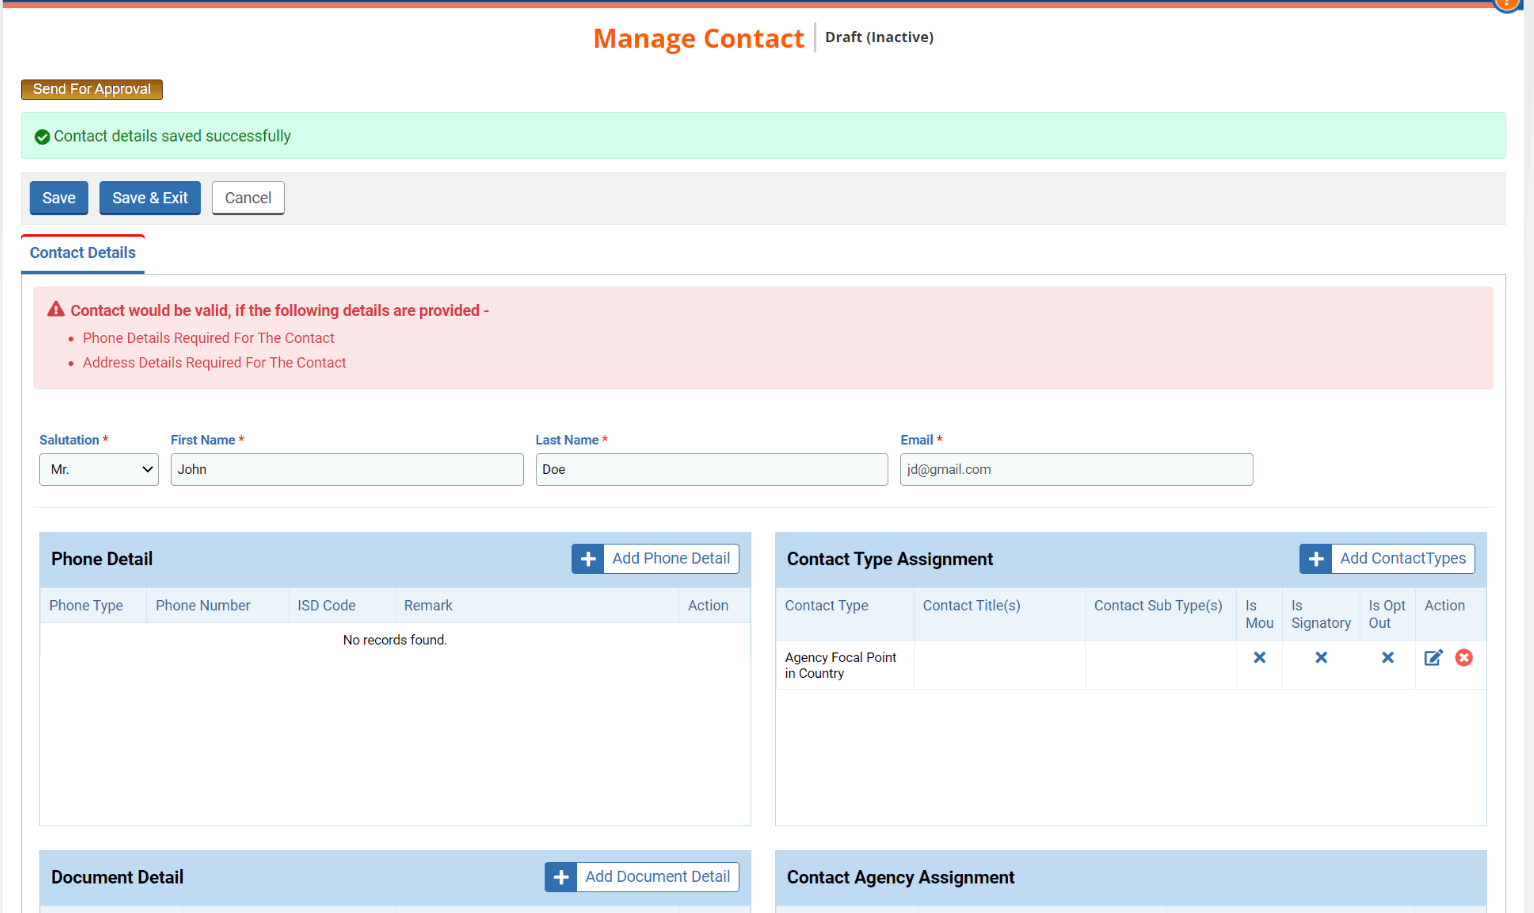
It means that your contact was never registered in the system, and you will need to register them and add the contact details. Click here if you want to read more on how to register a new contact from this page. Once registered, you will have to search and add the contact from the ‘Overview’ tab.
-
You get an error message
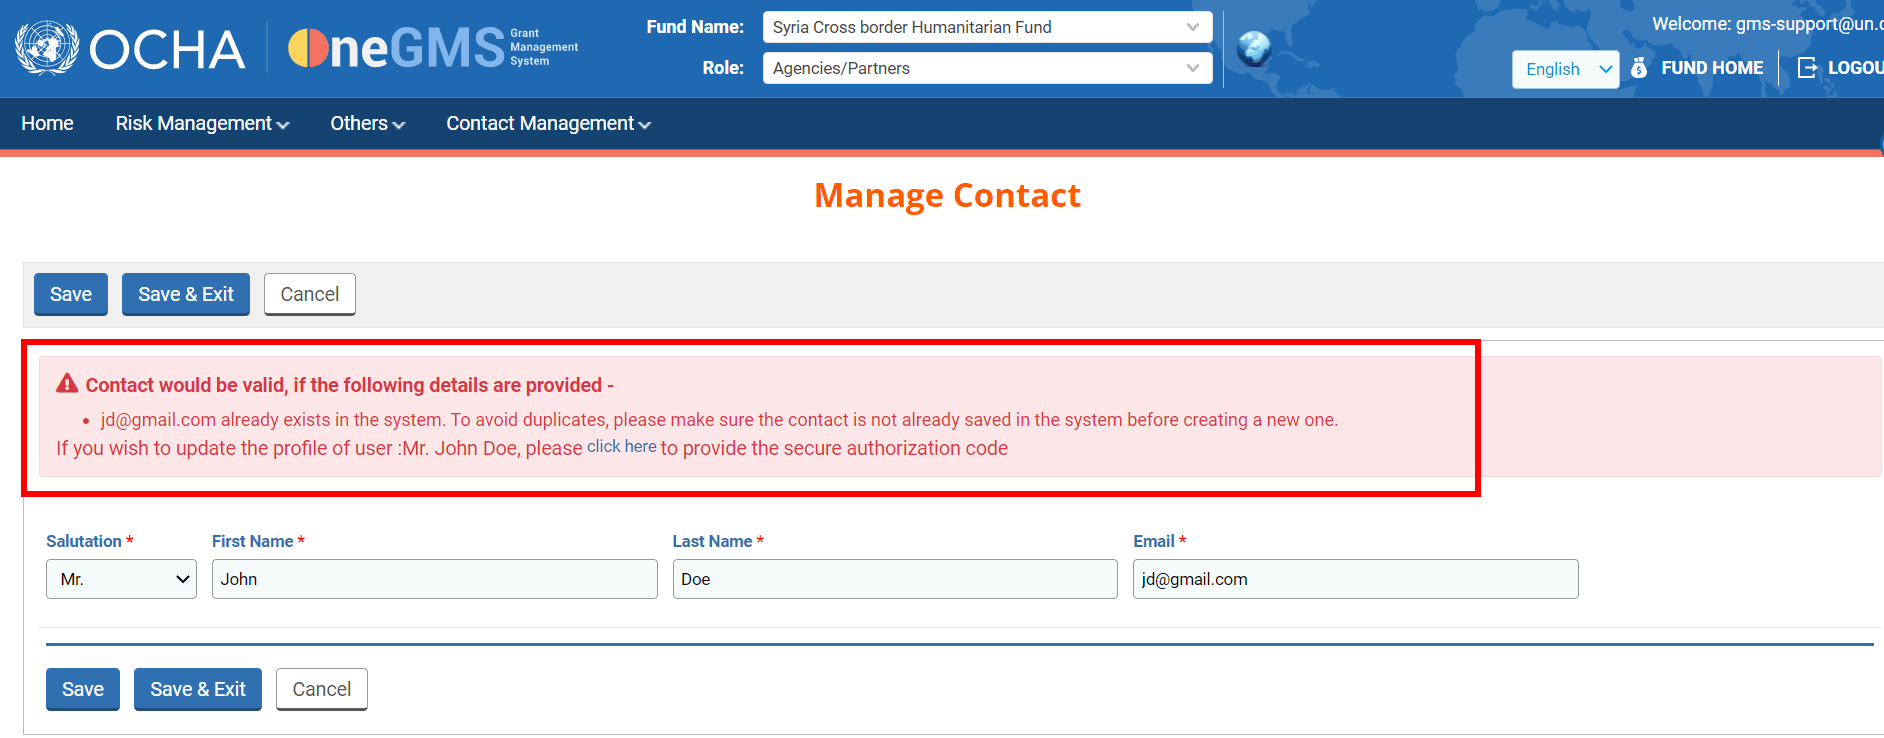
It means that your contact was already added but is inactive. It could happen if you started to add the contact’s details but didn’t send the draft for approval or the profile was made inactive for other reasons. Consequently, the status of the contact is ‘inactive’. If you wish to update the profile and send it for approval, you must click on the ‘click here’ hyperlink.
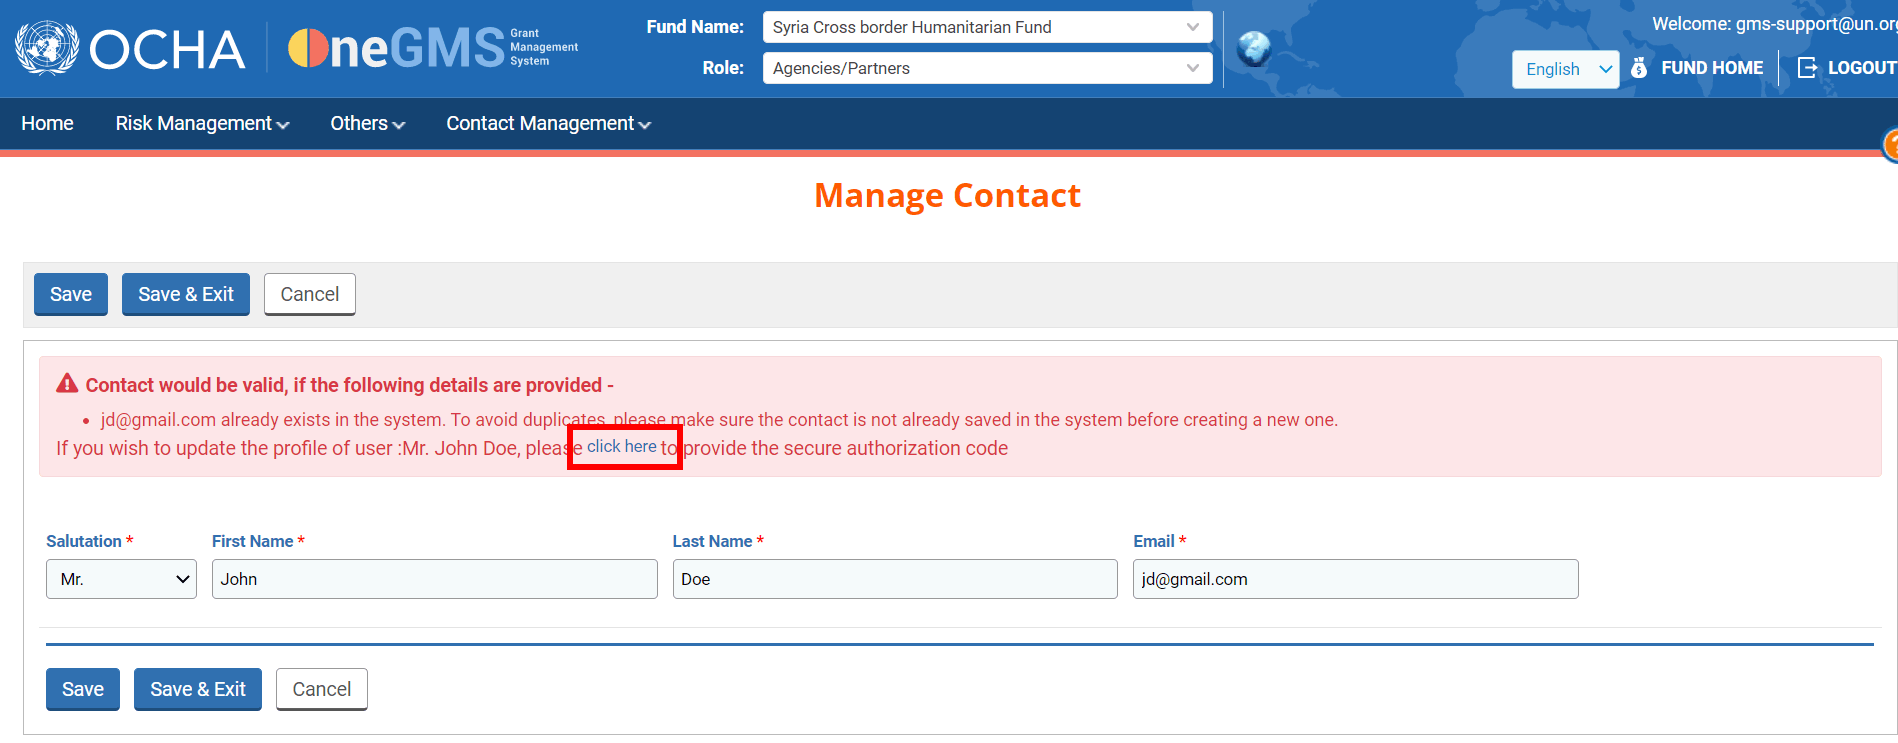
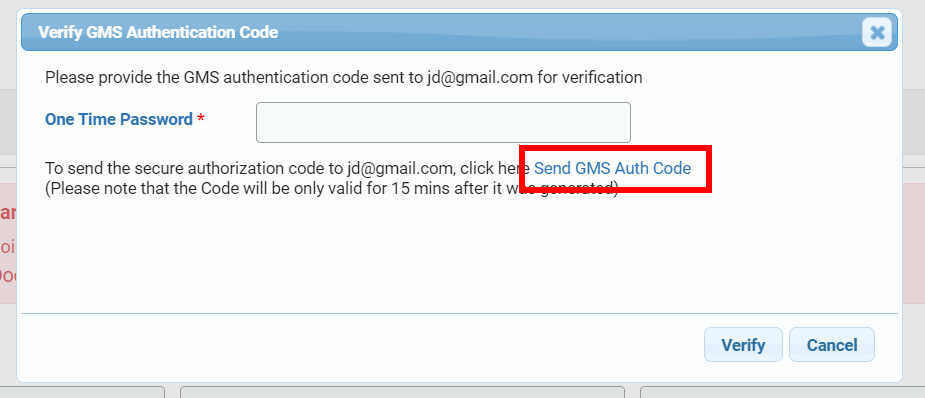
Clicking on this hyperlink will open a pop-up window that will allow you to send to your focal point a one-time password. To do so click on the hyperlink ‘Send GMS Auth Code’.
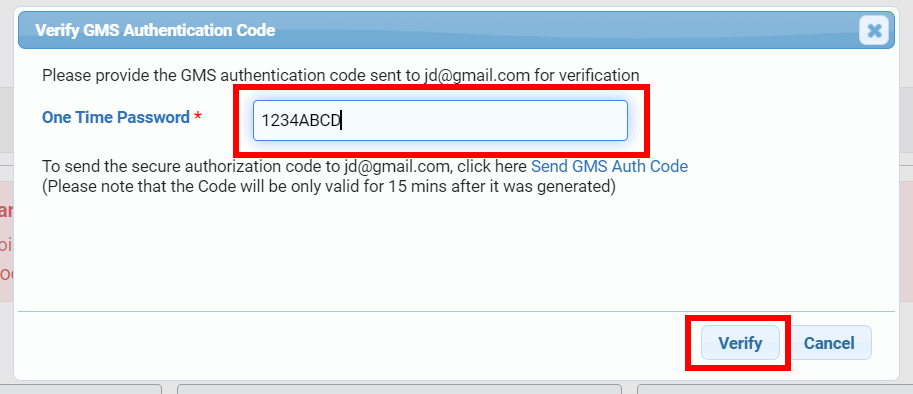
This one-time password will be available for 15minutes. Your focal point will have to communicate you this password and you will be able to enter it on the pop-up window. Then click on [Verify].
Upon clicking on [Verify], the Manage Contact page will open. There, you will be able to edit and save your focal point. To know how to fill in this page, please click here. Once registered, you will have to search and add the contact from the ‘Overview’ tab.
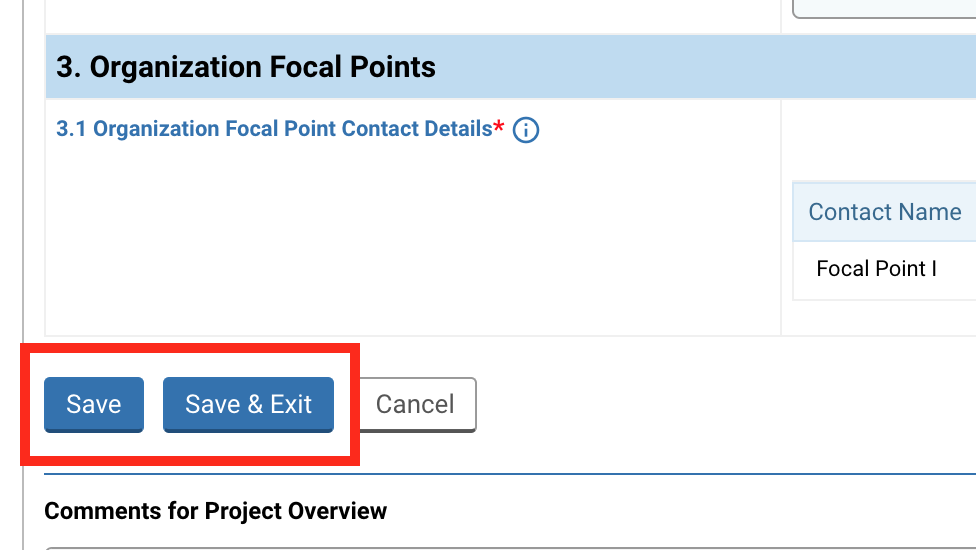
Please note: once you have completed this tab, do not forget to save your progress, as the system will not automatically save it. You can find the [Save] buttons at the top of the tab,
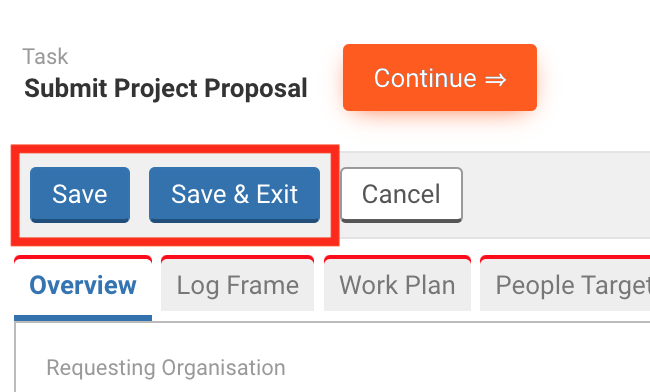
or the end of the tab.