The ‘Documents’ page allows the user to upload and download documents related to the project.
20. Documents 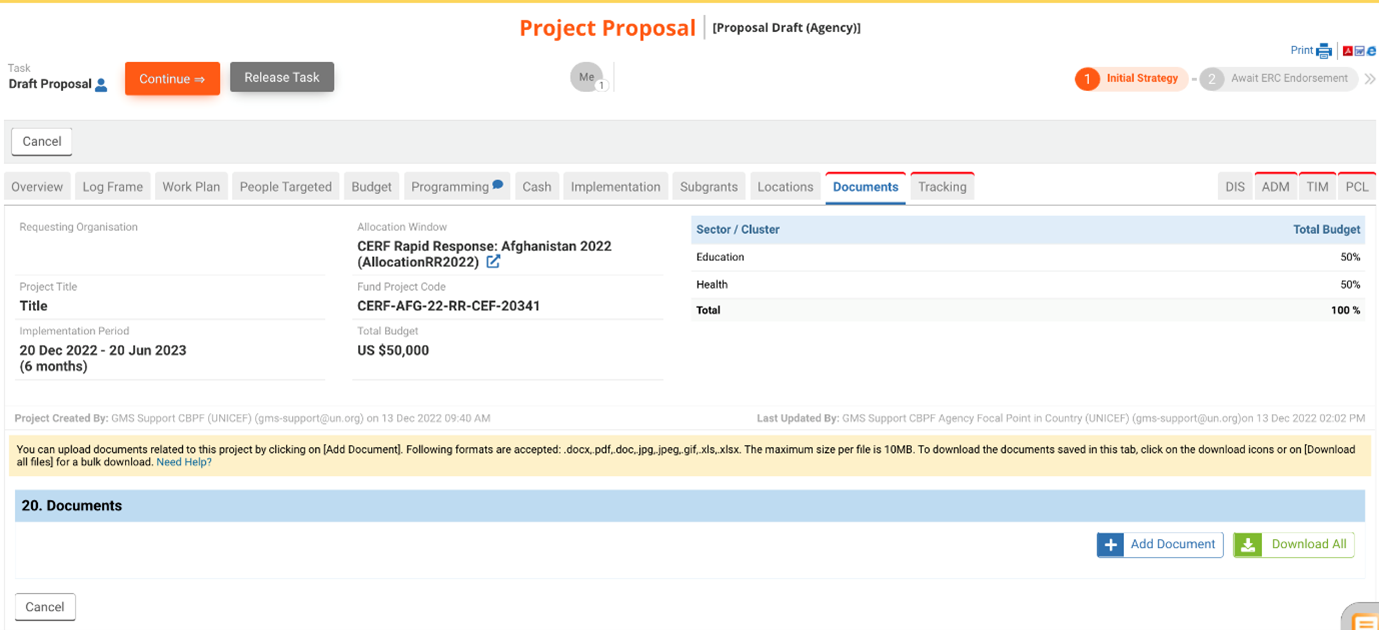
To upload a new document, click on the [+Add Document] button.

A popup will appear that will enable you to select a document for upload.
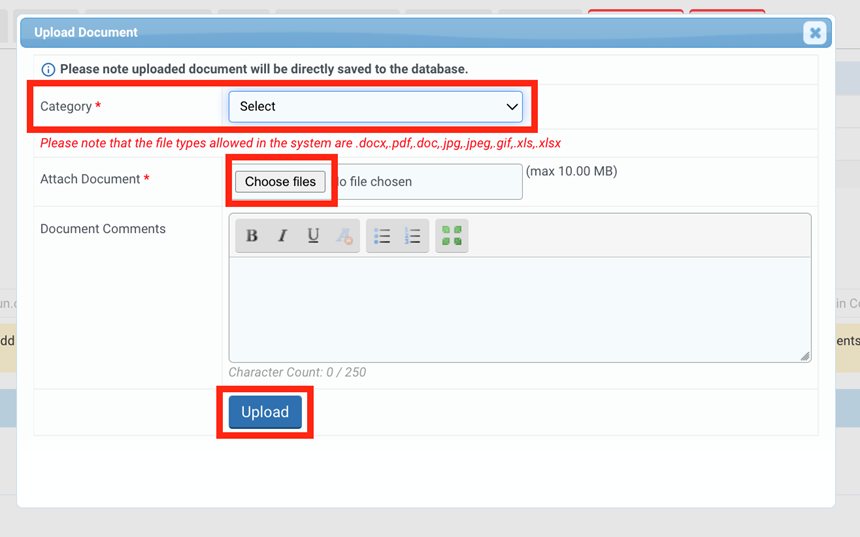
From the dropdown menu in the popup, select the category of document you wish to upload your document as.
Click the [Choose Files] button to select a file from your desktop.
Please note: The allowed file types for upload to the system, are docx., pdf., doc., jpeg., gif., xls. and xlsx. File size should not exceed 10MB.
You can leave an optional comment in the ‘Document Comments’ field for your upload if necessary.
Click the [Upload] button to upload your document.
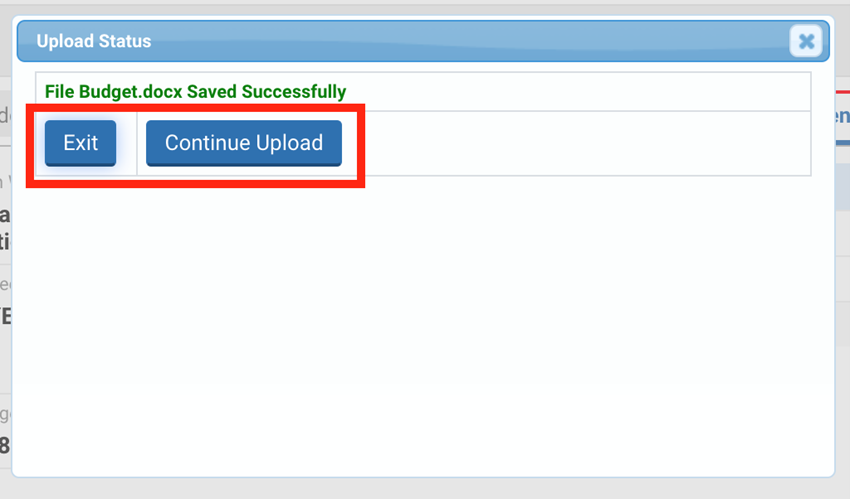
As your document uploads, the below popup should appear.
Click the [Exit] button if you have completed upload of all desired documents.
You can click the [Continue Upload] if you wish to upload additional documents.
The documents should list as seen below. Documents should be listed under the category you selected in the previous popup.

Actions: In the document list, you can mouse hover-over the ‘profile’ icon (![]() ) to see who uploaded the document, as well as the date and time of upload.
) to see who uploaded the document, as well as the date and time of upload.
You can click on the ‘view’ icon (![]() ) to open and save the document on your computer.
) to open and save the document on your computer.
You can click on the ‘edit’ icon (![]() ) to edit the file name, or to amend or add a comment.
) to edit the file name, or to amend or add a comment.
Once all updates are made, click the ‘refresh’ icon (![]() ) to save your changes, or click in the ‘delete’ icon (
) to save your changes, or click in the ‘delete’ icon (![]() ) to discard them.
) to discard them.
Please note: We kindly ask that you contact your country office if you wish to delete a document.

If you would like to download all documents, you can click the [Download All] button.
